
Roofing – Vents
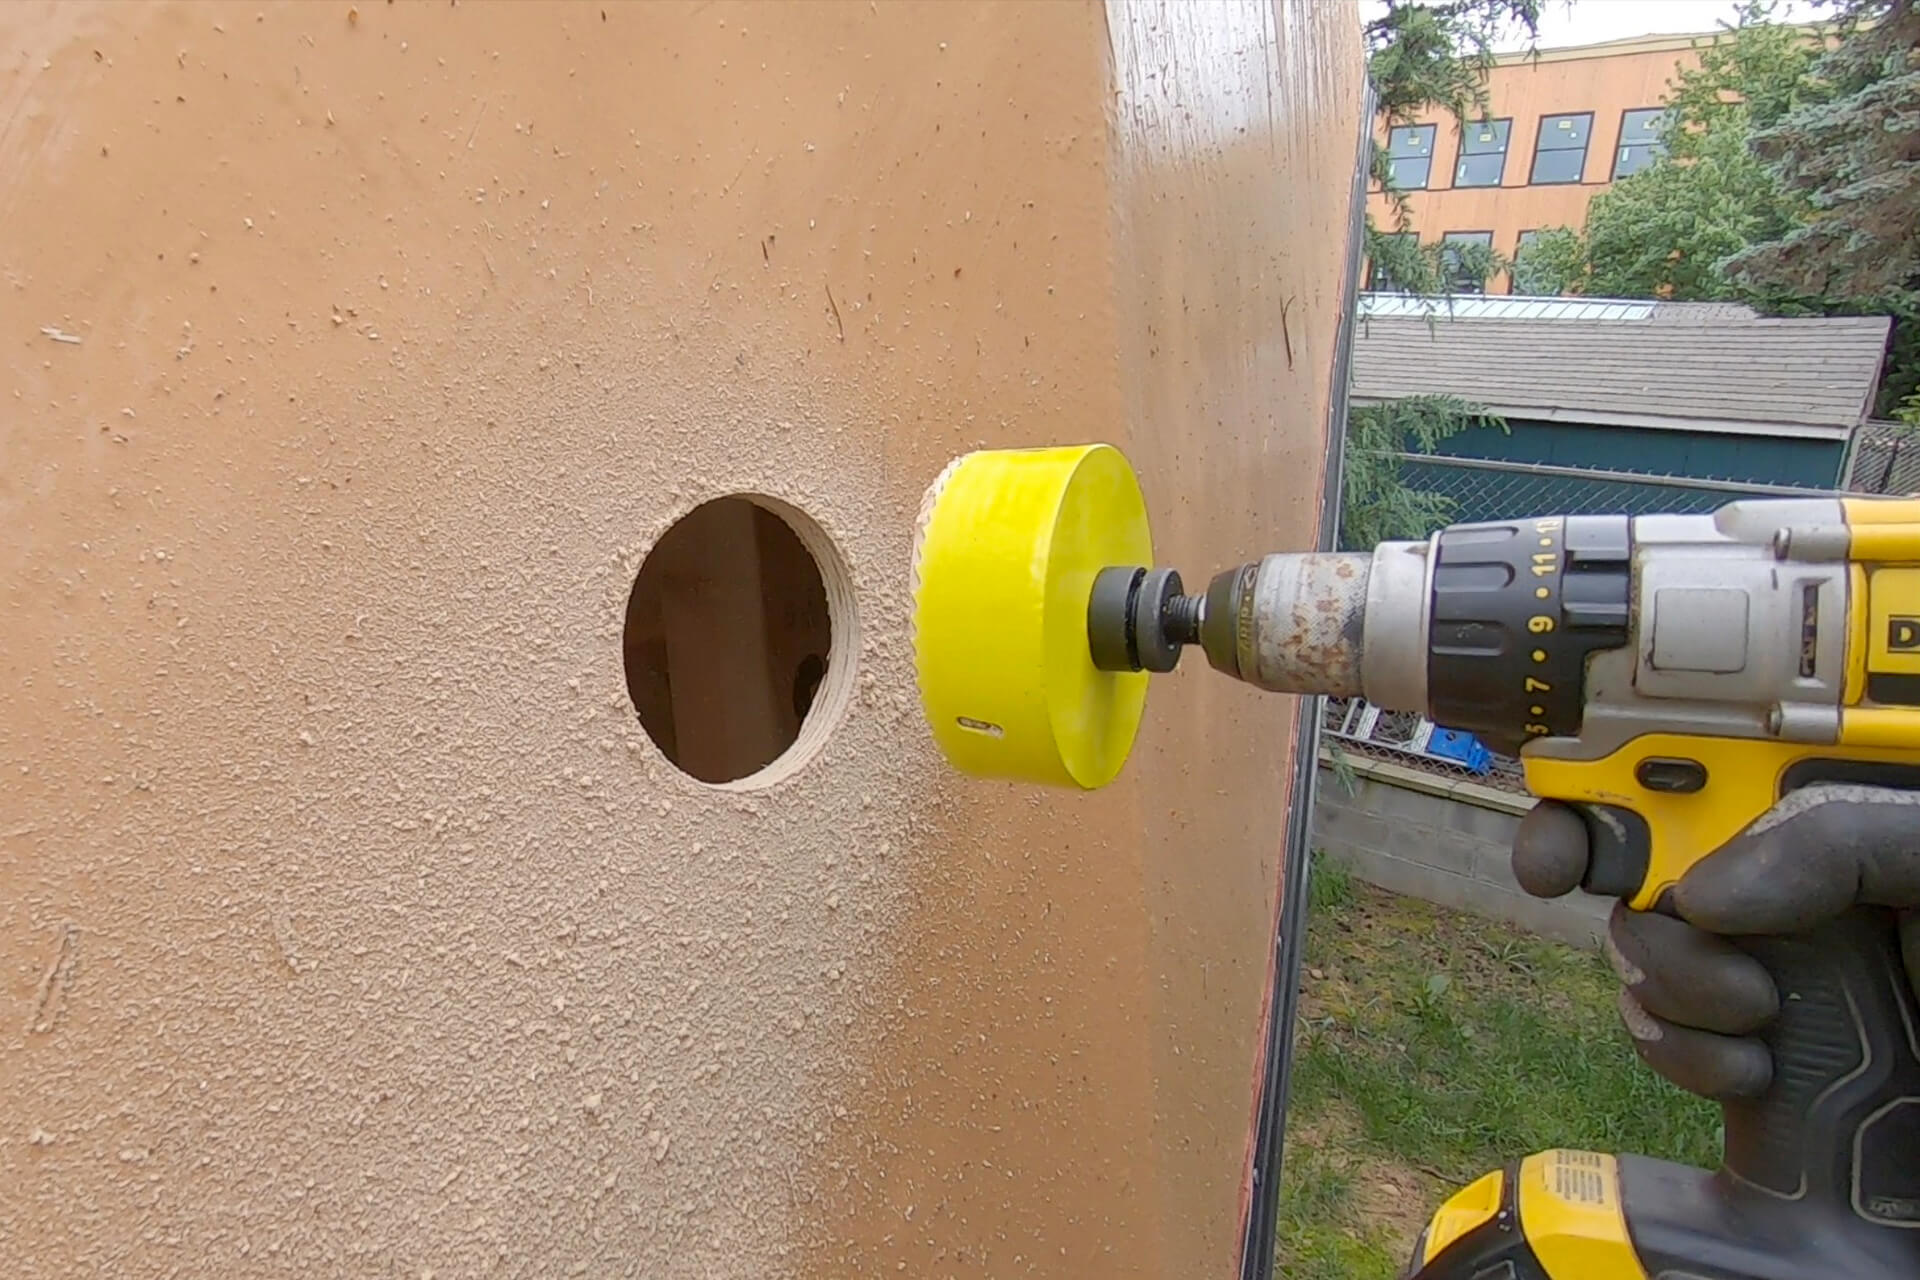
Locate and hole-saw the intake and exhaust HRV (Heat Recovery Ventilator) vent locations. A 4.5” hole saw is shown here.
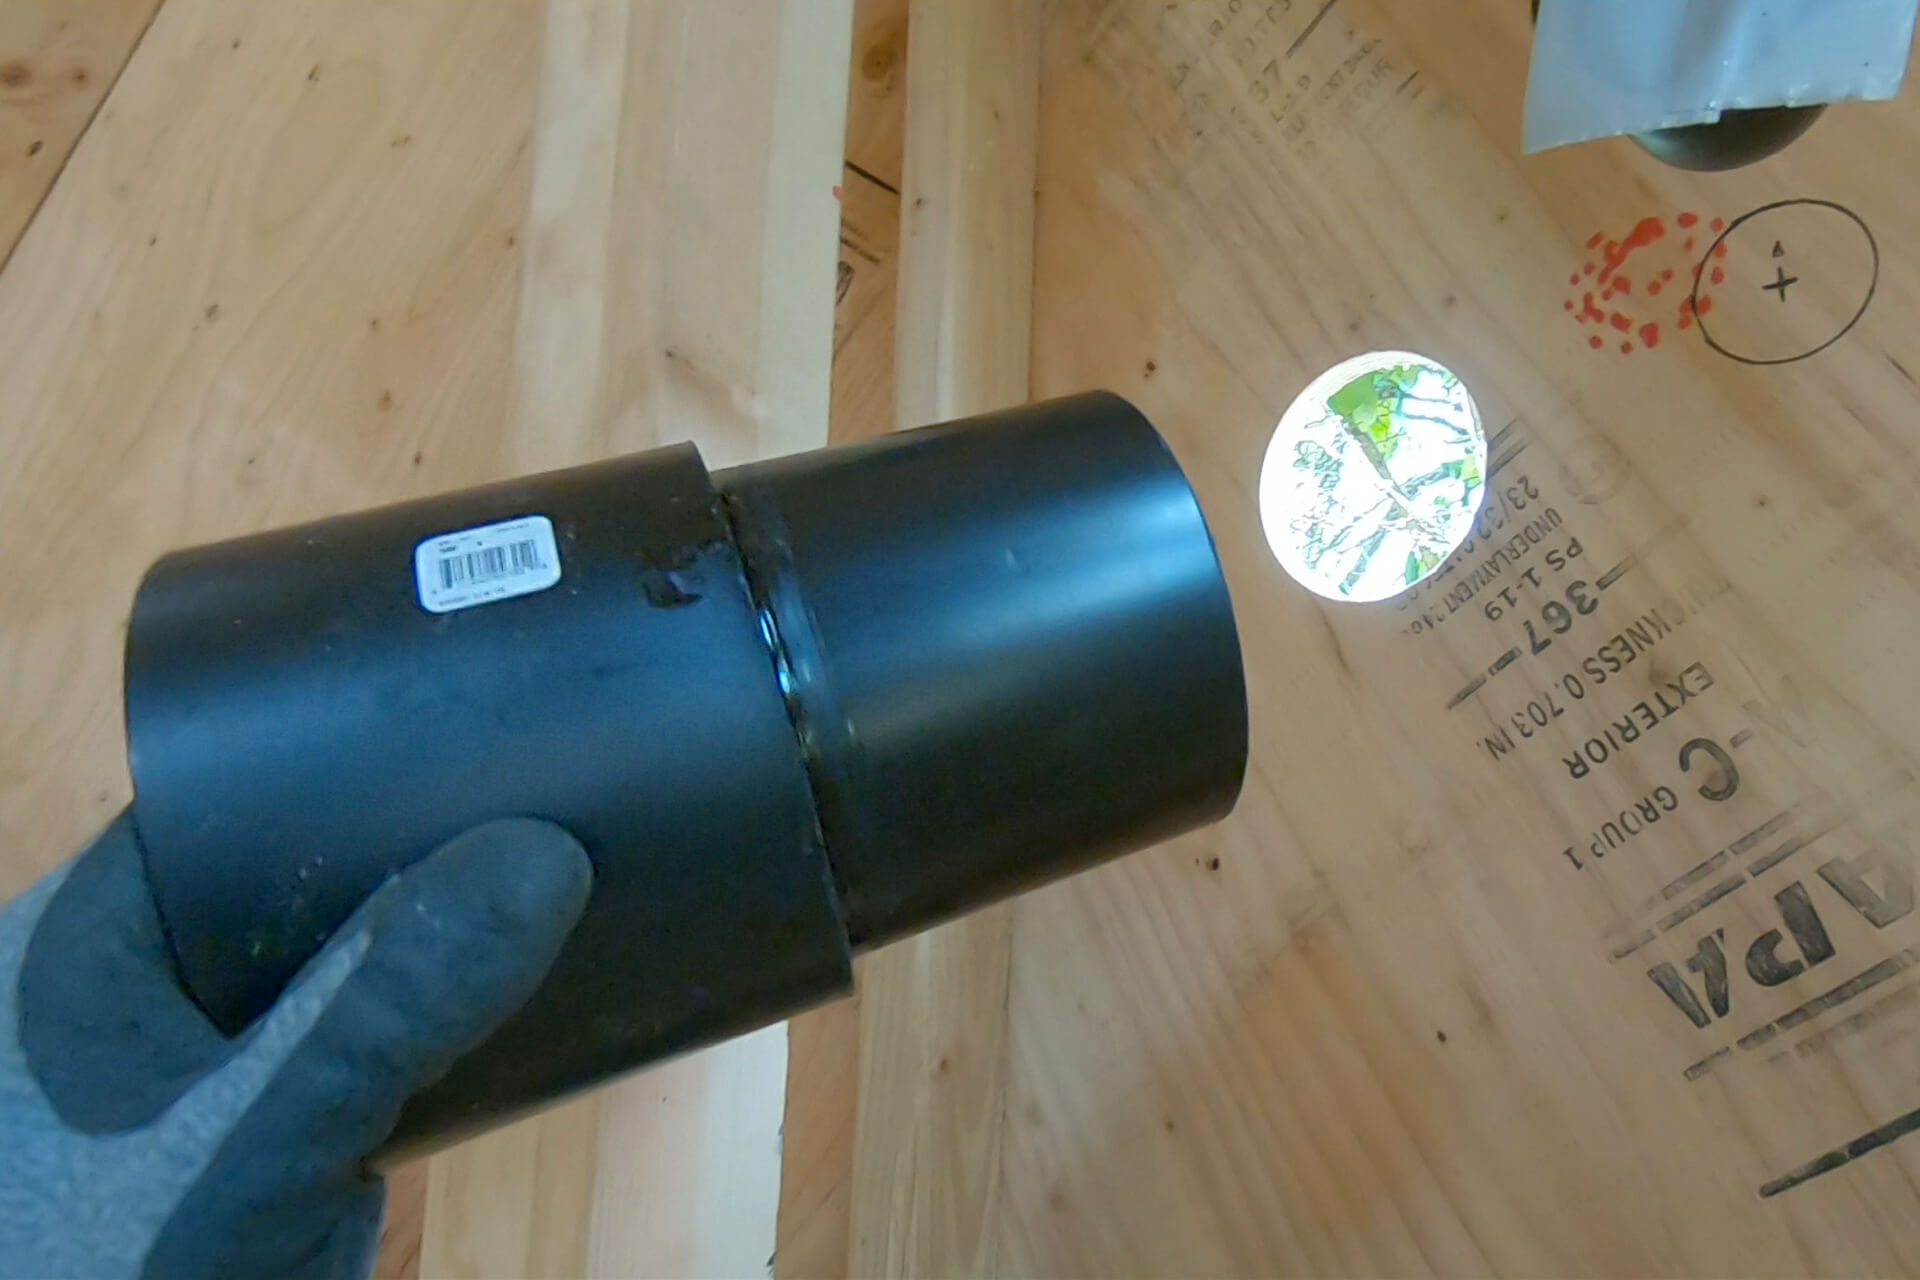
Create vent fittings using 4” ABS and couplings to form a shoulder that will rest against the plywood. Insert the fitting from inside the dome.
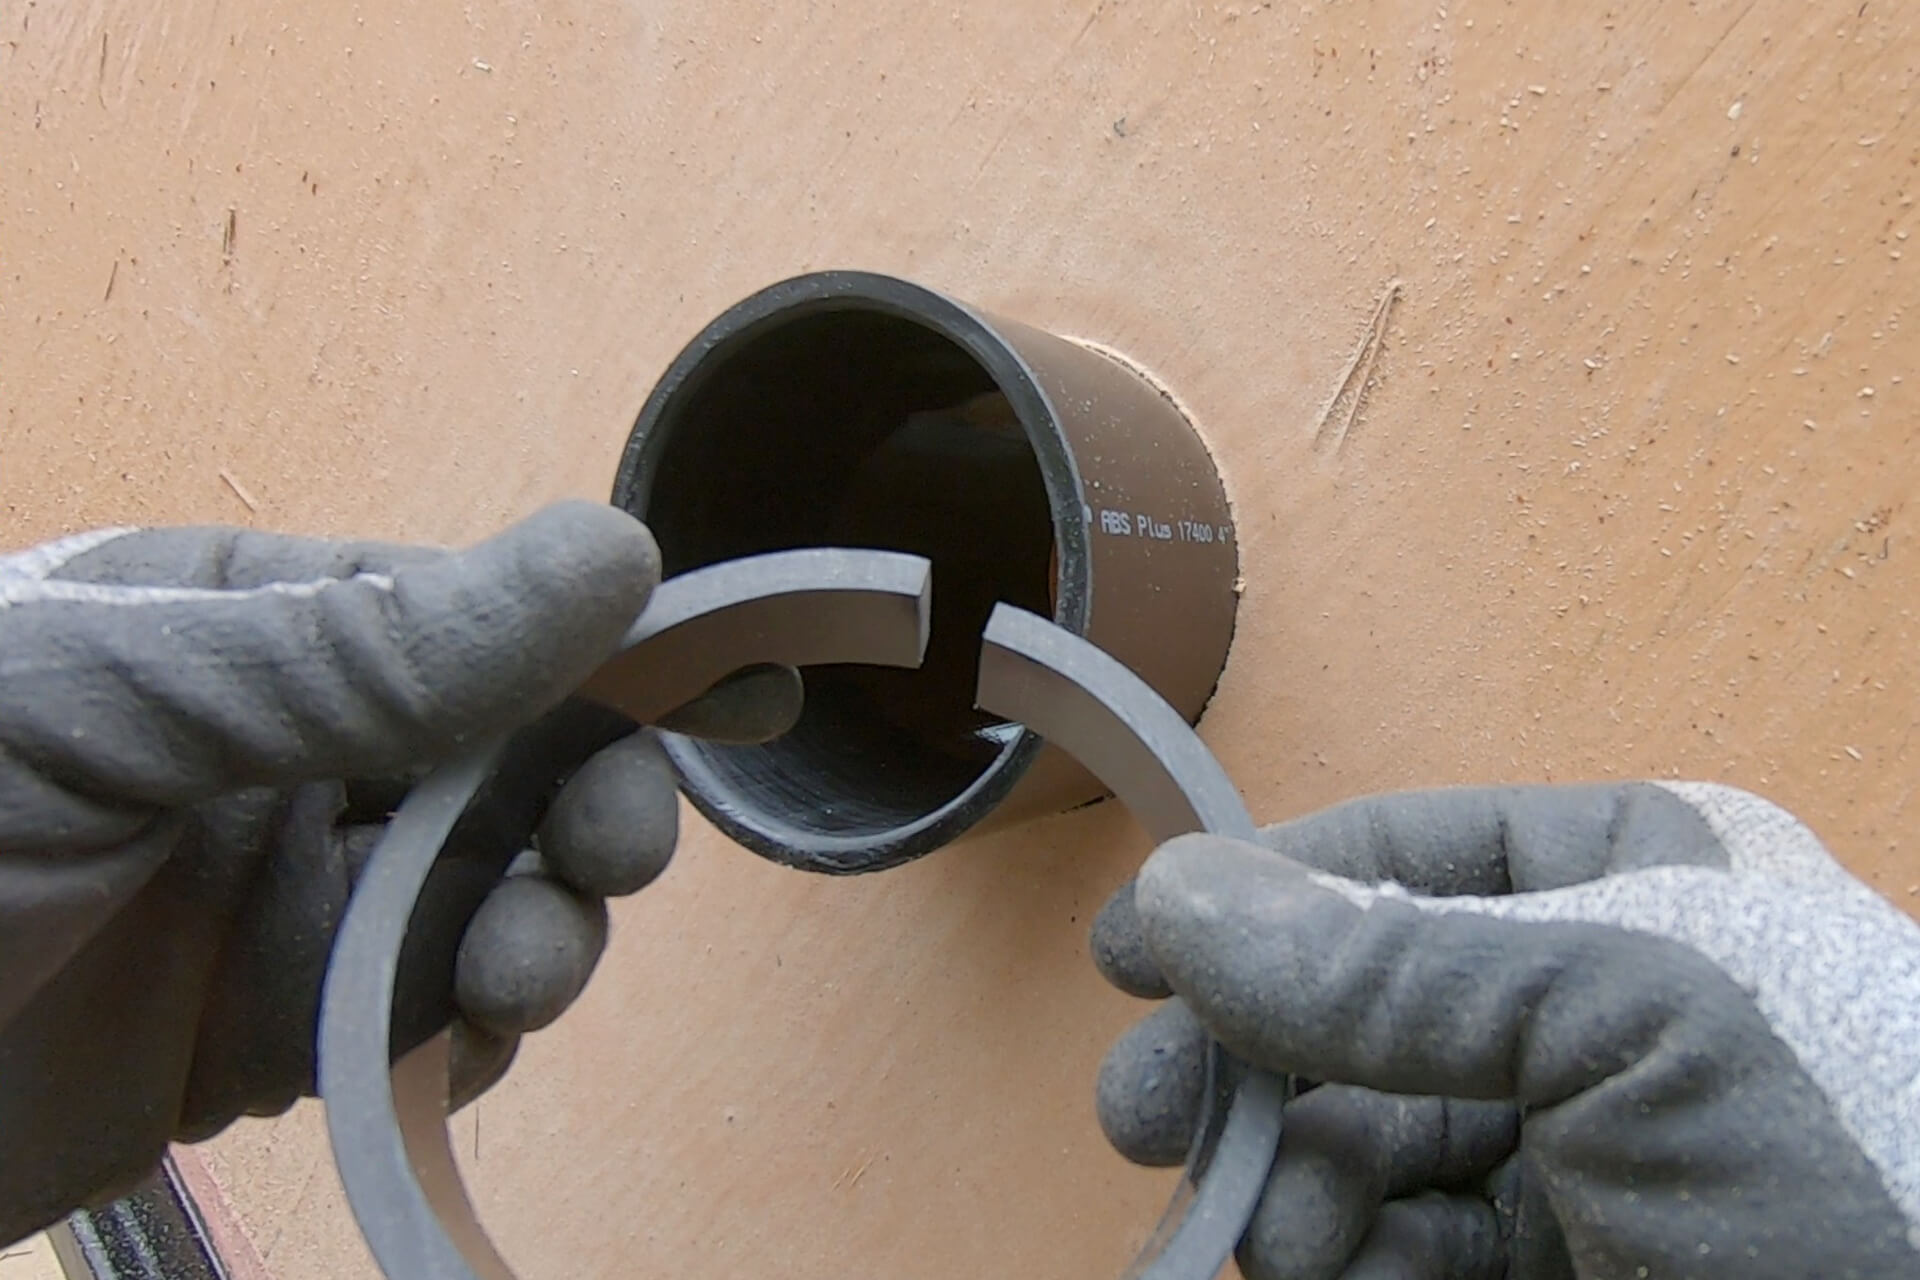
Cut and glue a sliced sleeve from the outside to secure the vent fitting in place. Reach inside the fitting and pull outward while gluing to ensure a tight, stable fit that doesn't wobble or spin.
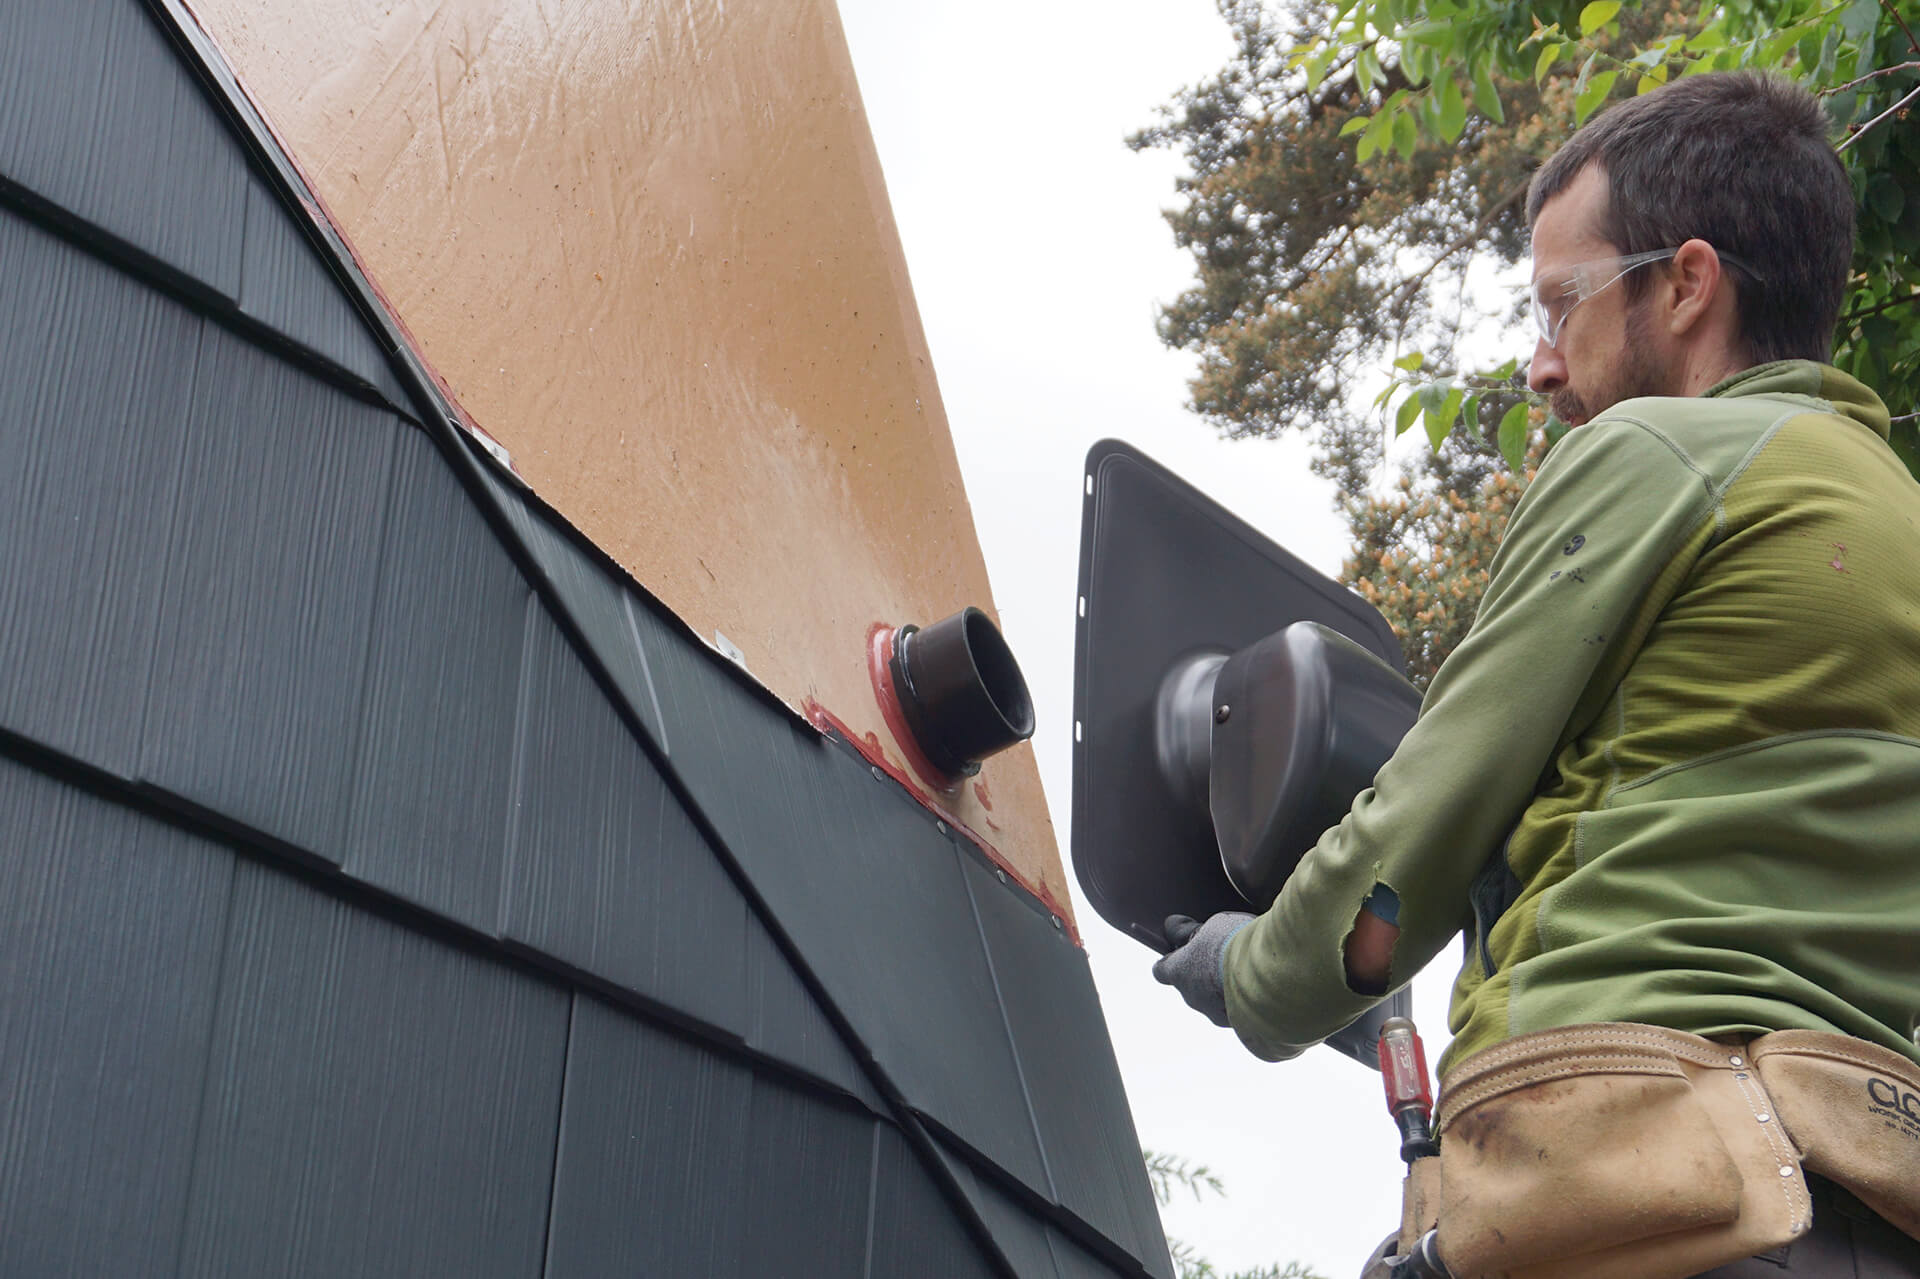
Caulk with an STPE-type material or equivalent. Prosoco R-Guard Fast Flash is shown here.
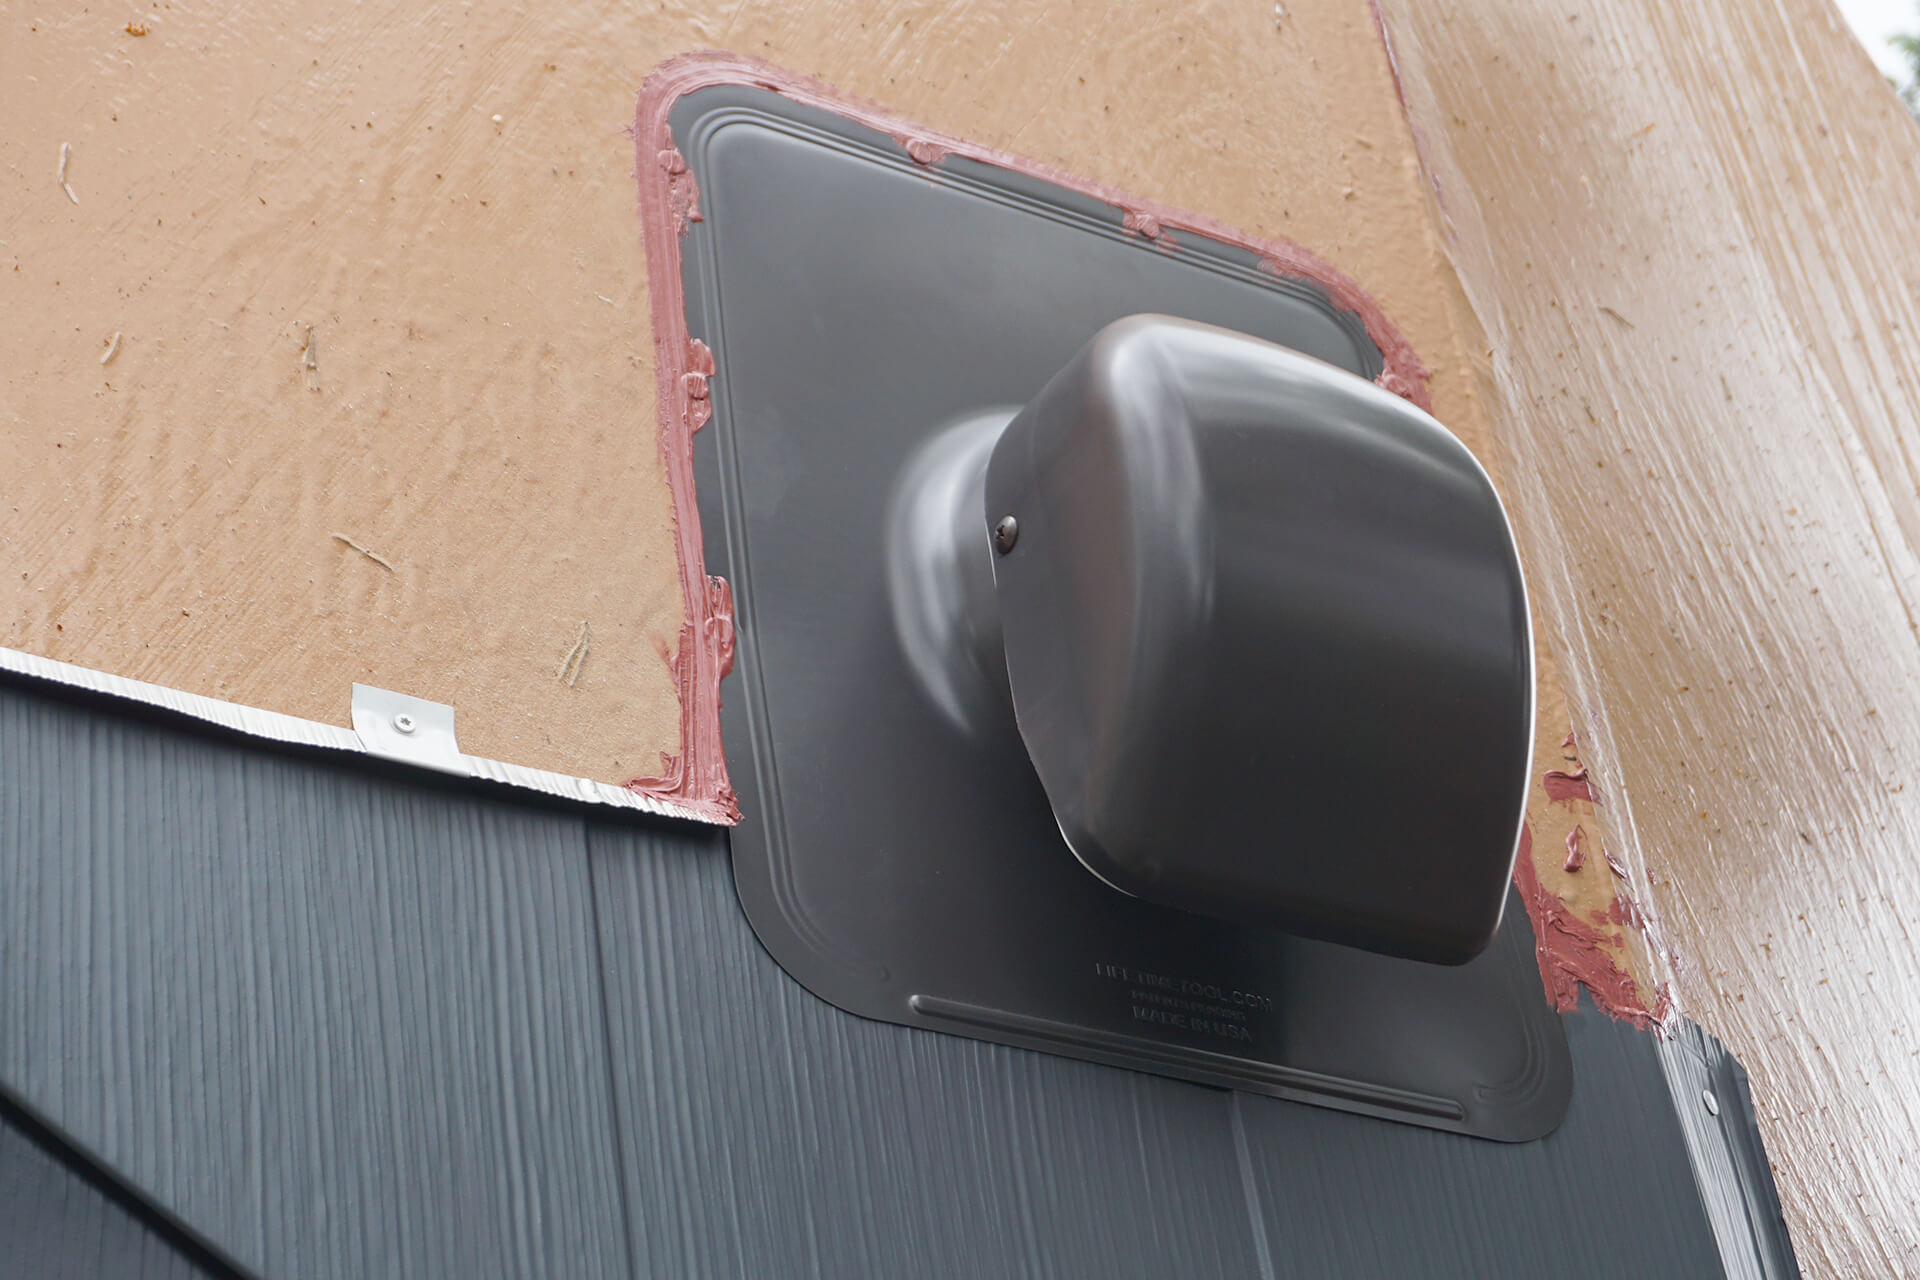
Install the vent cover and apply caulk. Prosoco R-Guard Fast Flash is shown here. Vent cover should overlap the shingle below (as shown).
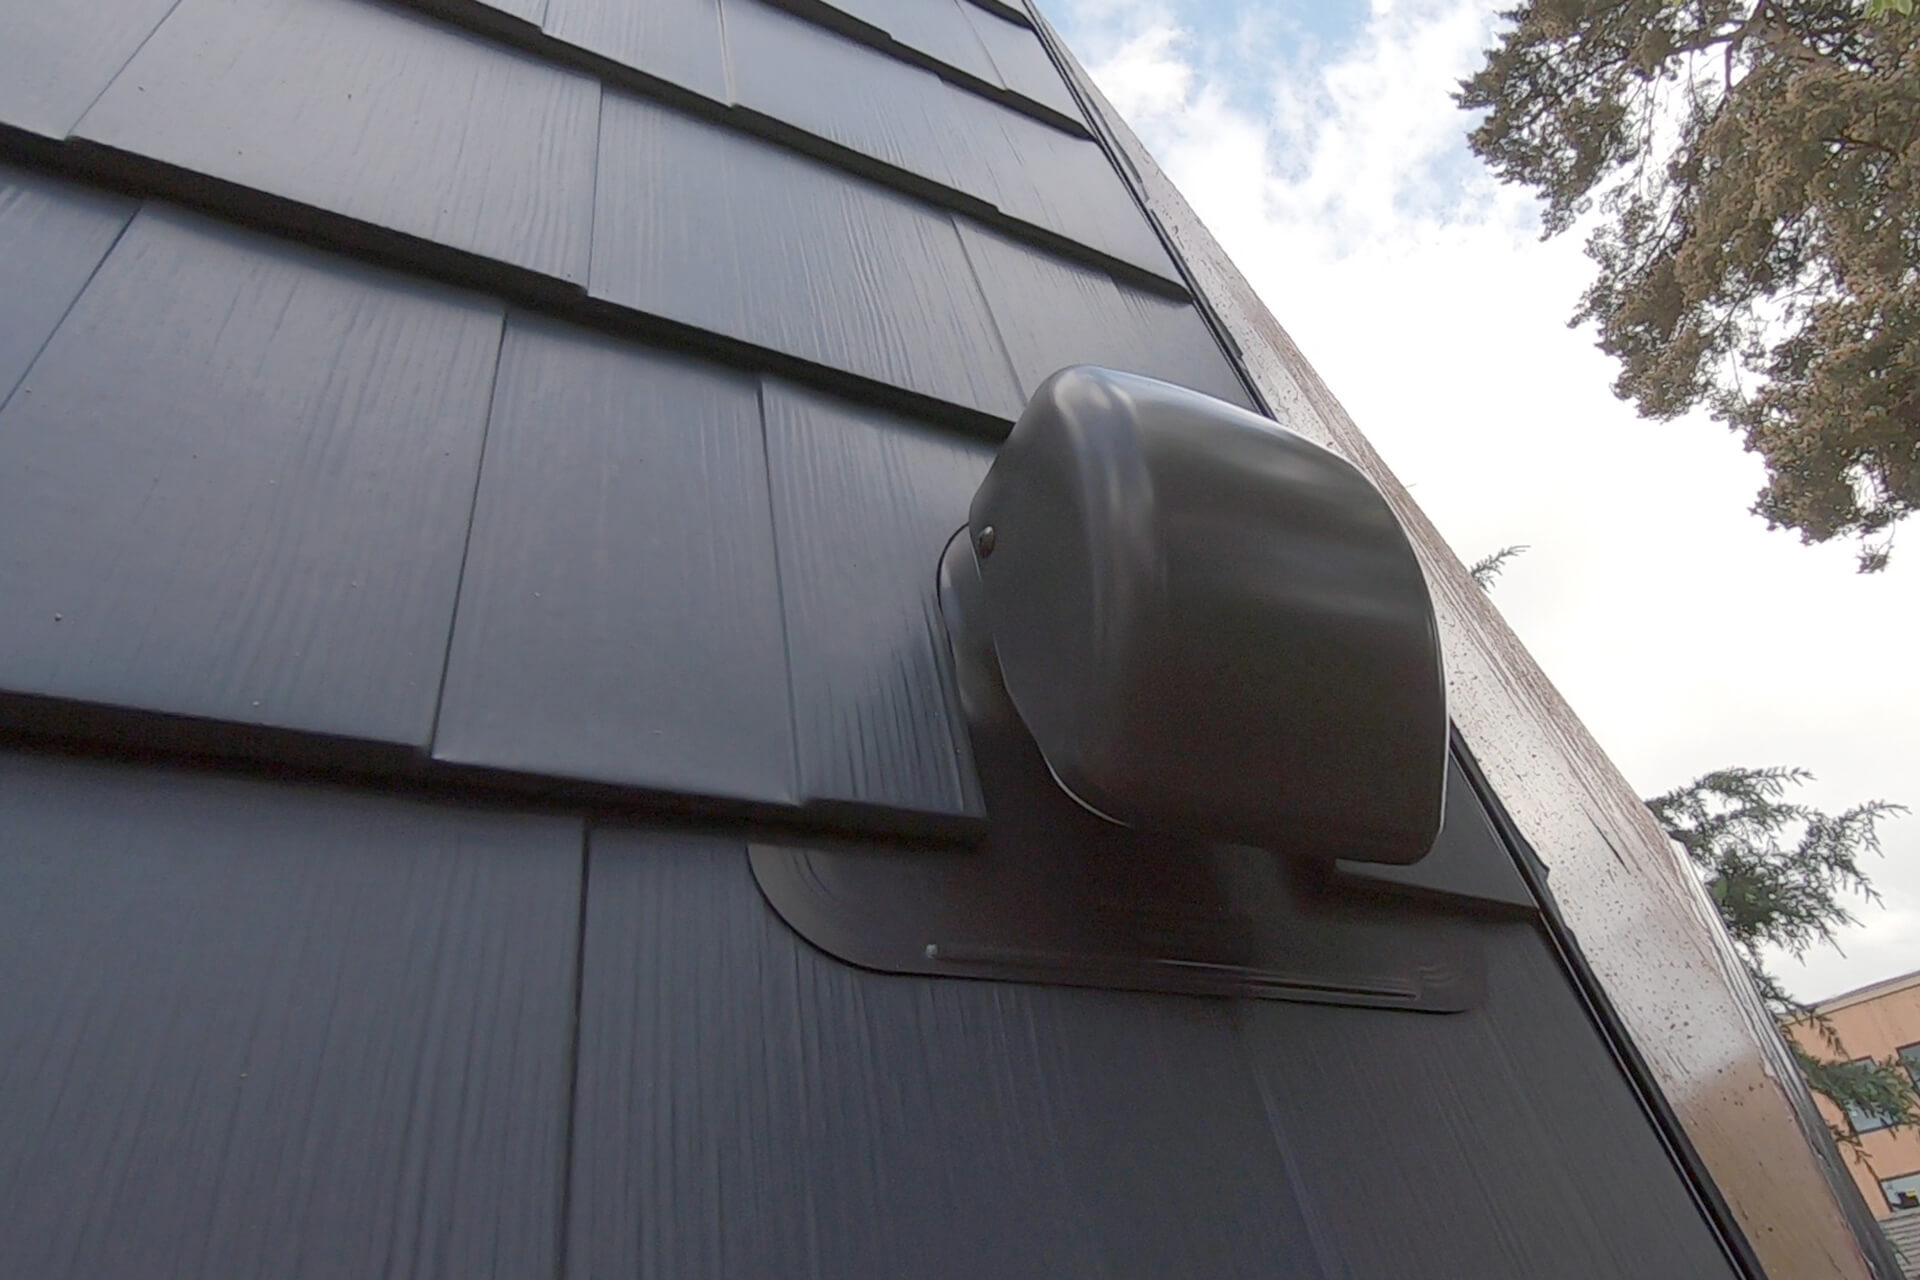
The completed shingling of a dome panel with a vent.
Next Step
© 2025 Dodeca Domes. All rights reserved.

