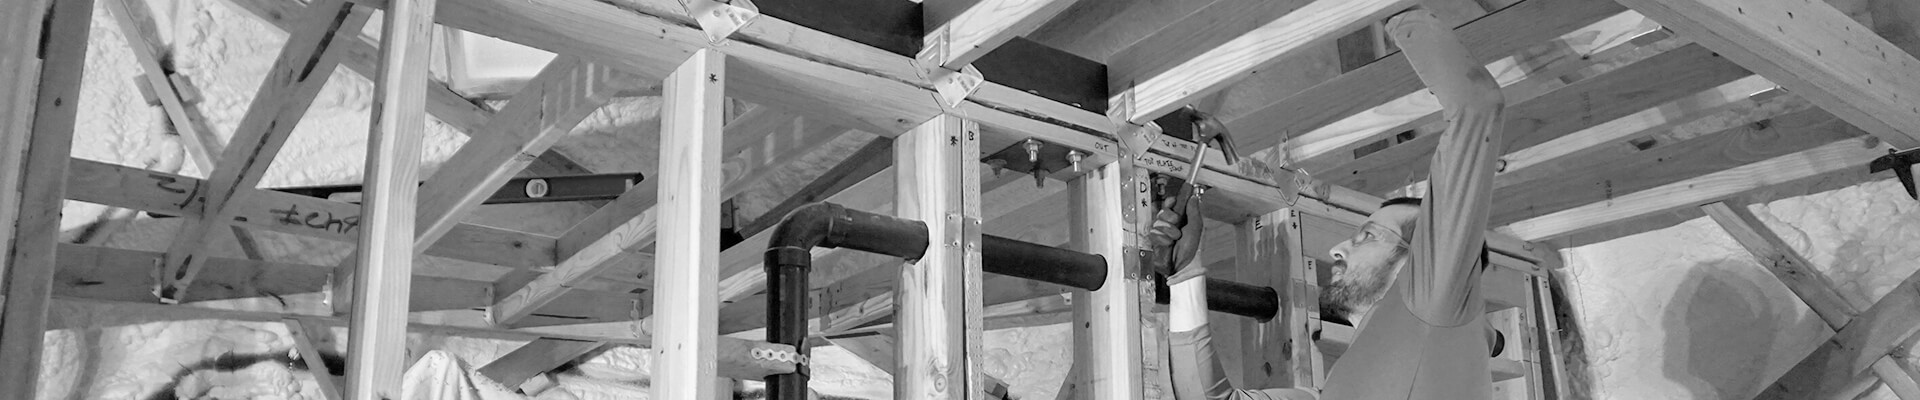
Room Framing – Shower
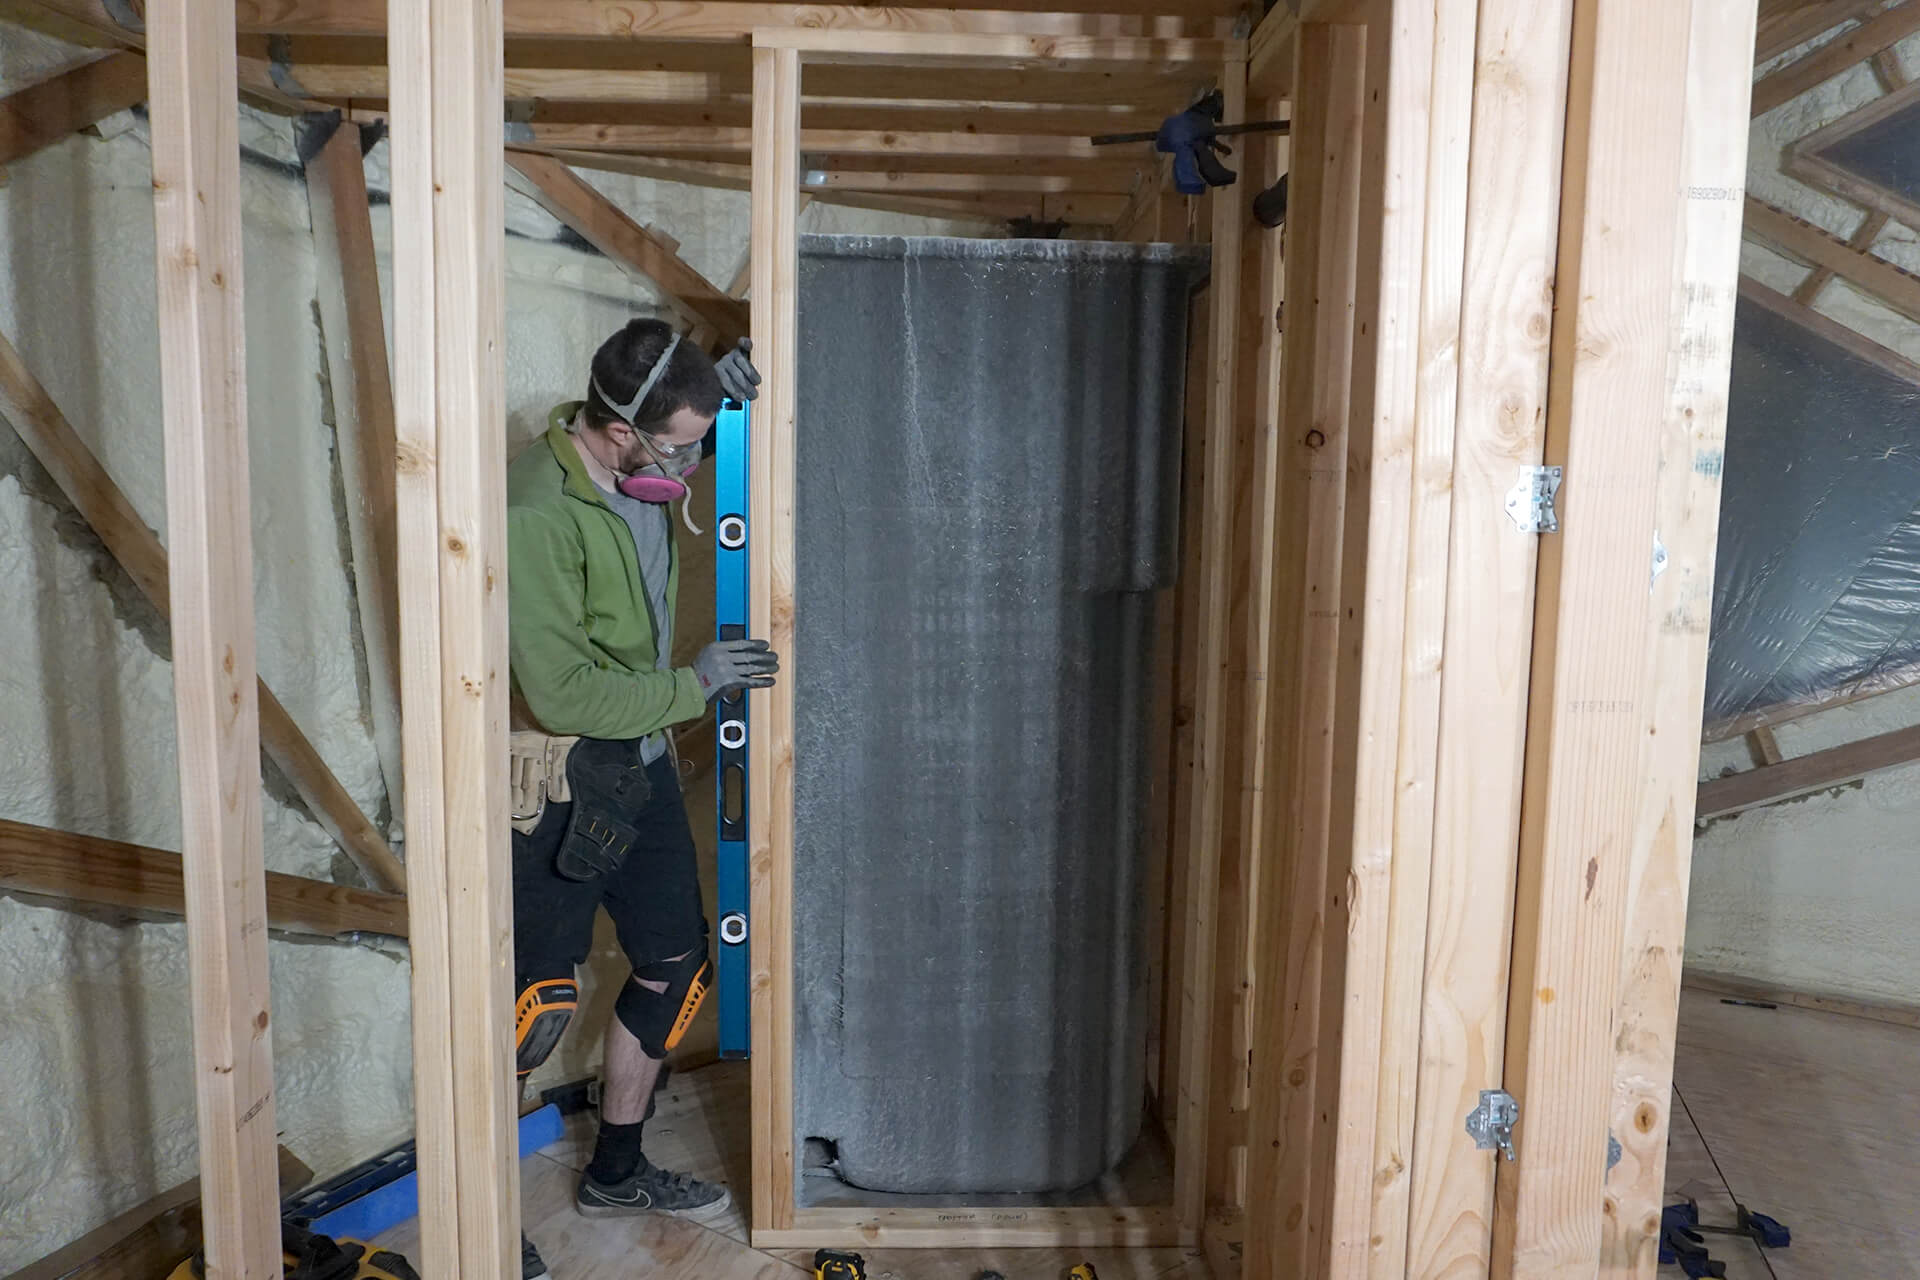
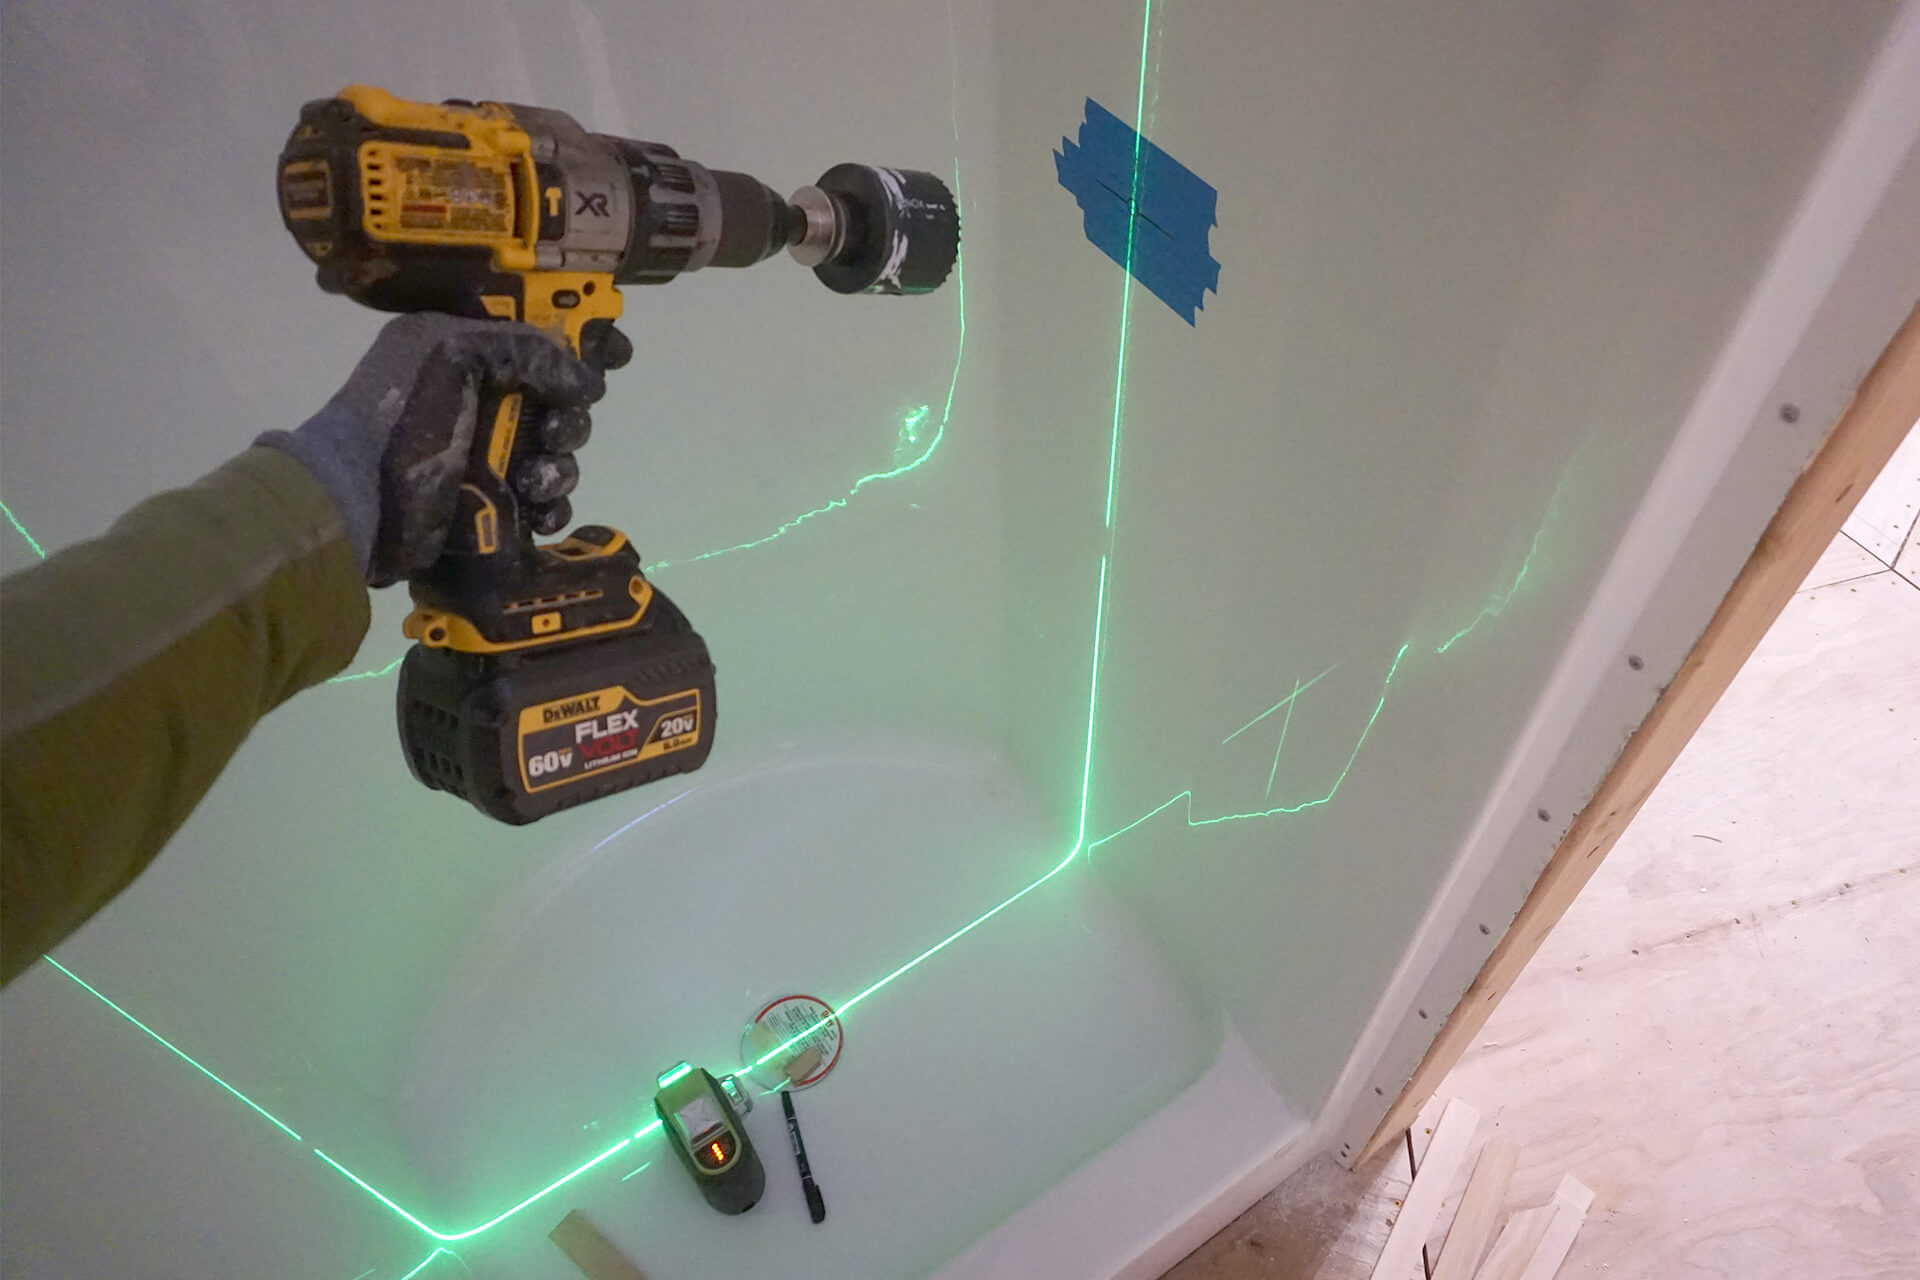
Position the base of the shower in place, ensuring it is square to the wall. Mark the ideal shower wall locations.
Reference the rounded lip of the shower when determining how much to shim behind the shower nailing fin to ensure the shower is plumb.
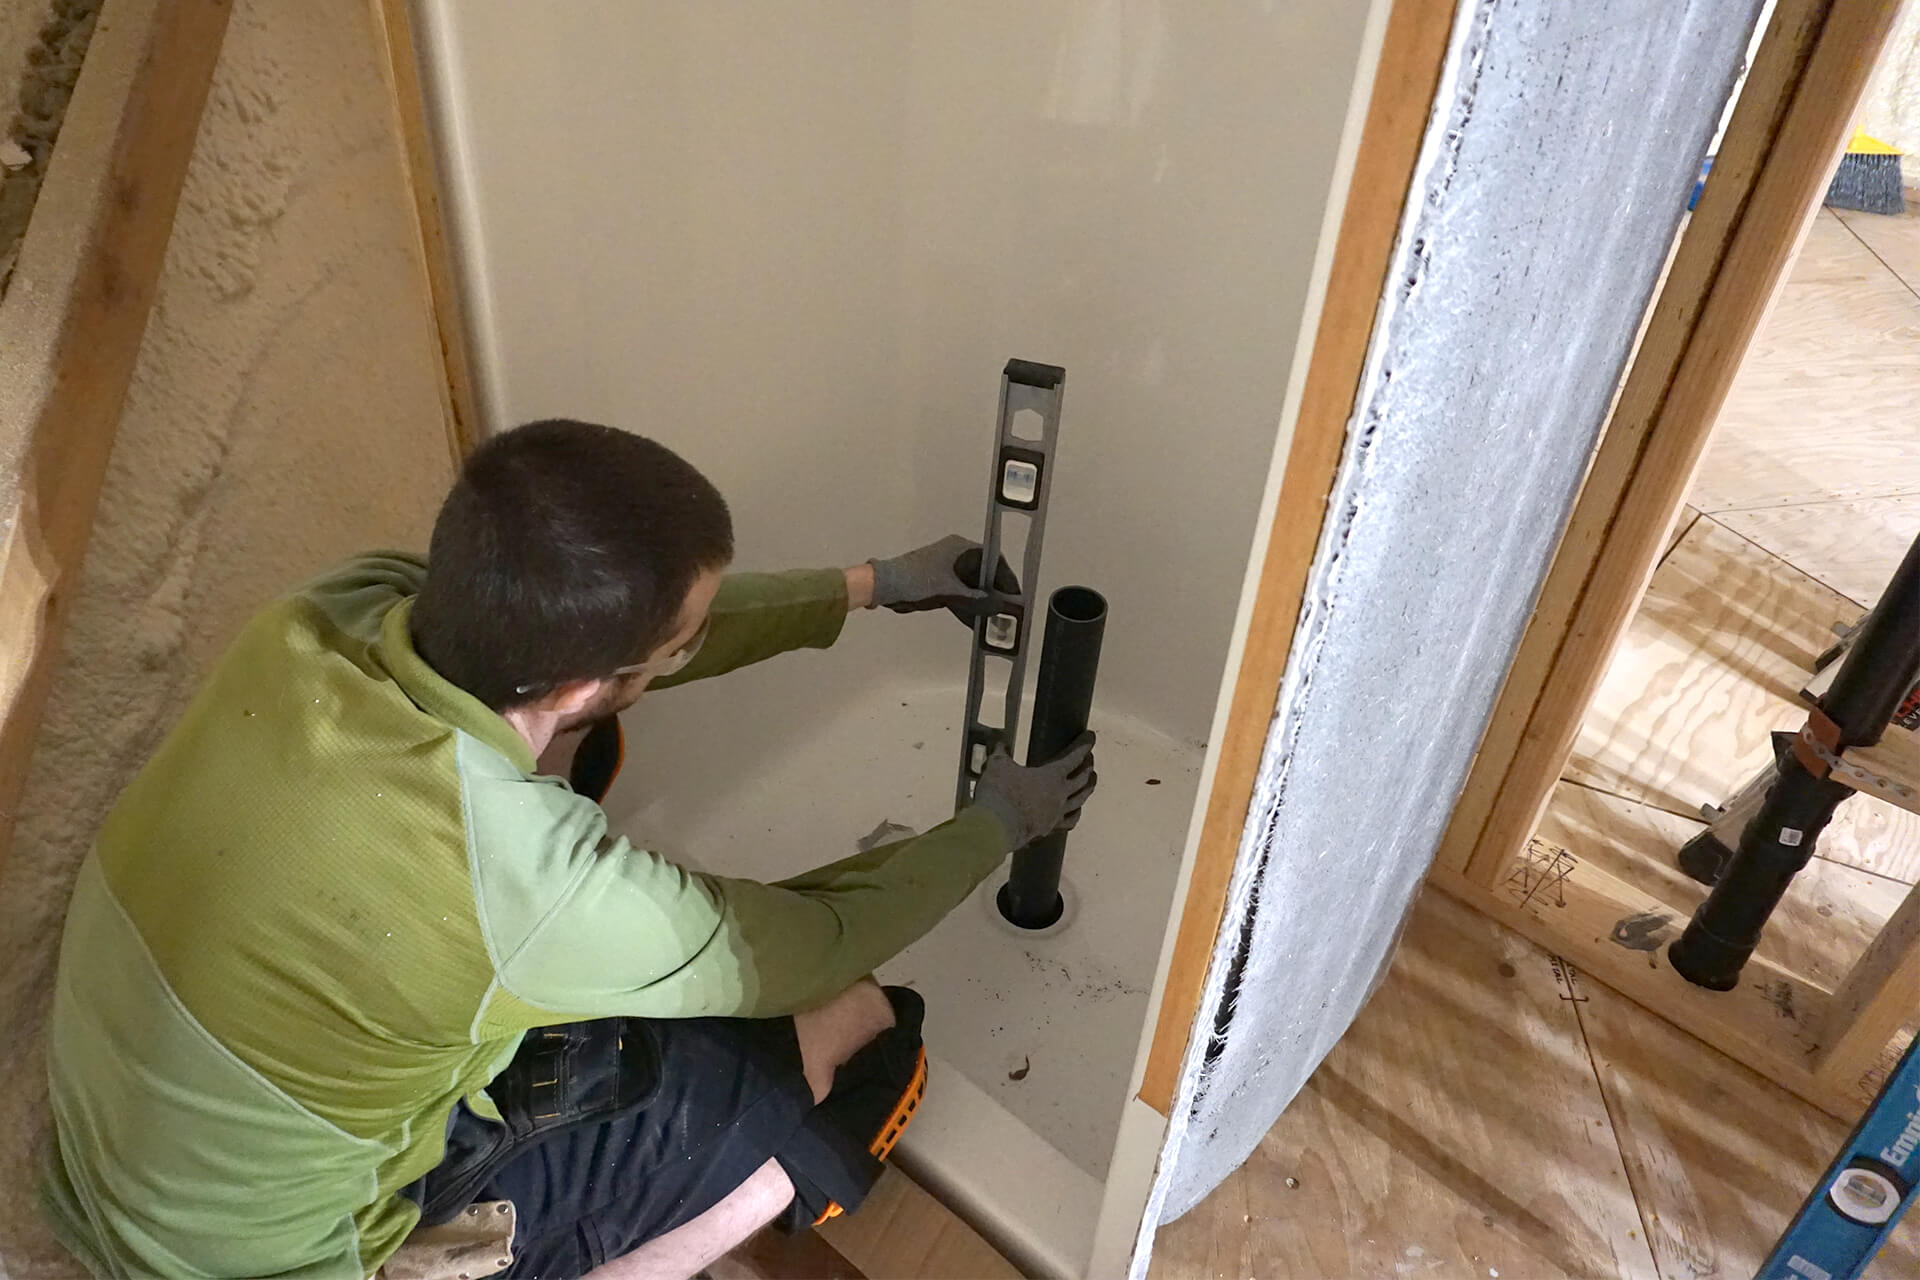
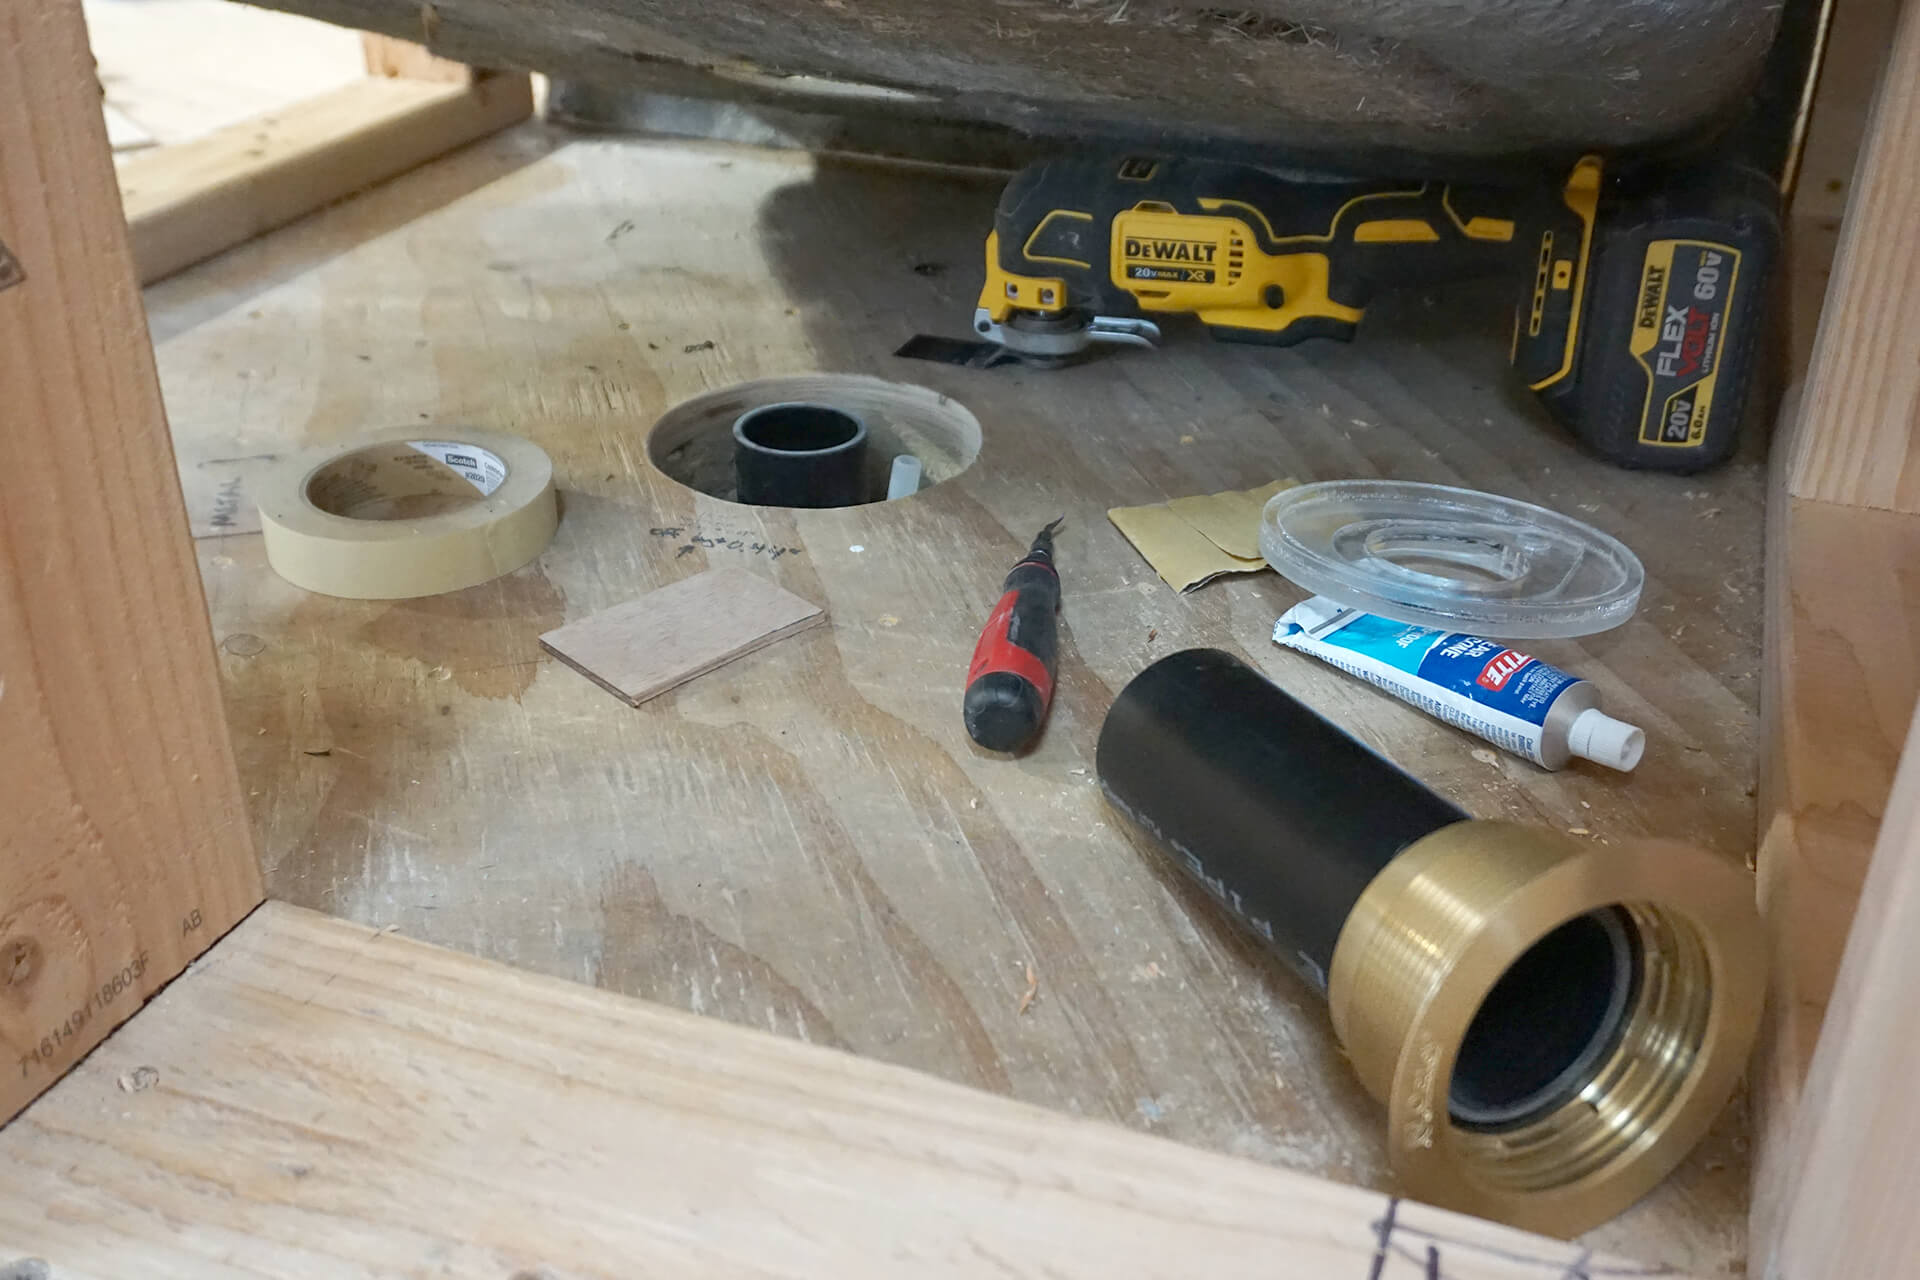
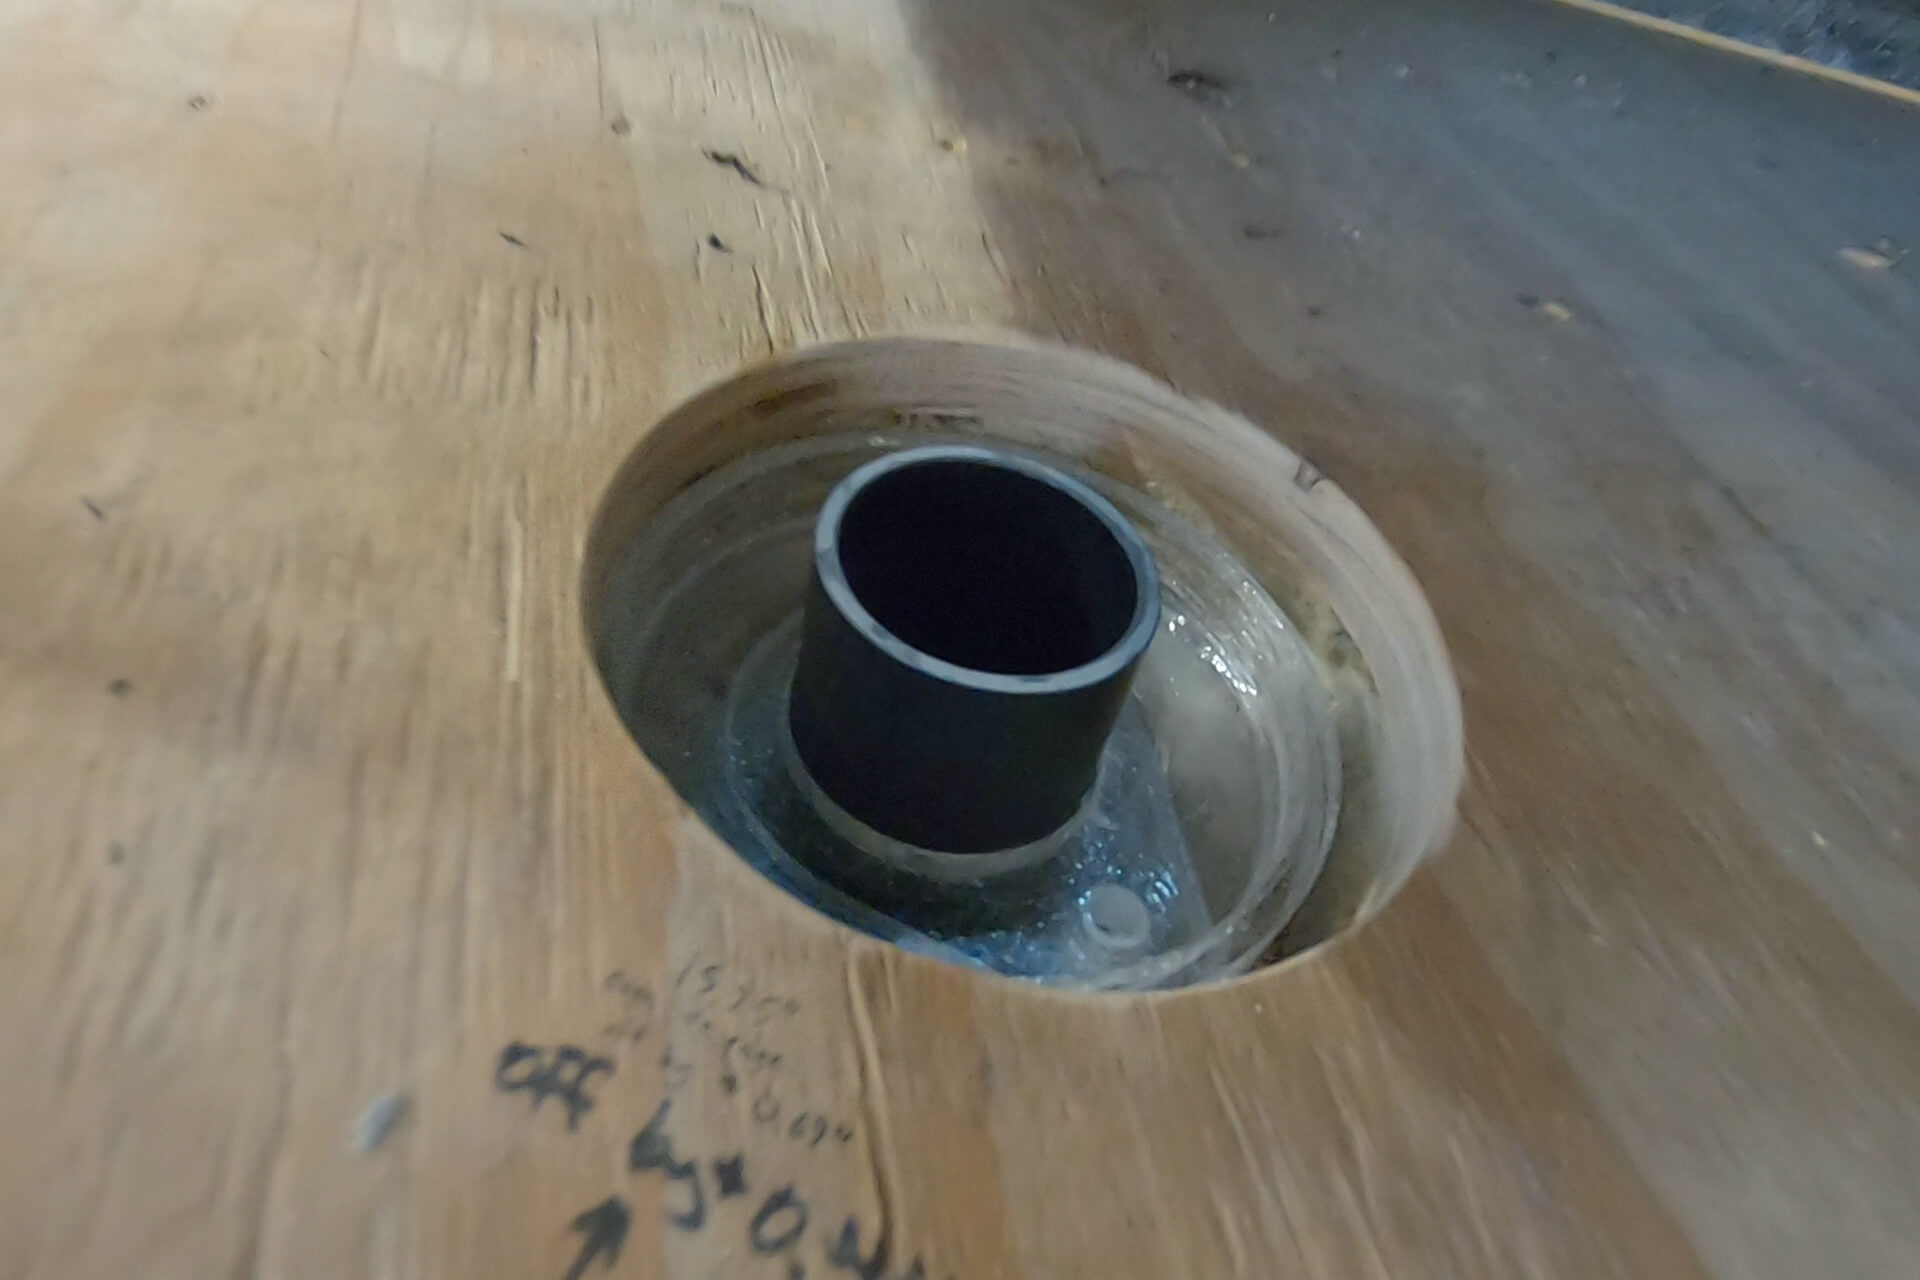
Glue the waste pipe into the underfloor P-trap. The pipe should be plumb and concentric with the drain opening. A heat gun can be used to make minor bends before gluing.
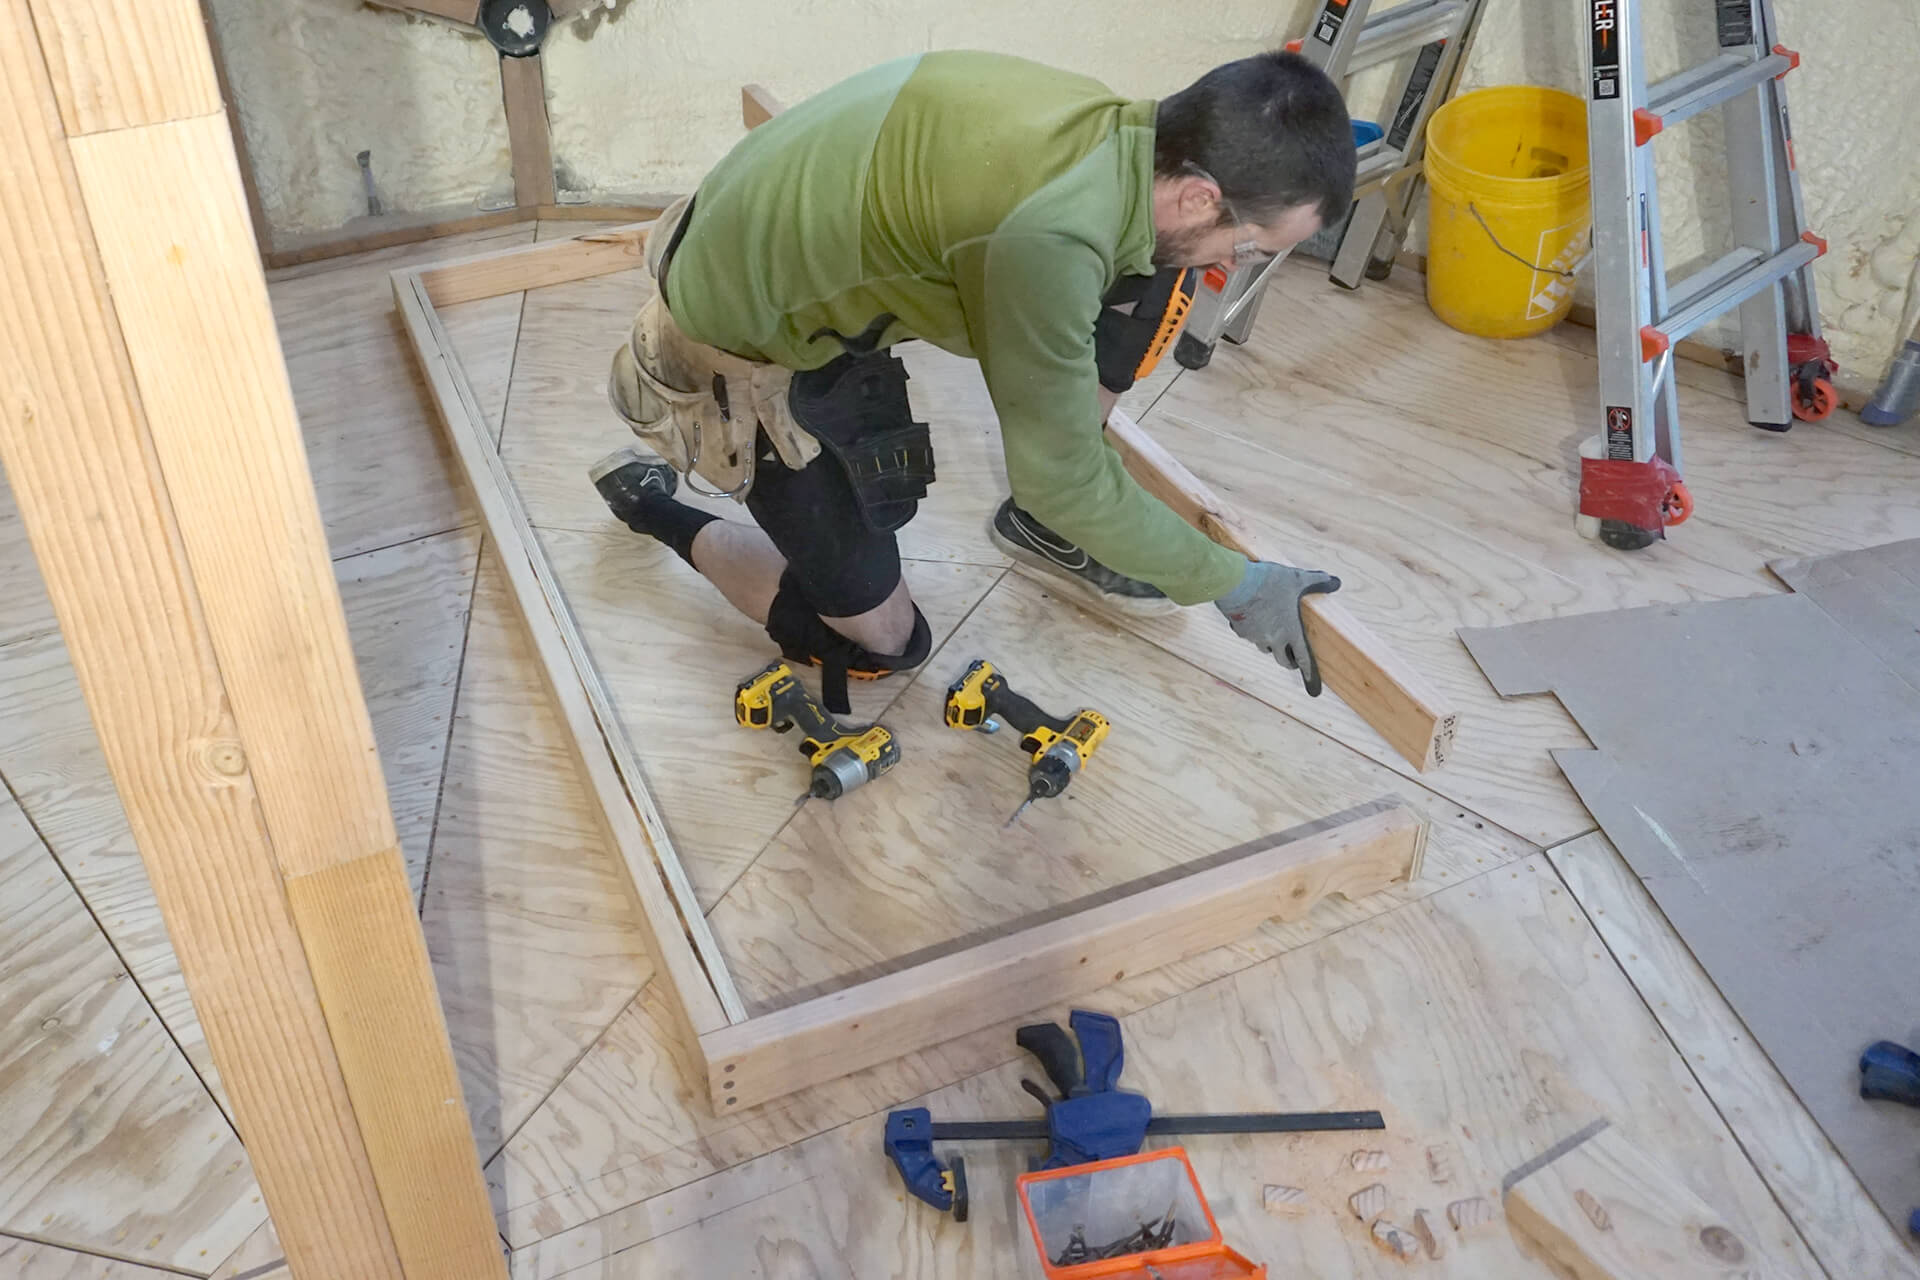
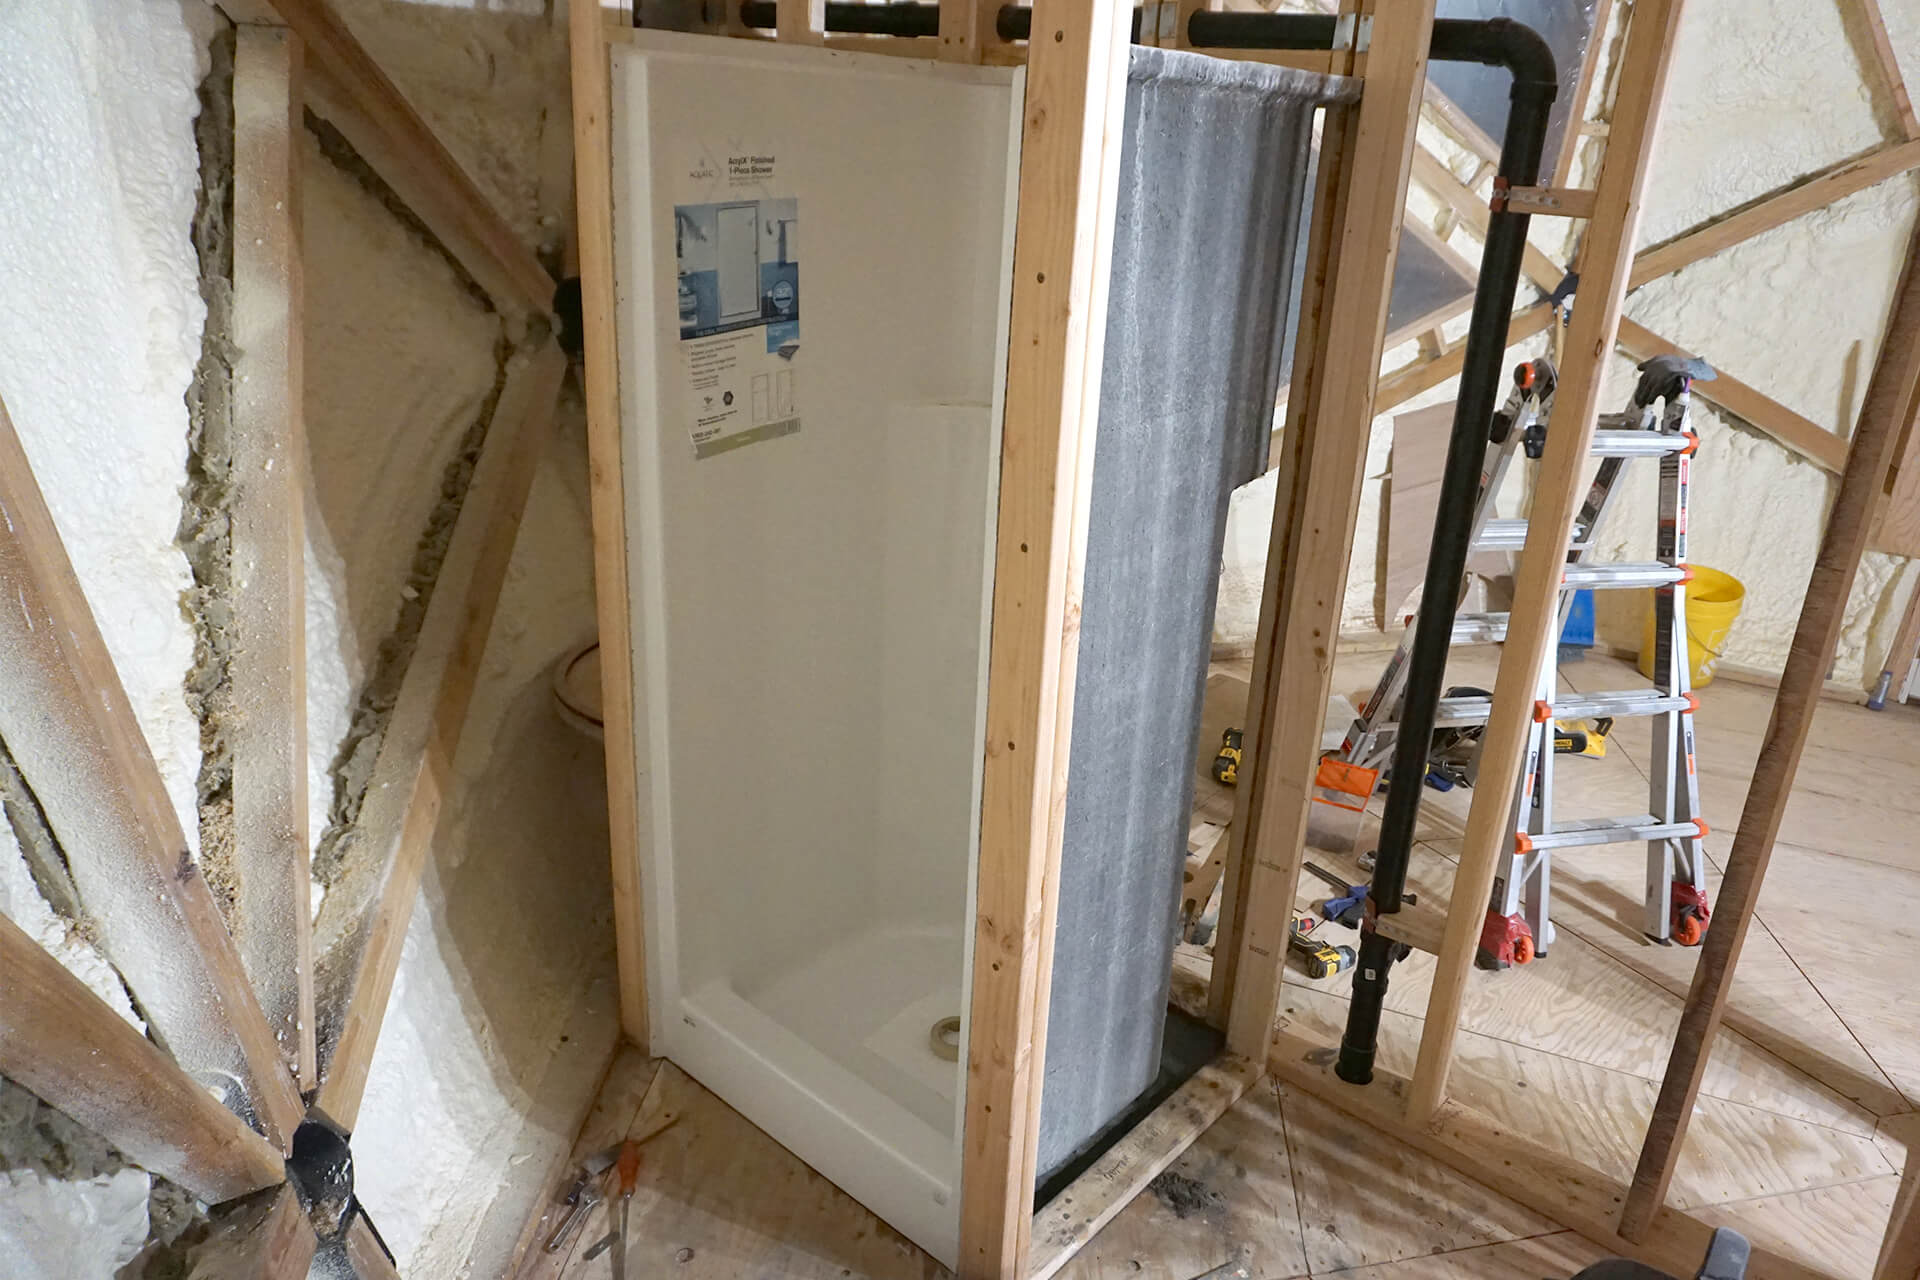
Build the shower walls. Notch holes in the base plate of the back wall for utilities. Remove the top plate and possibly the framing around the utility opening to fit the back wall into place.
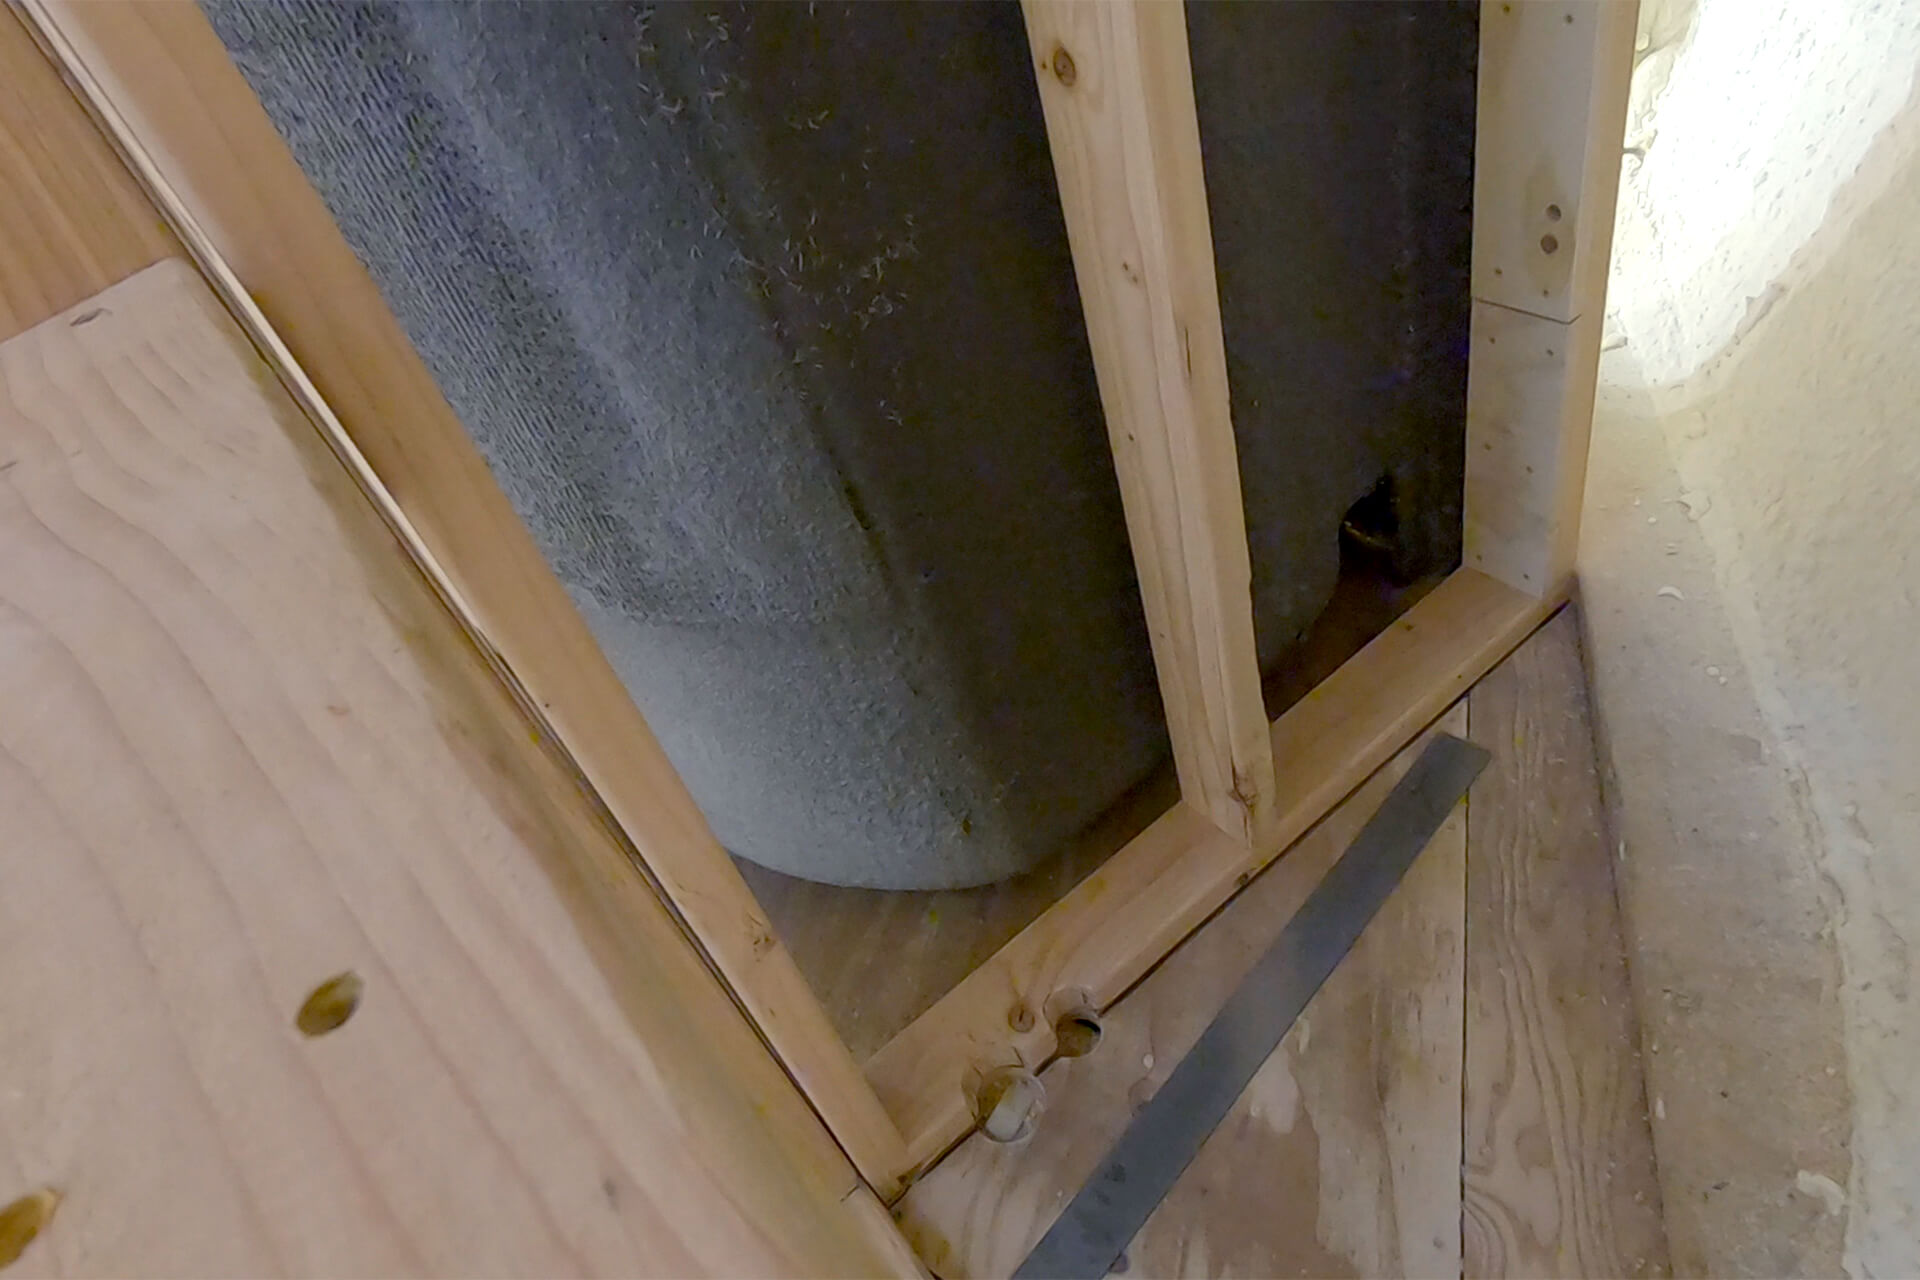
Fit the back wall into place. Secure it by screwing through the base plate, subfloor, and into the floor beams beneath. Ensure the wall is plumb, then secure it to the Interior-Wall-B framing.
Fit and secure the front shower wall into place.
Secure the shower walls to the upper floor joists. Add blocking as needed for additional support.
Mark the proper waste pipe cut location (0.2” above the subfloor in this case), tilt the shower forward, then cut and deburr the pipe as needed.
Optional: Install the custom leak-detection system. Use silicone to seal the dish around the waste pipe and glue the smaller leak detection tube to the dish.
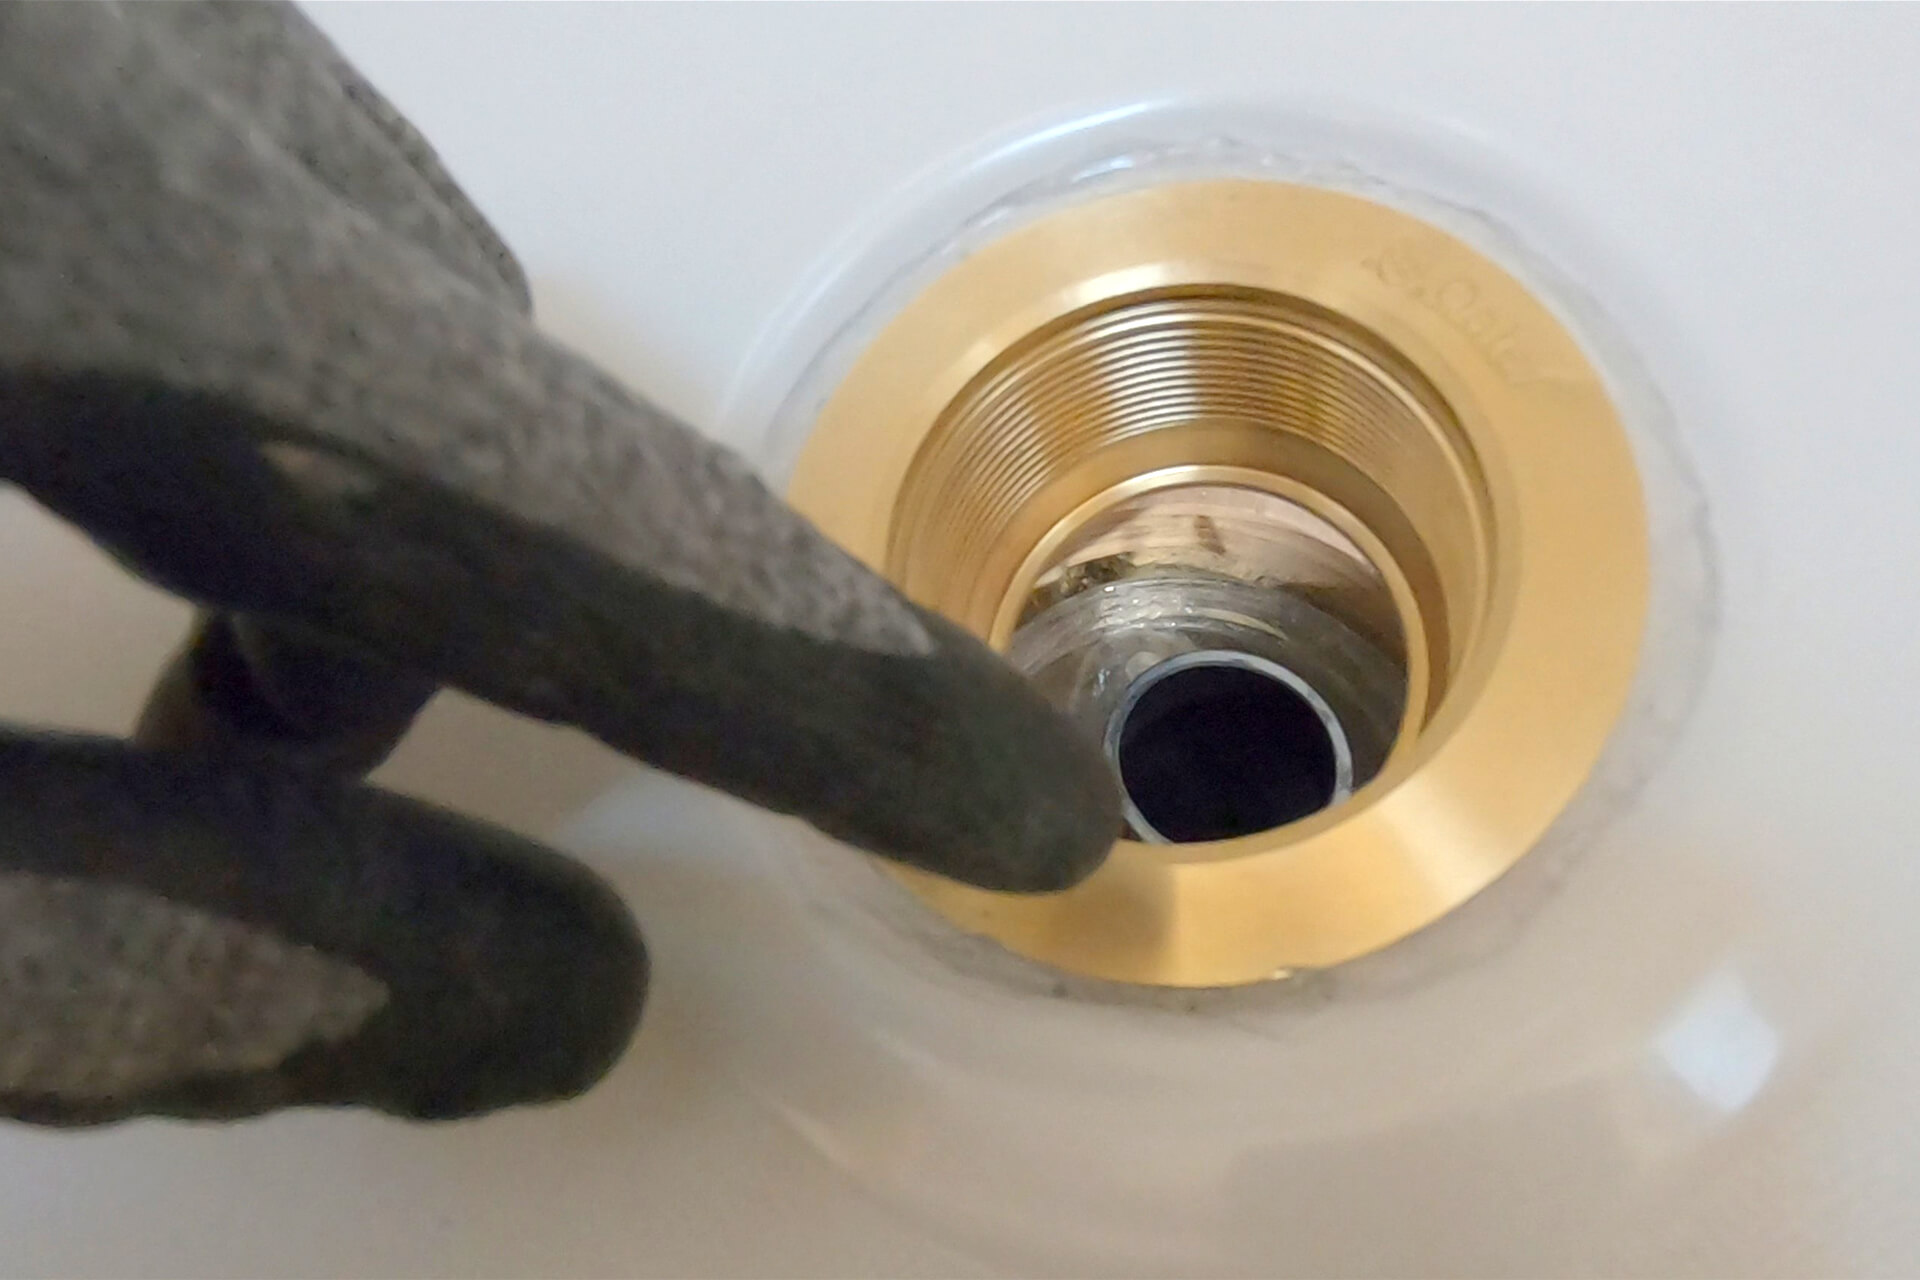
Apply a bead of clear silicone around the shower drain hole, then place the shower drain atop the bead, centered in the recessed circle.
Install the rubber gasket, paper slip ring, and tighten snugly with the ring nut. A custom tightening tool is shown here, but large pliers or a hammer and screwdriver can also be used.
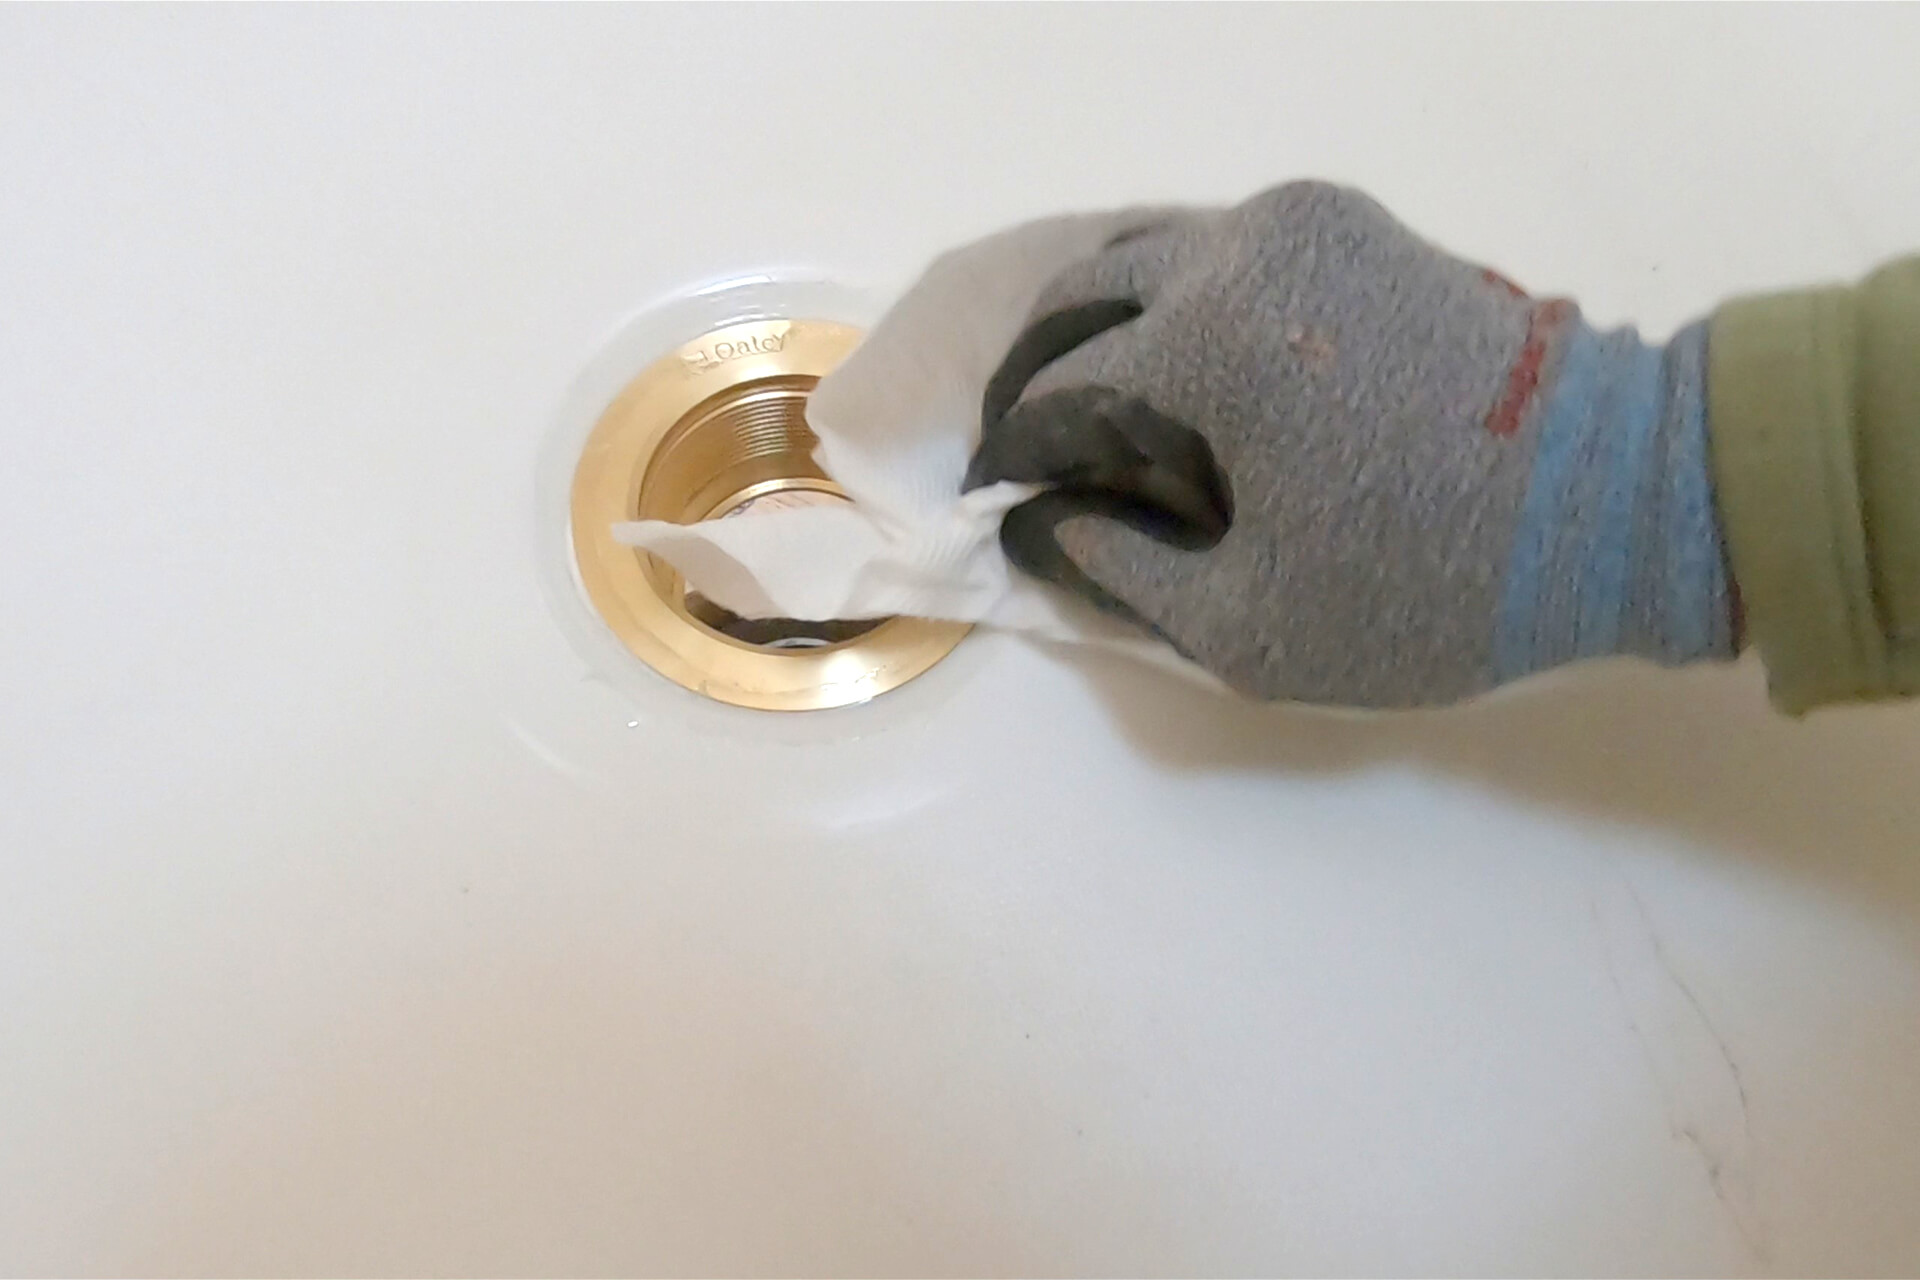
Wipe away excess silicone that oozed out when tightening the drain. If the drain is not centered, loosen it, apply more silicone, and try again.
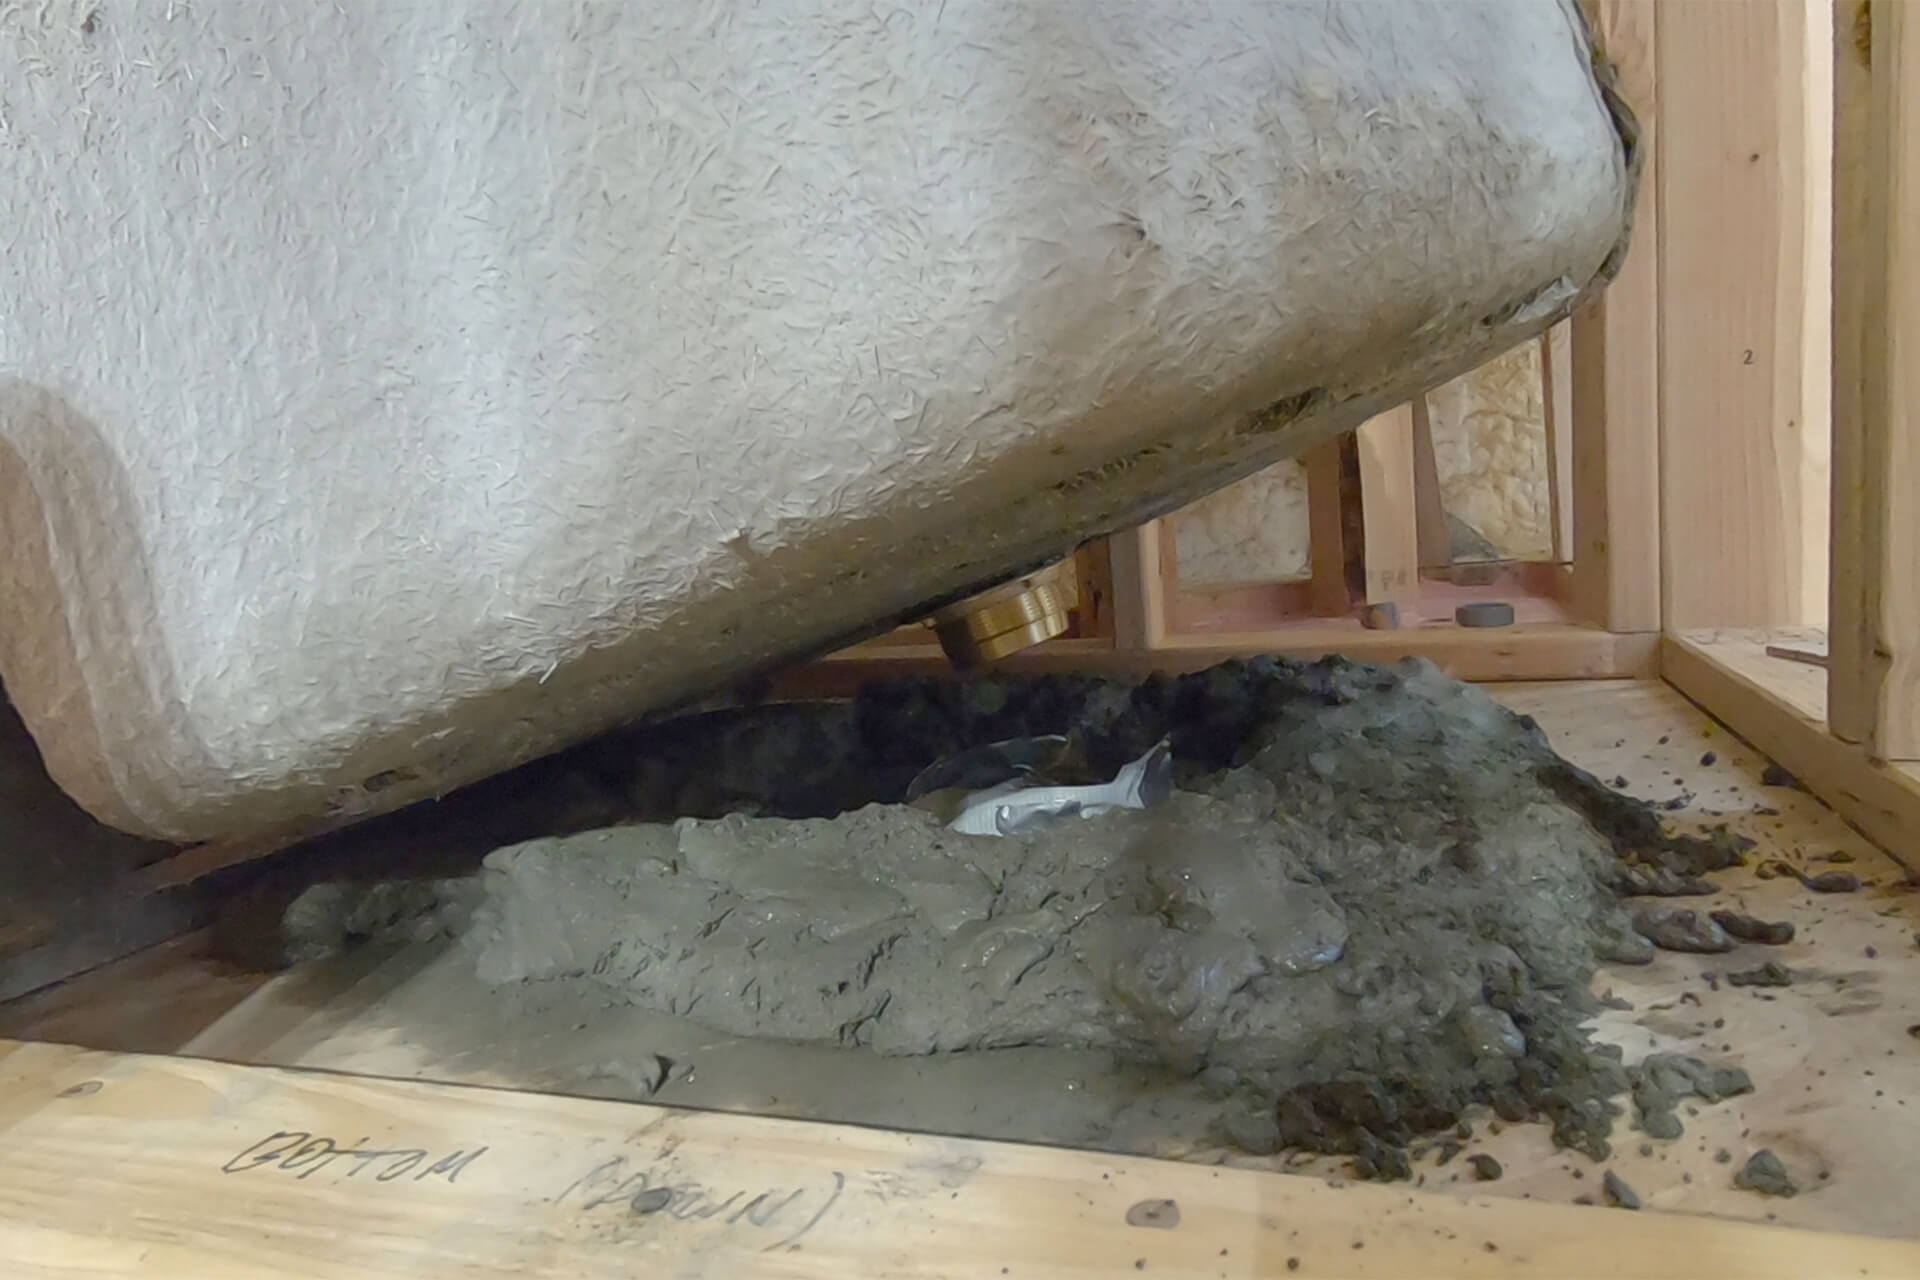
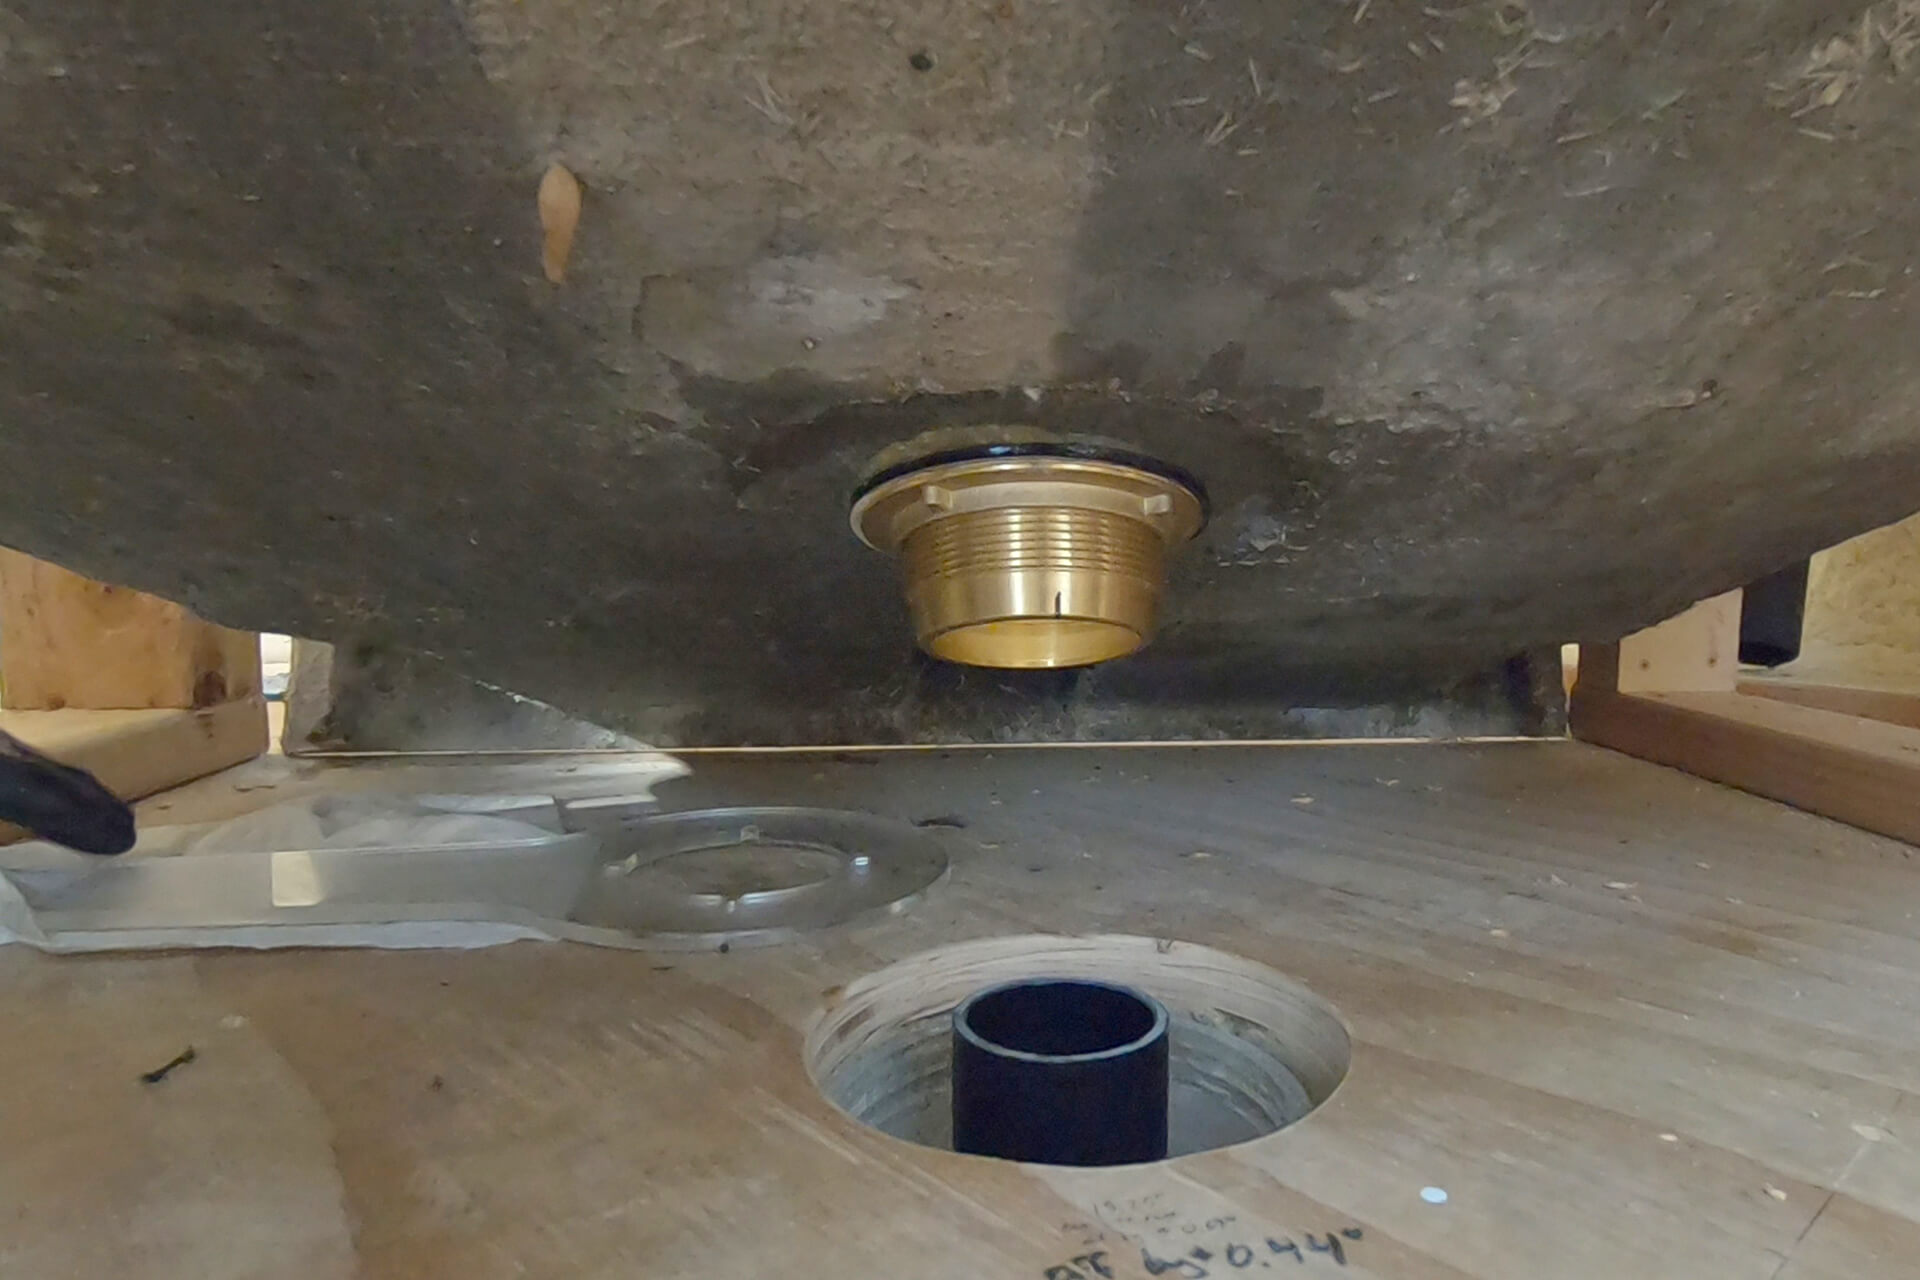
Protect the waste pipe with a wall of tape around the subfloor opening, then mix and place non-shrink grout. Press the shower into place. Note: This was too much grout.
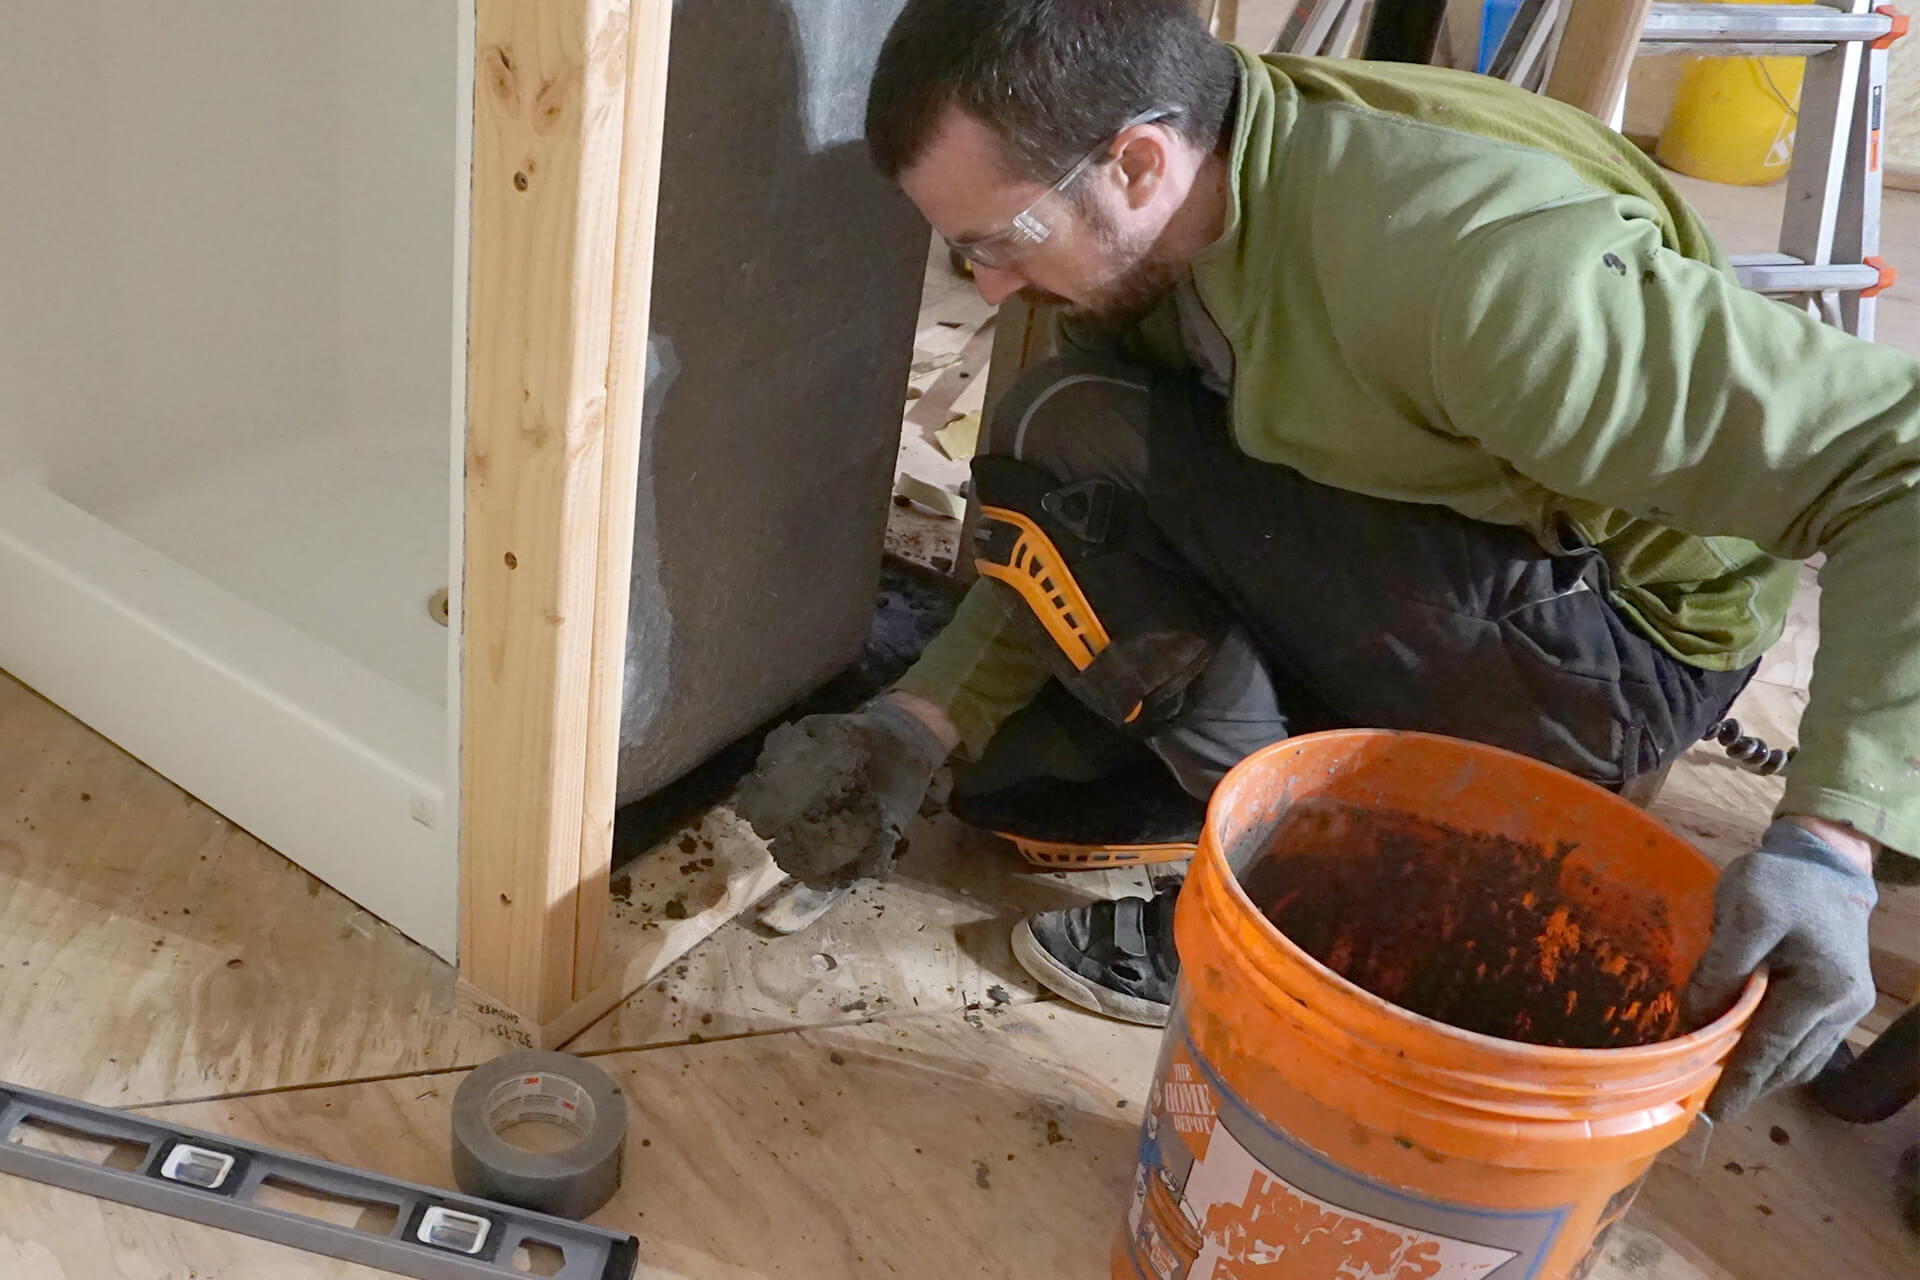
Remove excess grout if the shower is sitting too high, then press the shower into place again. Pack grout around the shower base once it is properly seated.
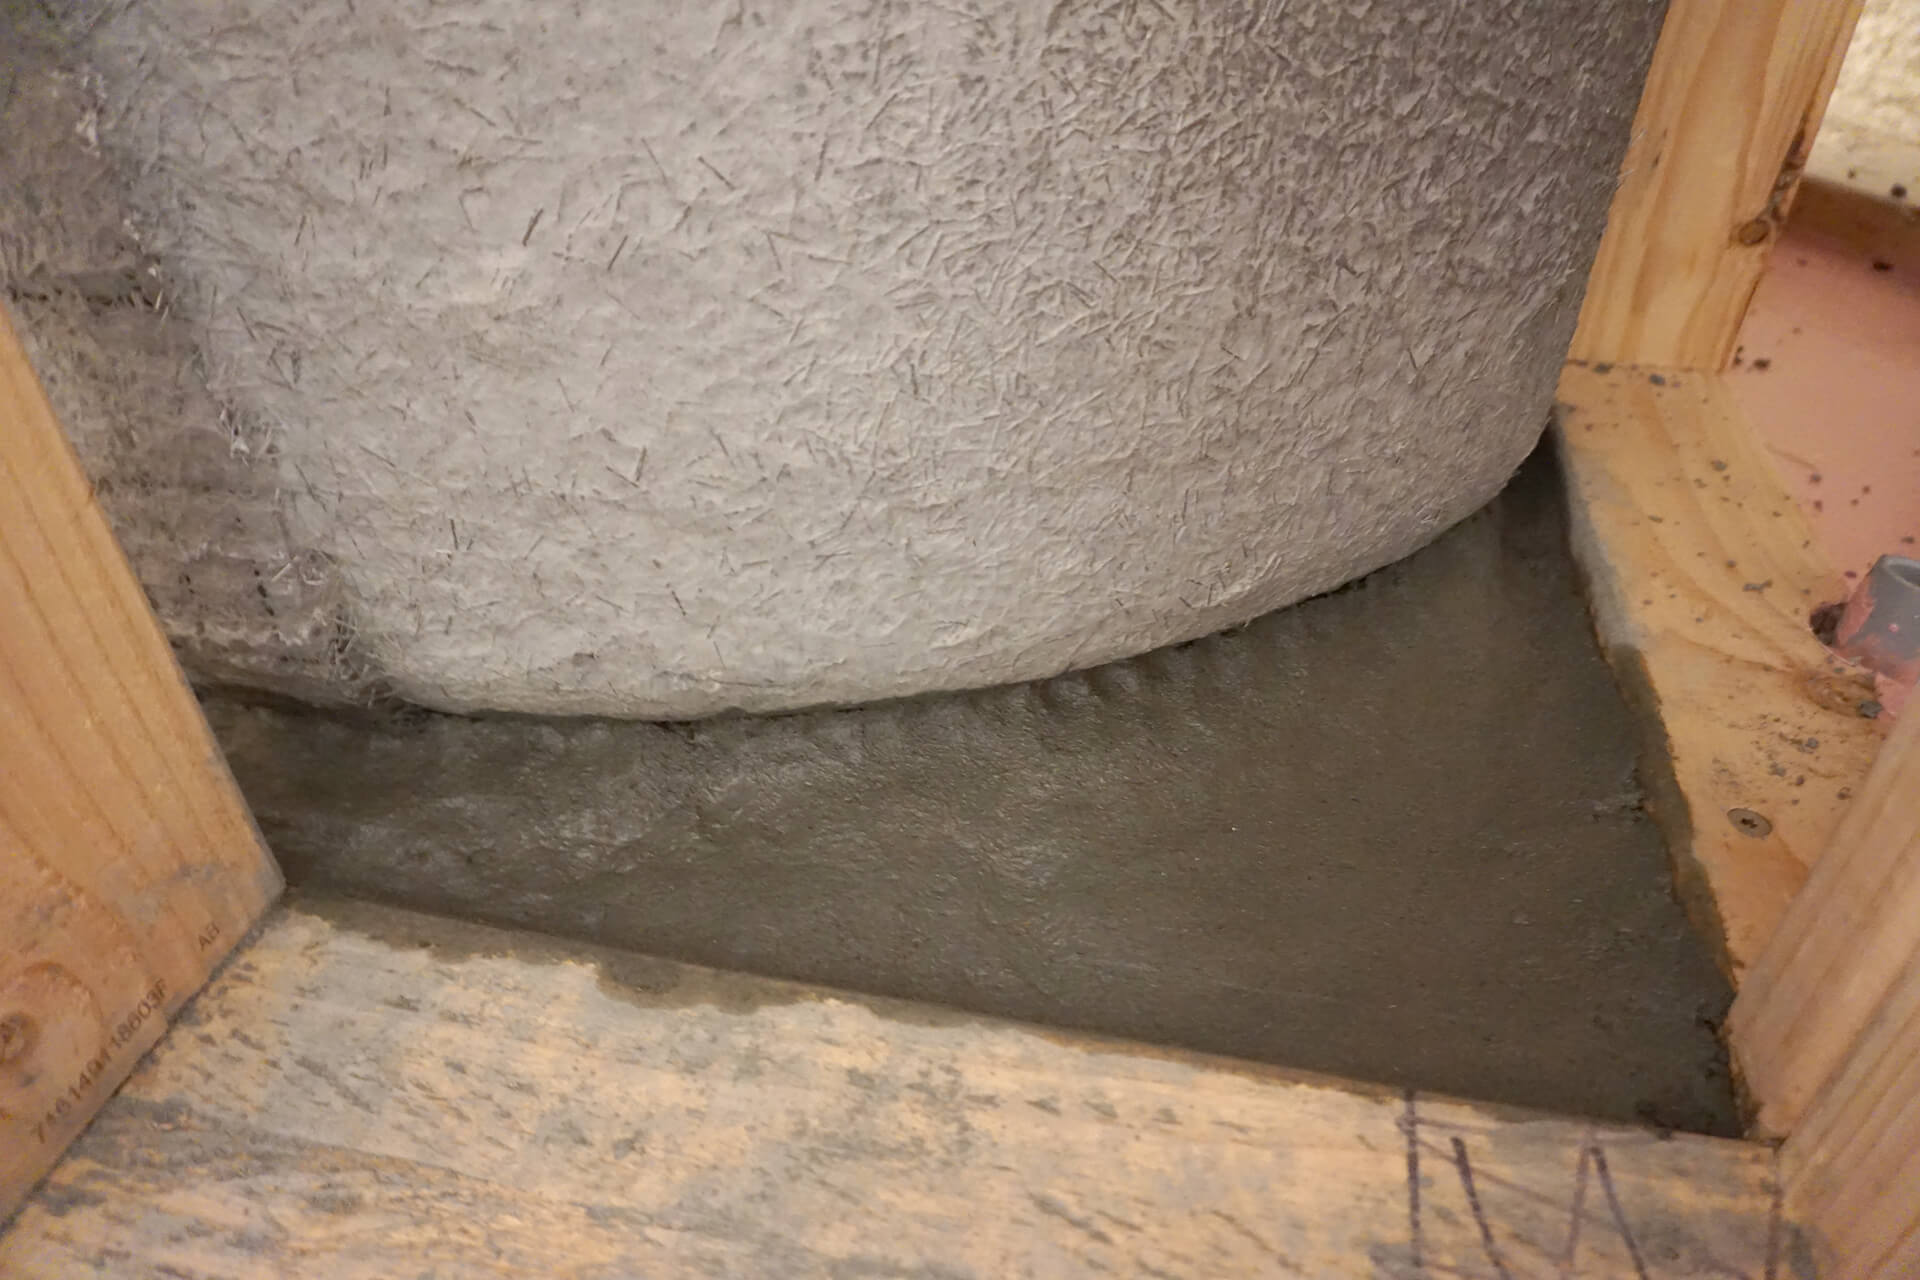
Detail shot showing the neatly packed grout below and around the shower. The grout supports the fiberglass of the shower, ensuring it will not crack, creak, or flex.
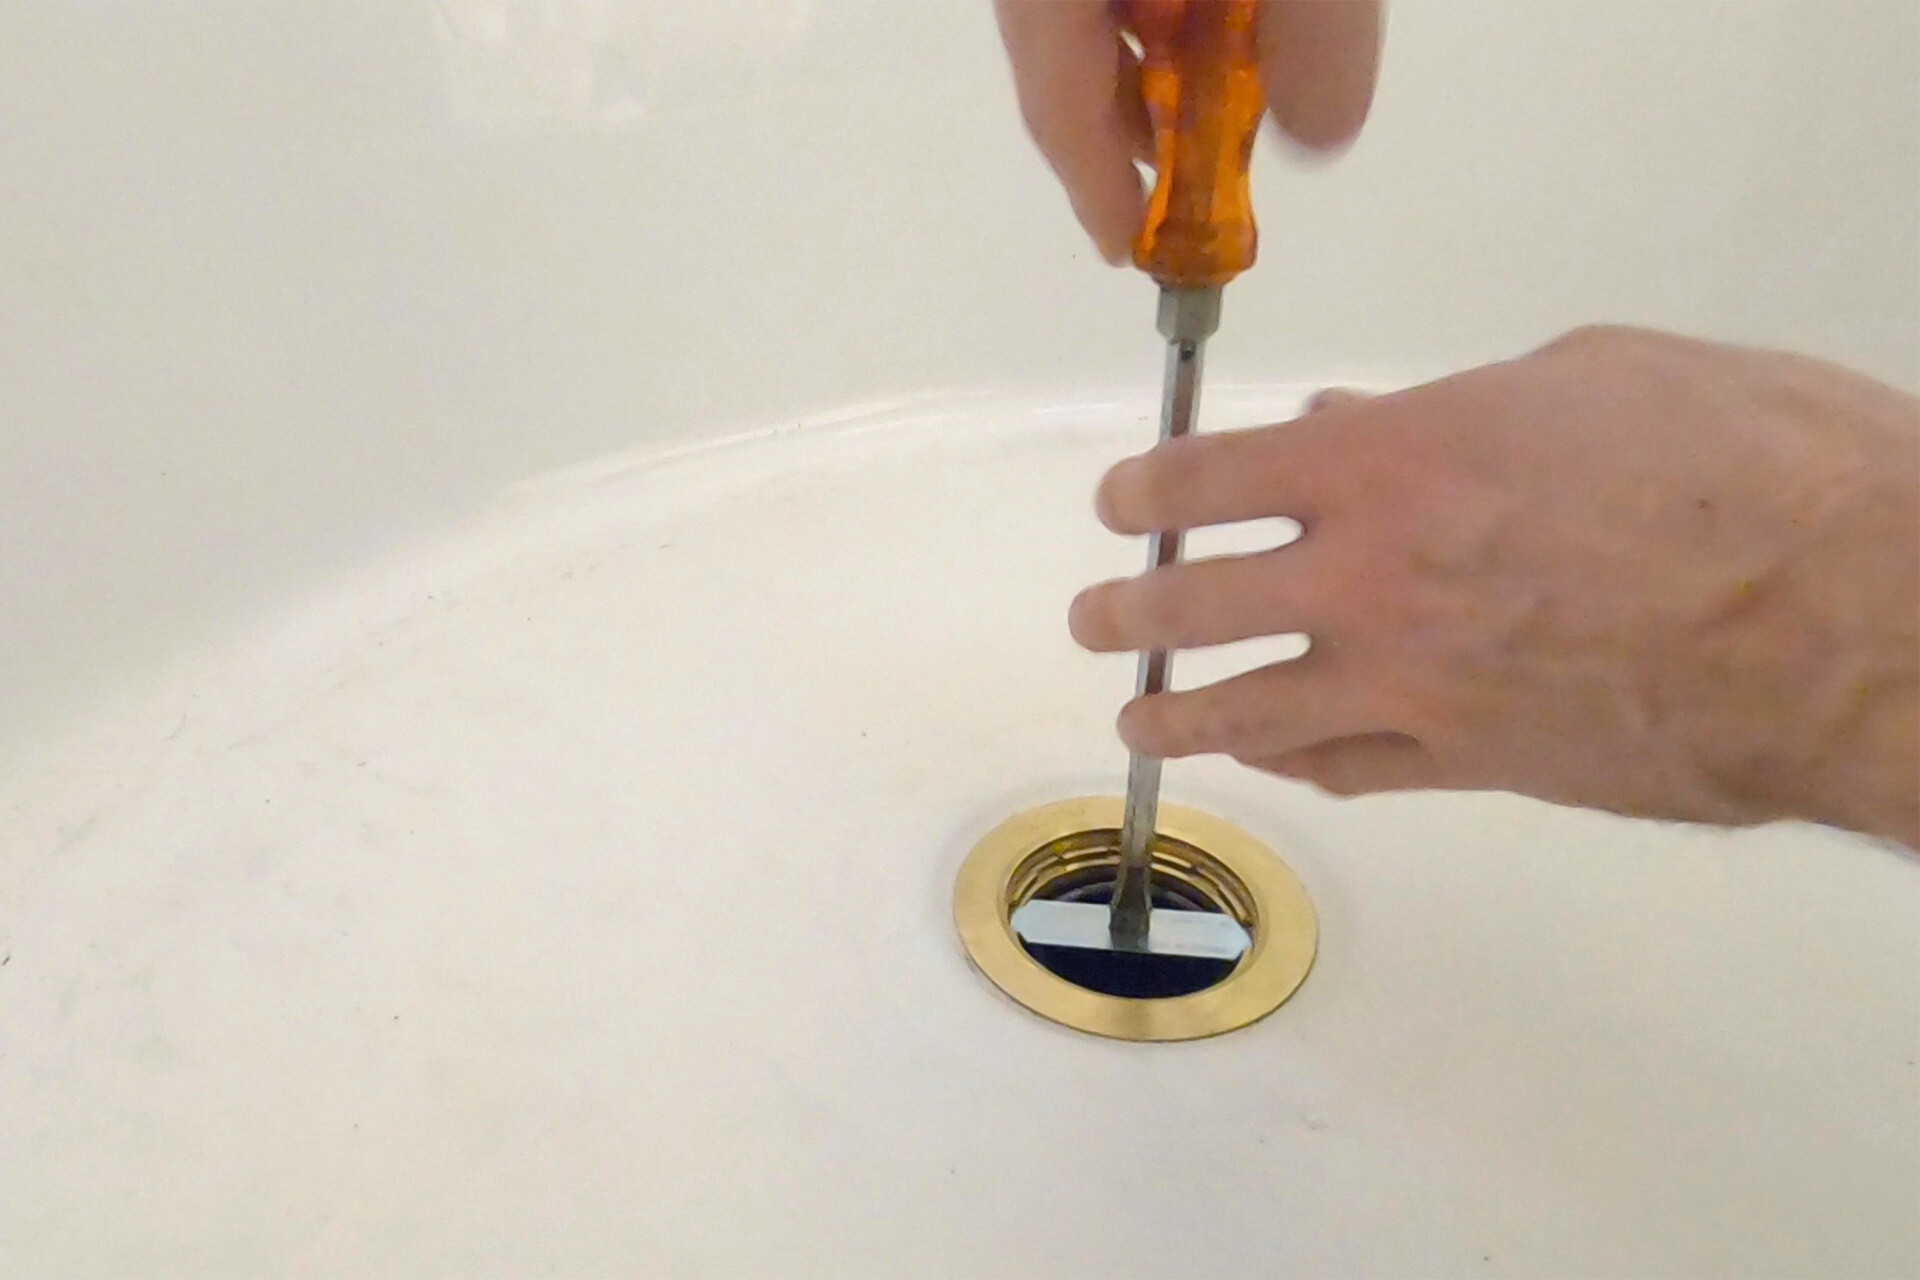
Place the rubber ring (bevel side up) around the waste pipe, then insert the brass set screw and tighten it with the tool provided. Use a magnet to fish out the tool if it is dropped down the drain.
Tape plastic over the drain to prevent sewer gases from entering the dome. Allow the grout and silicone to cure.
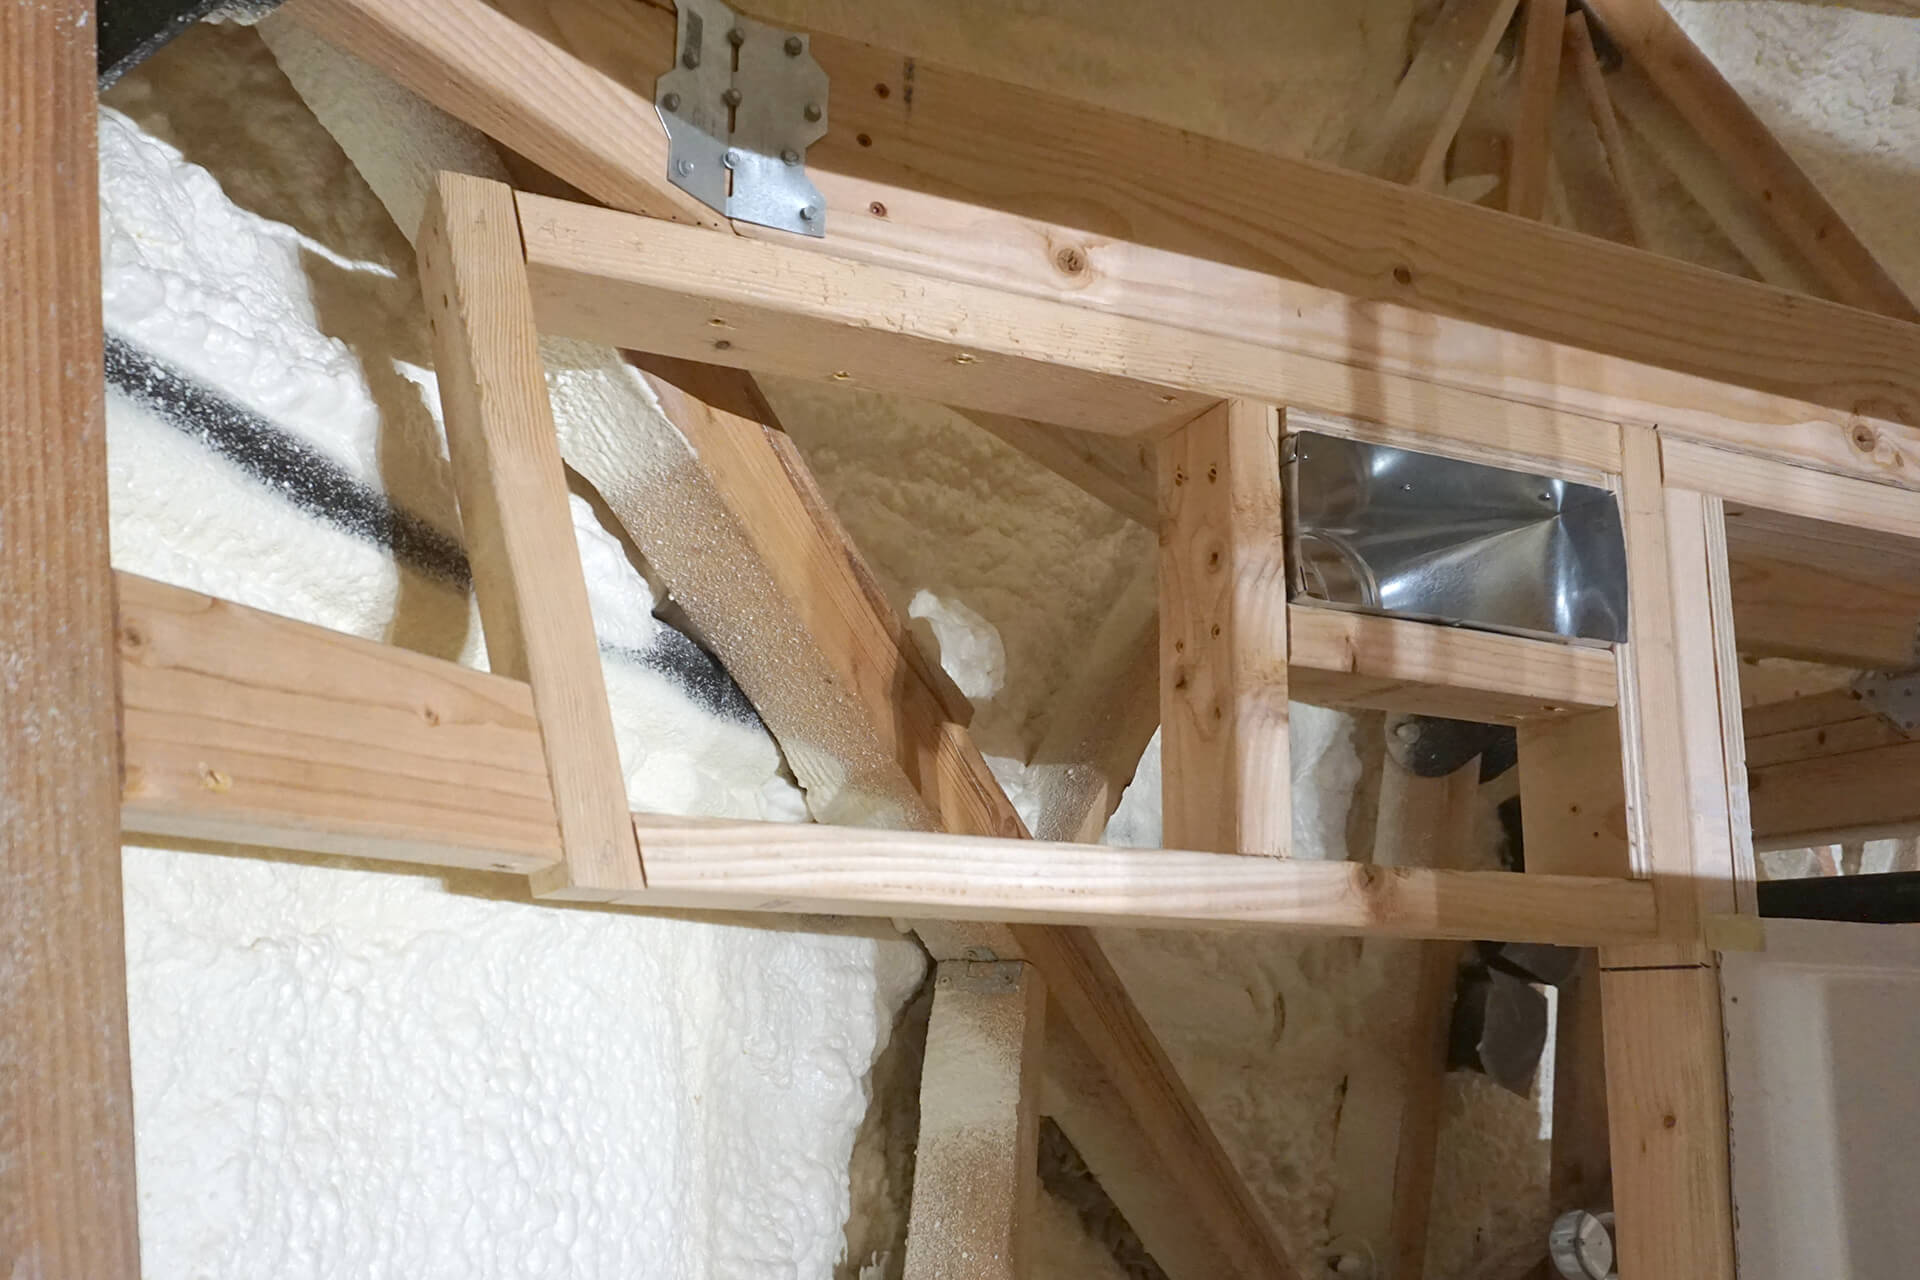
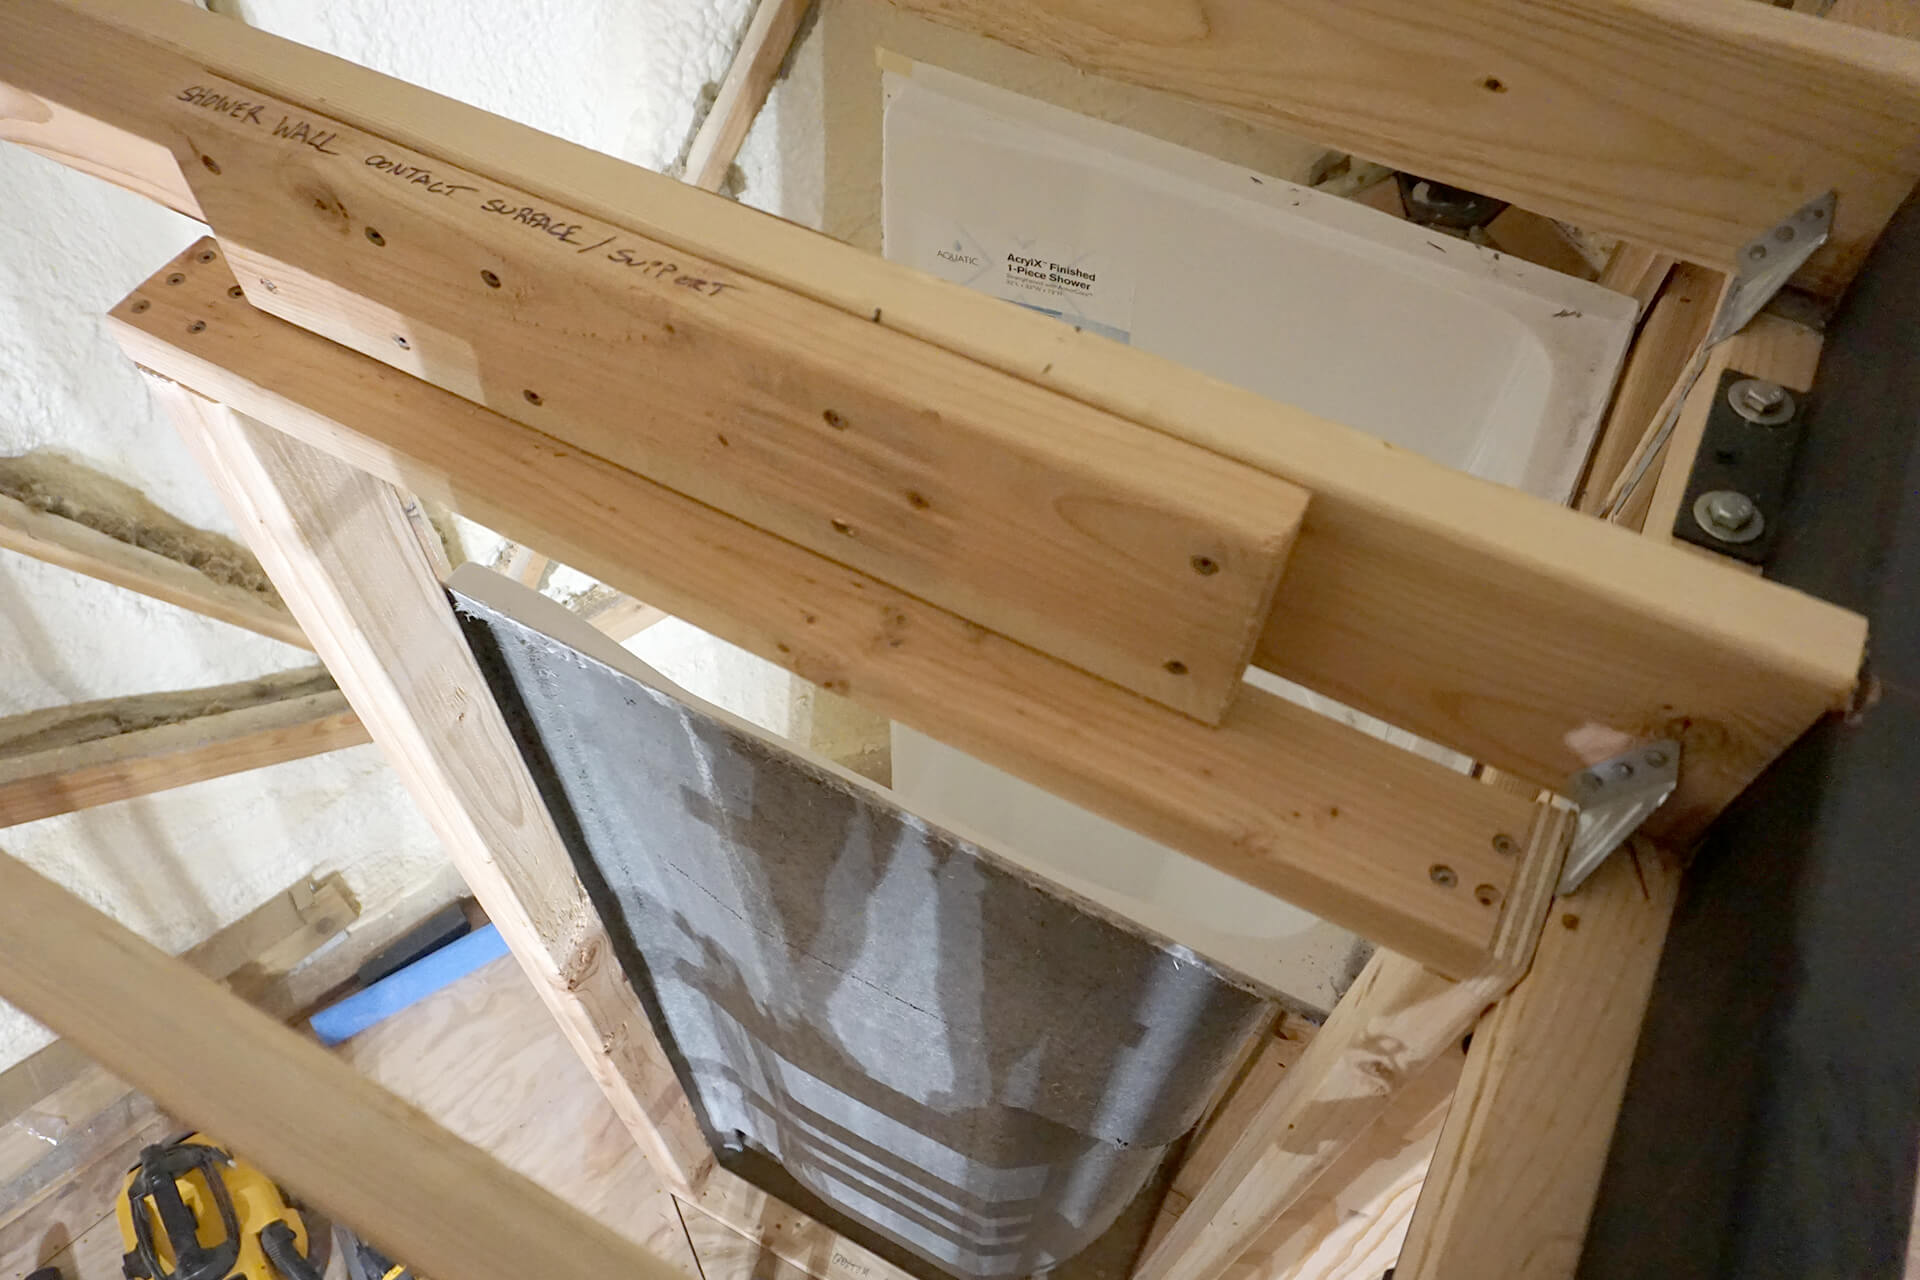
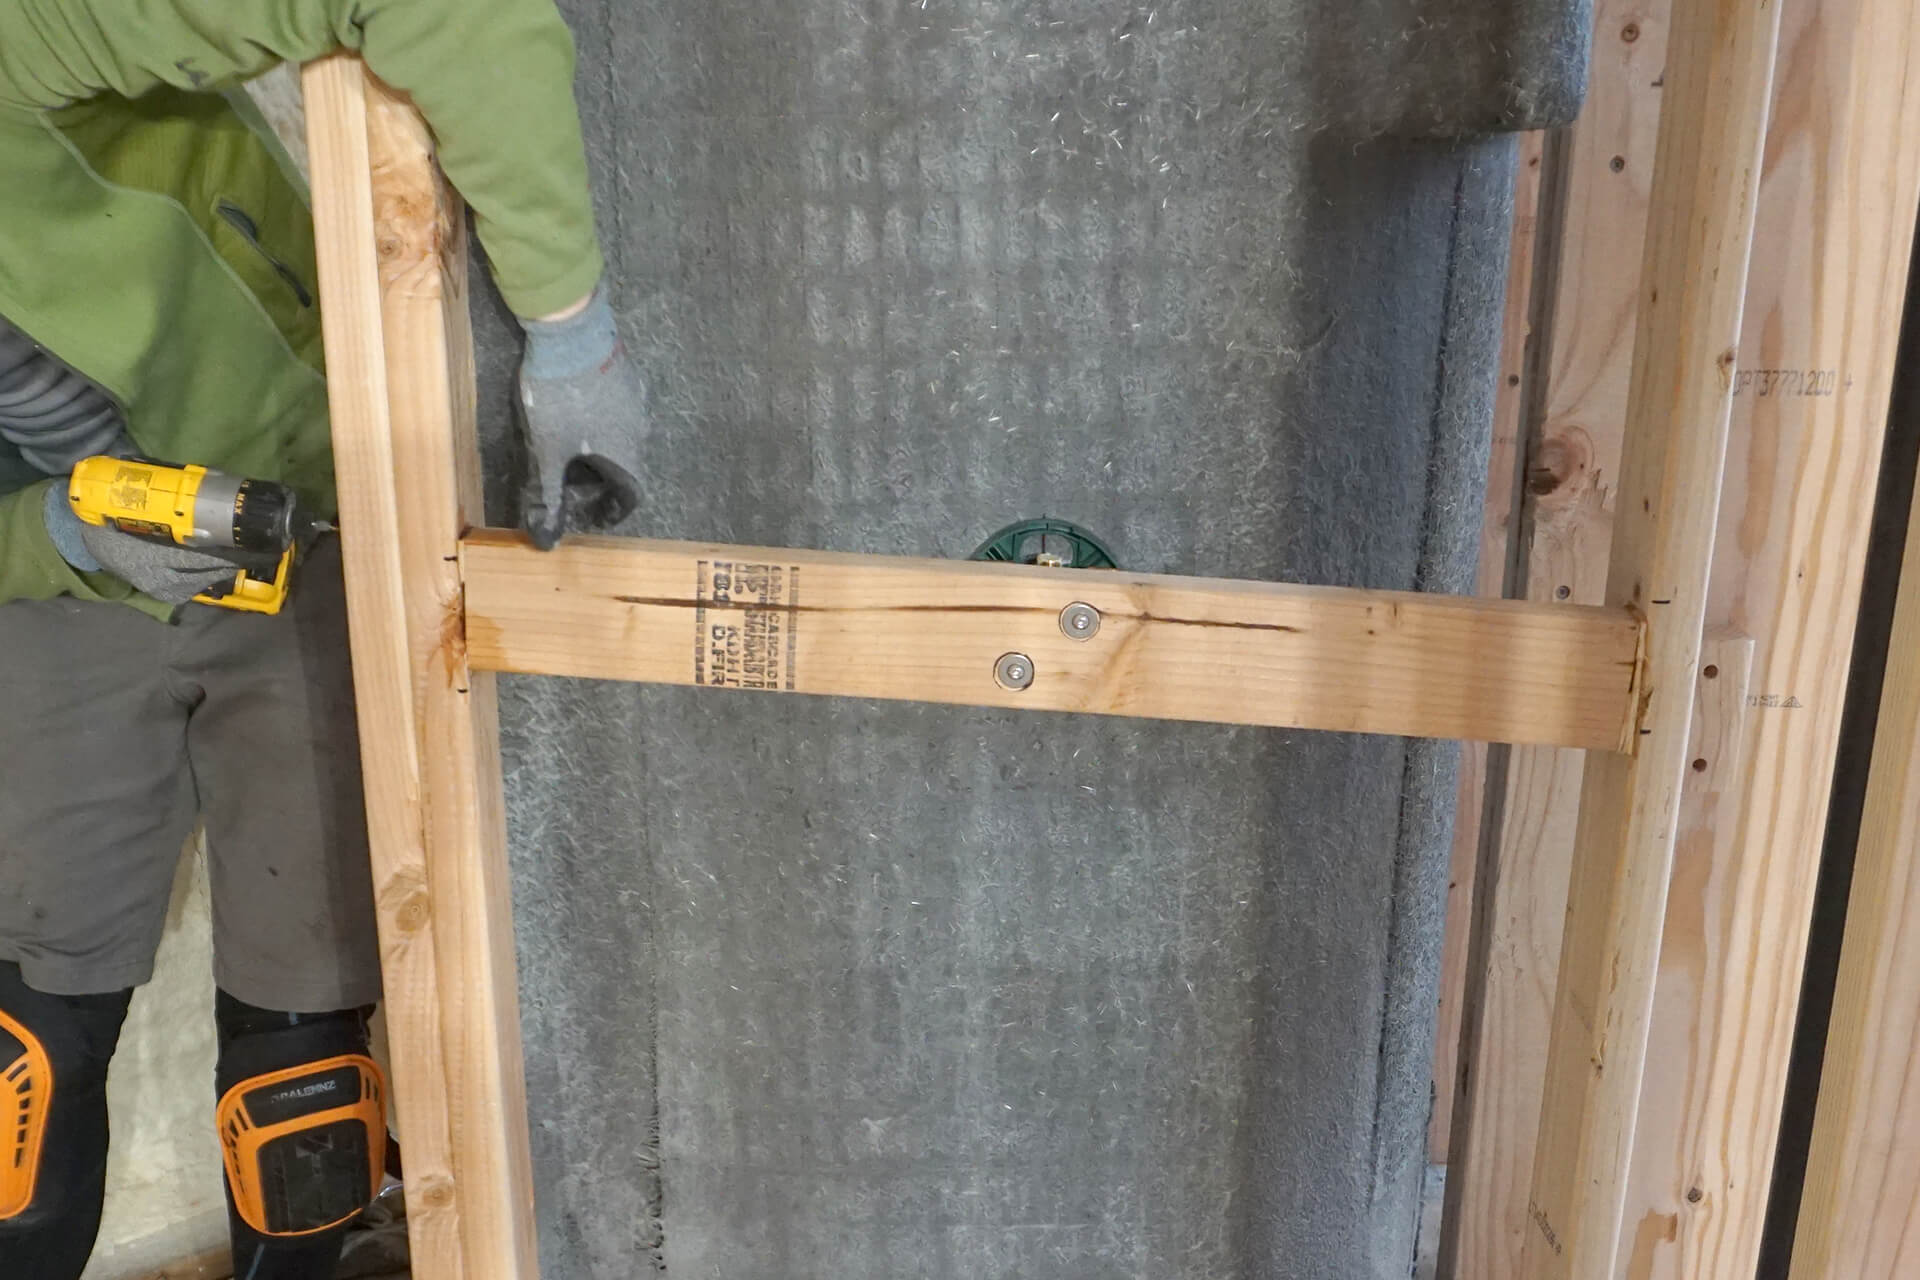
Measure and frame the header wall above the shower. Install blocking and plywood spacers to secure the register box in the proper location.
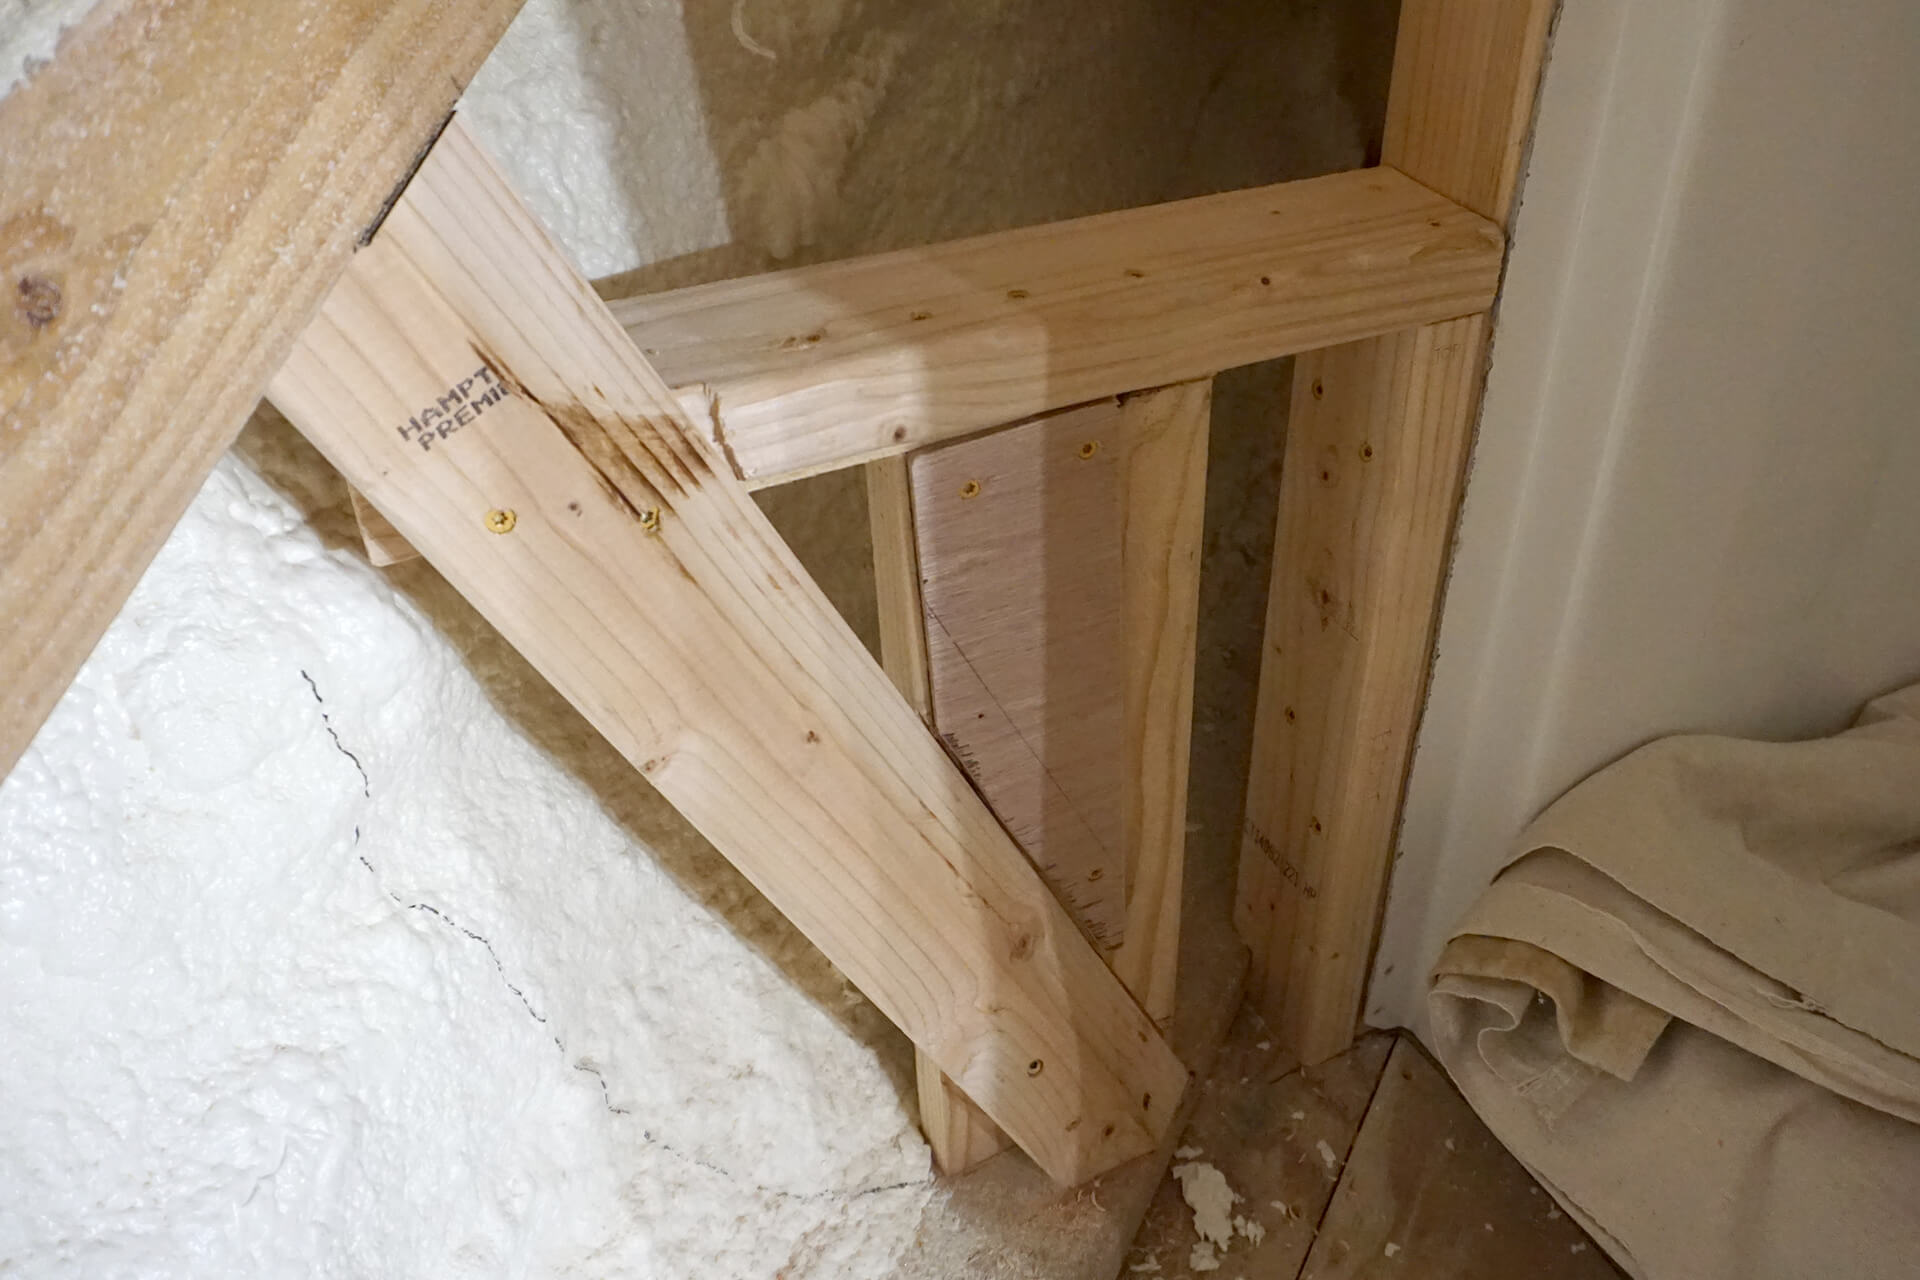
Measure and frame the footer wall below the shower. Install blocking and plywood spacers to provide a planar fastening surface for drywall.
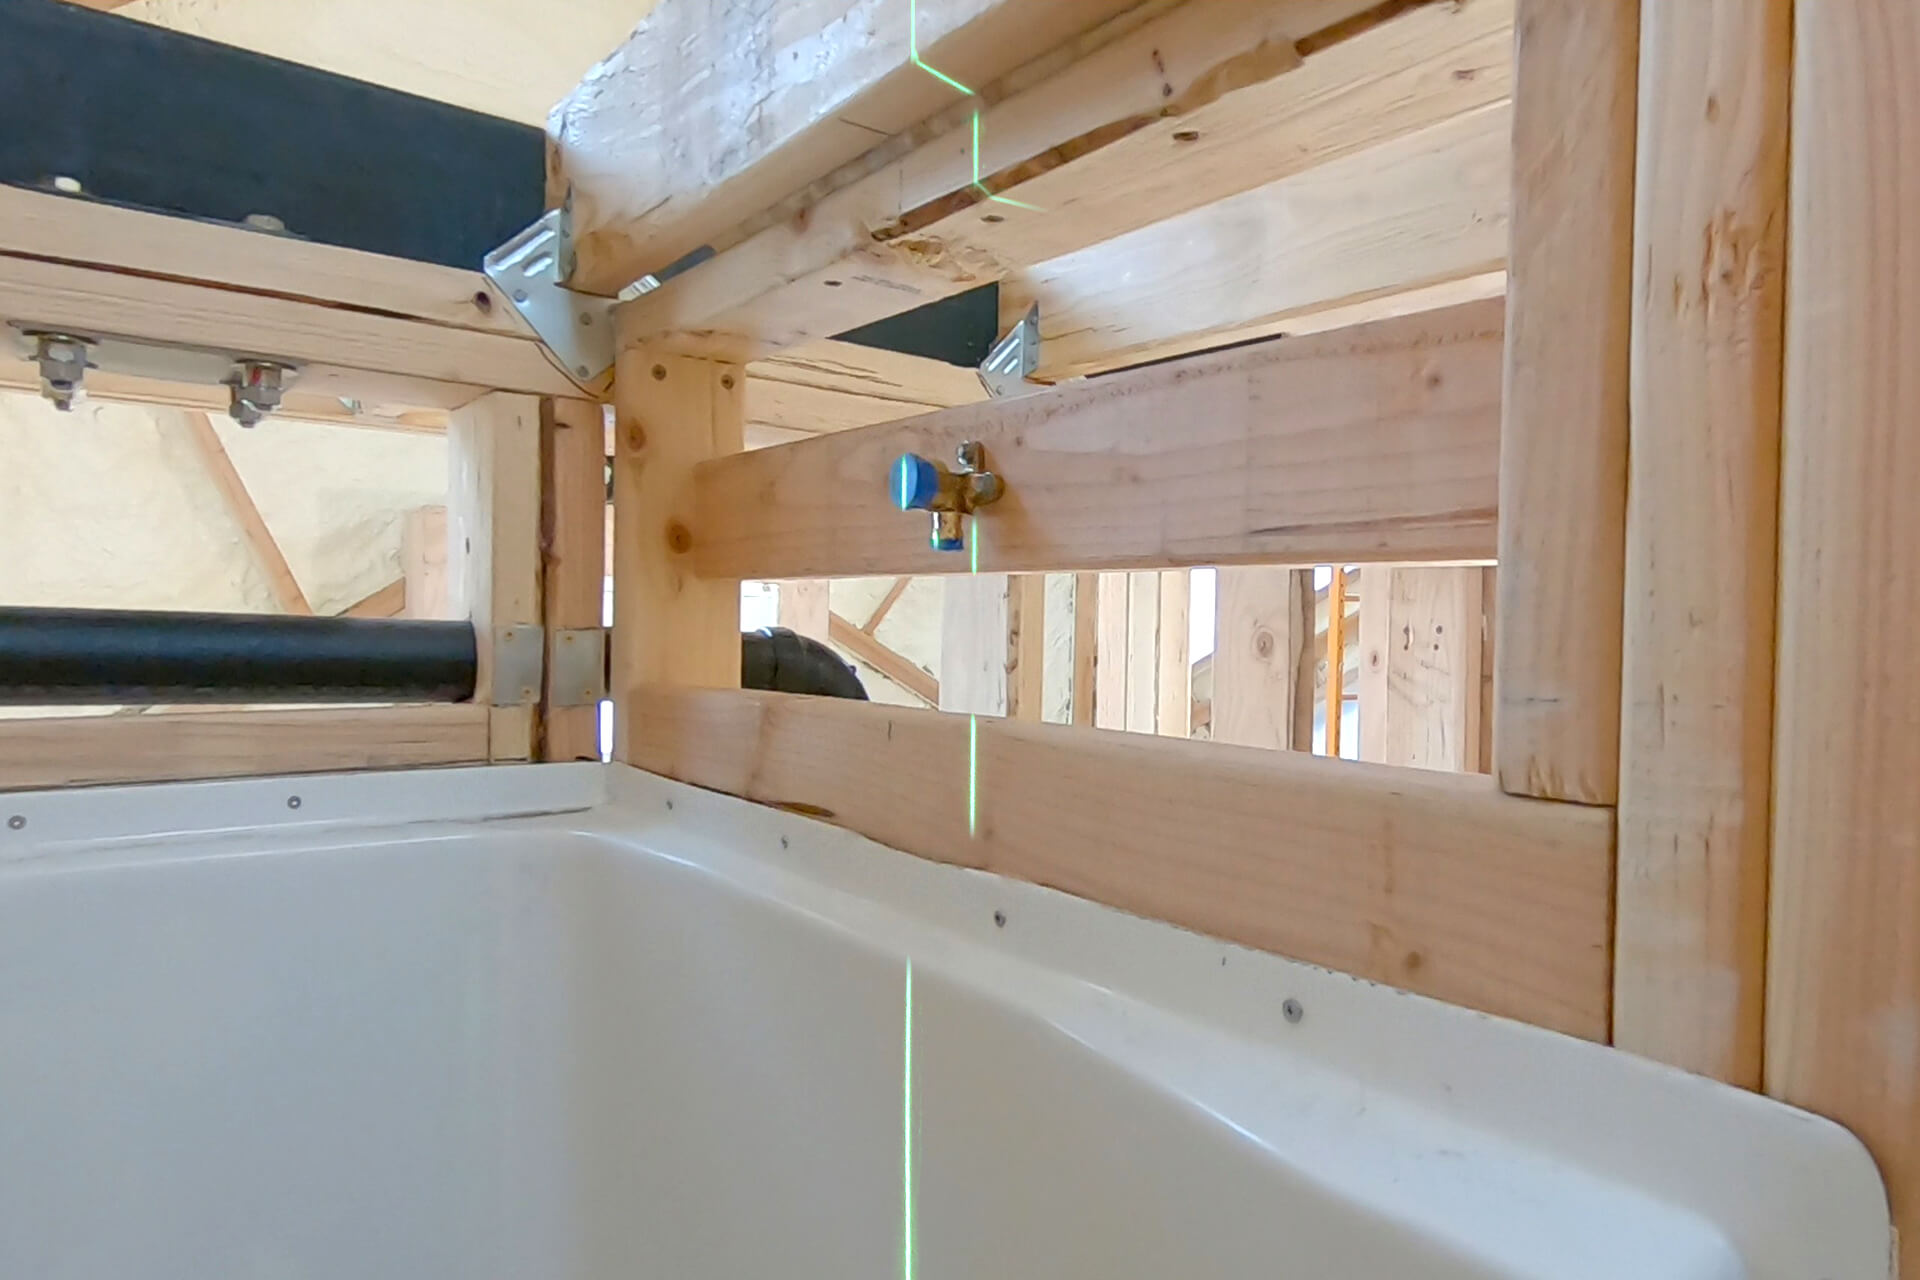
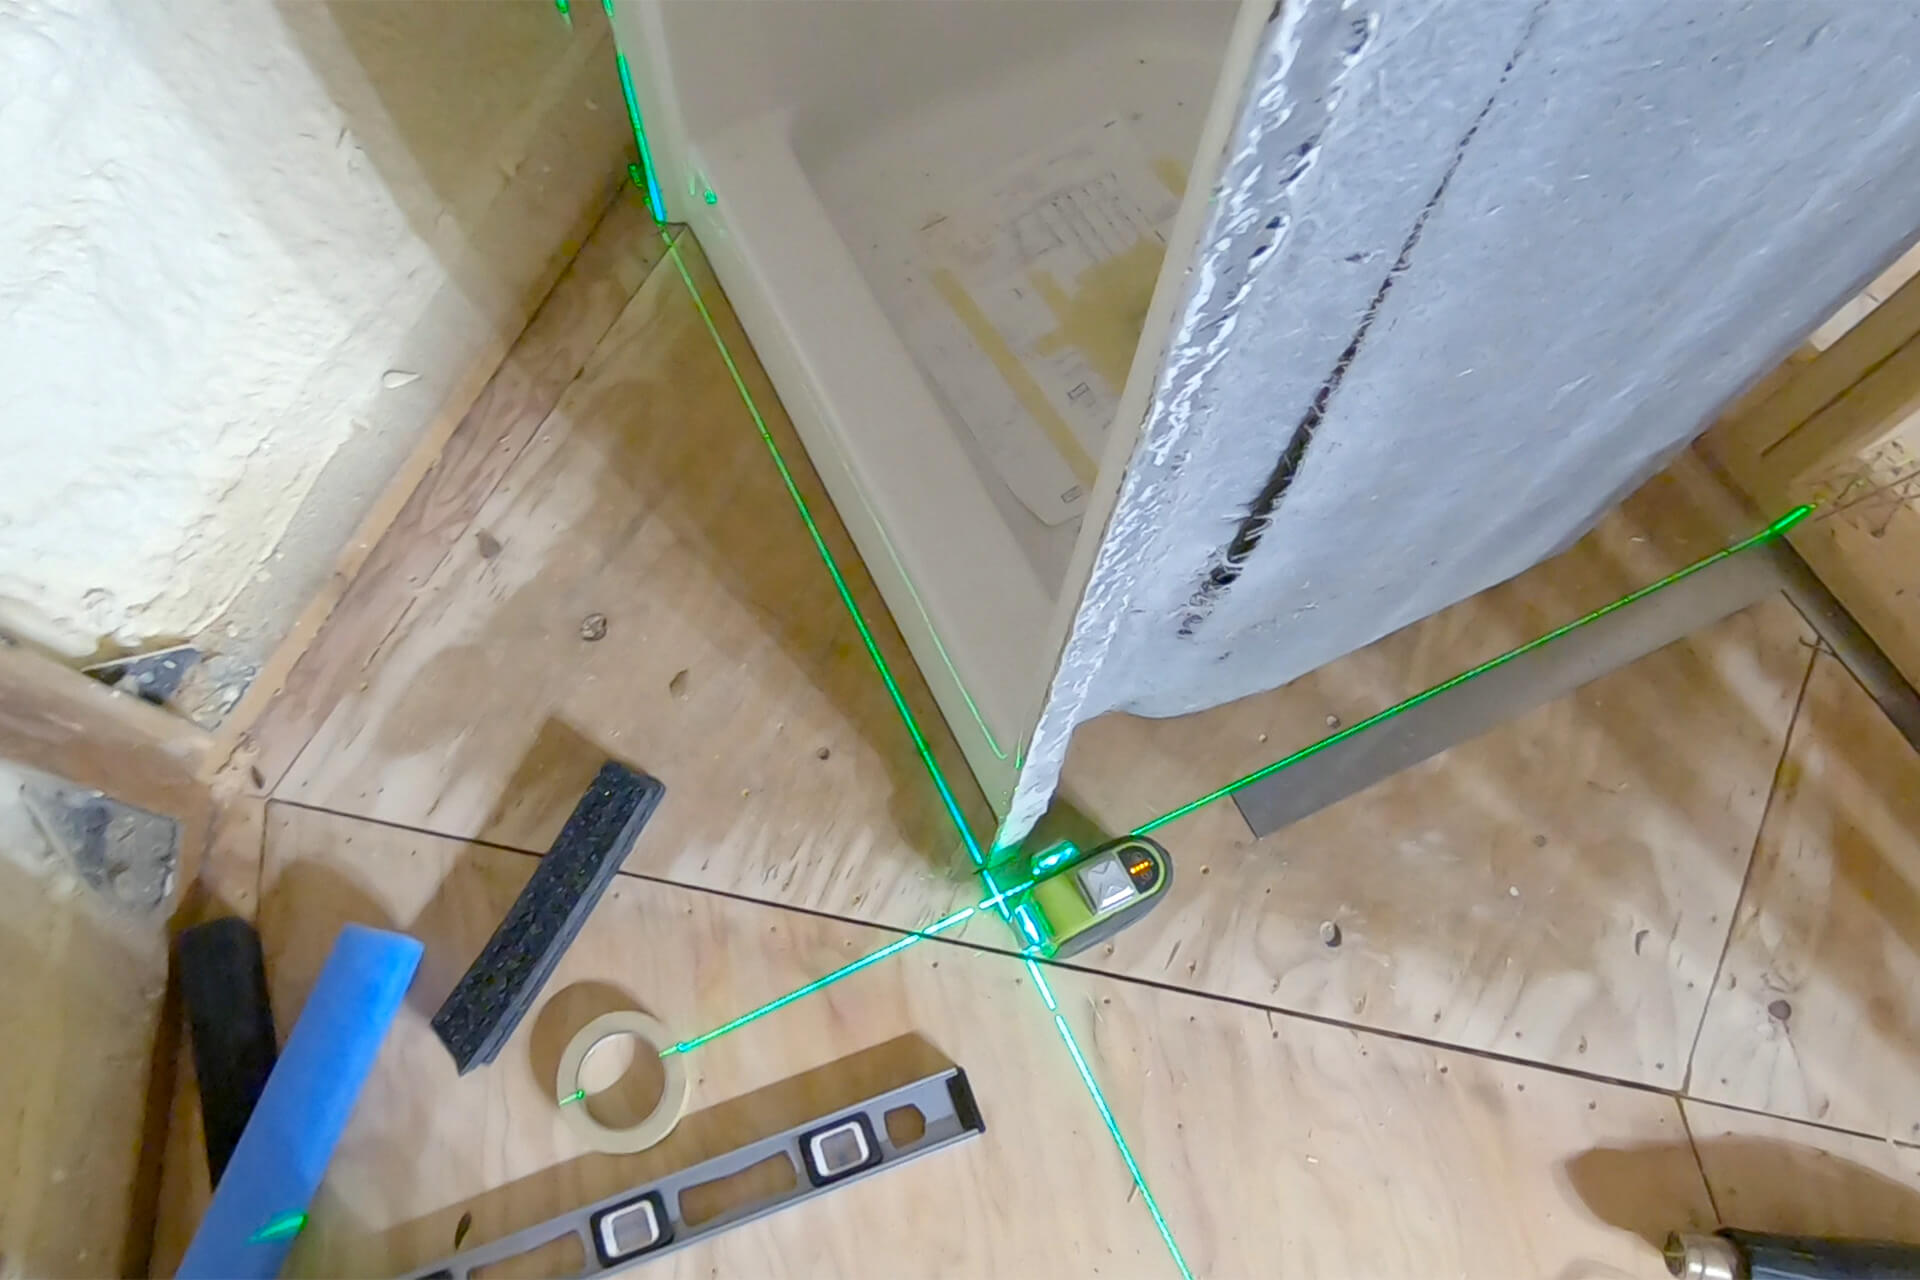
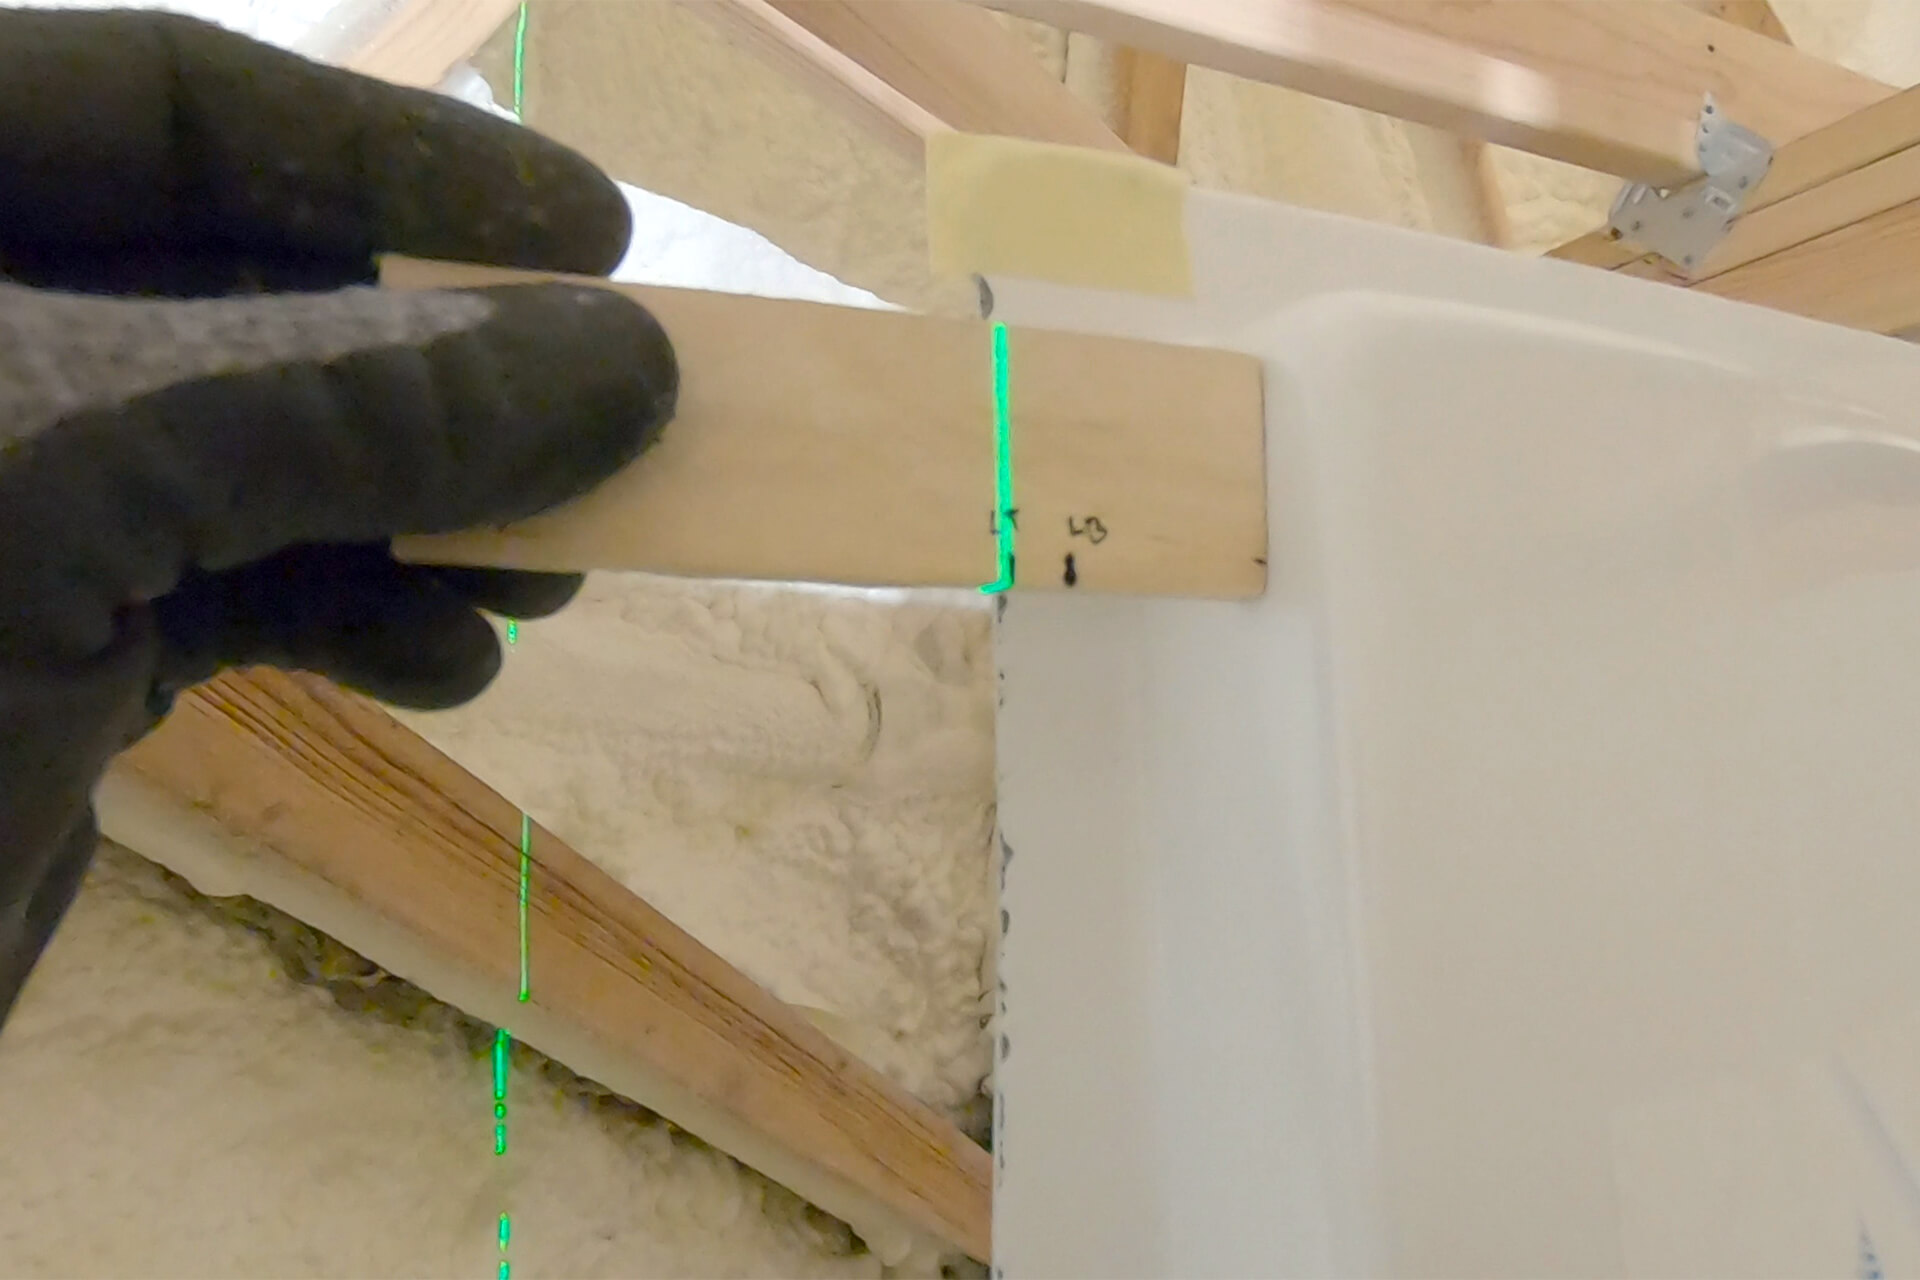
Install blocking around the shower lip. Pre-drill and screw the lip to the blocking with stainless steel screws. Install the shower drop ear. Use a laser to align it with the shower drain.
Drill a 2.5” hole for the shower valve. Use a laser to align it with the shower drain. The ideal hole center should be 35.25” above the shower floor.
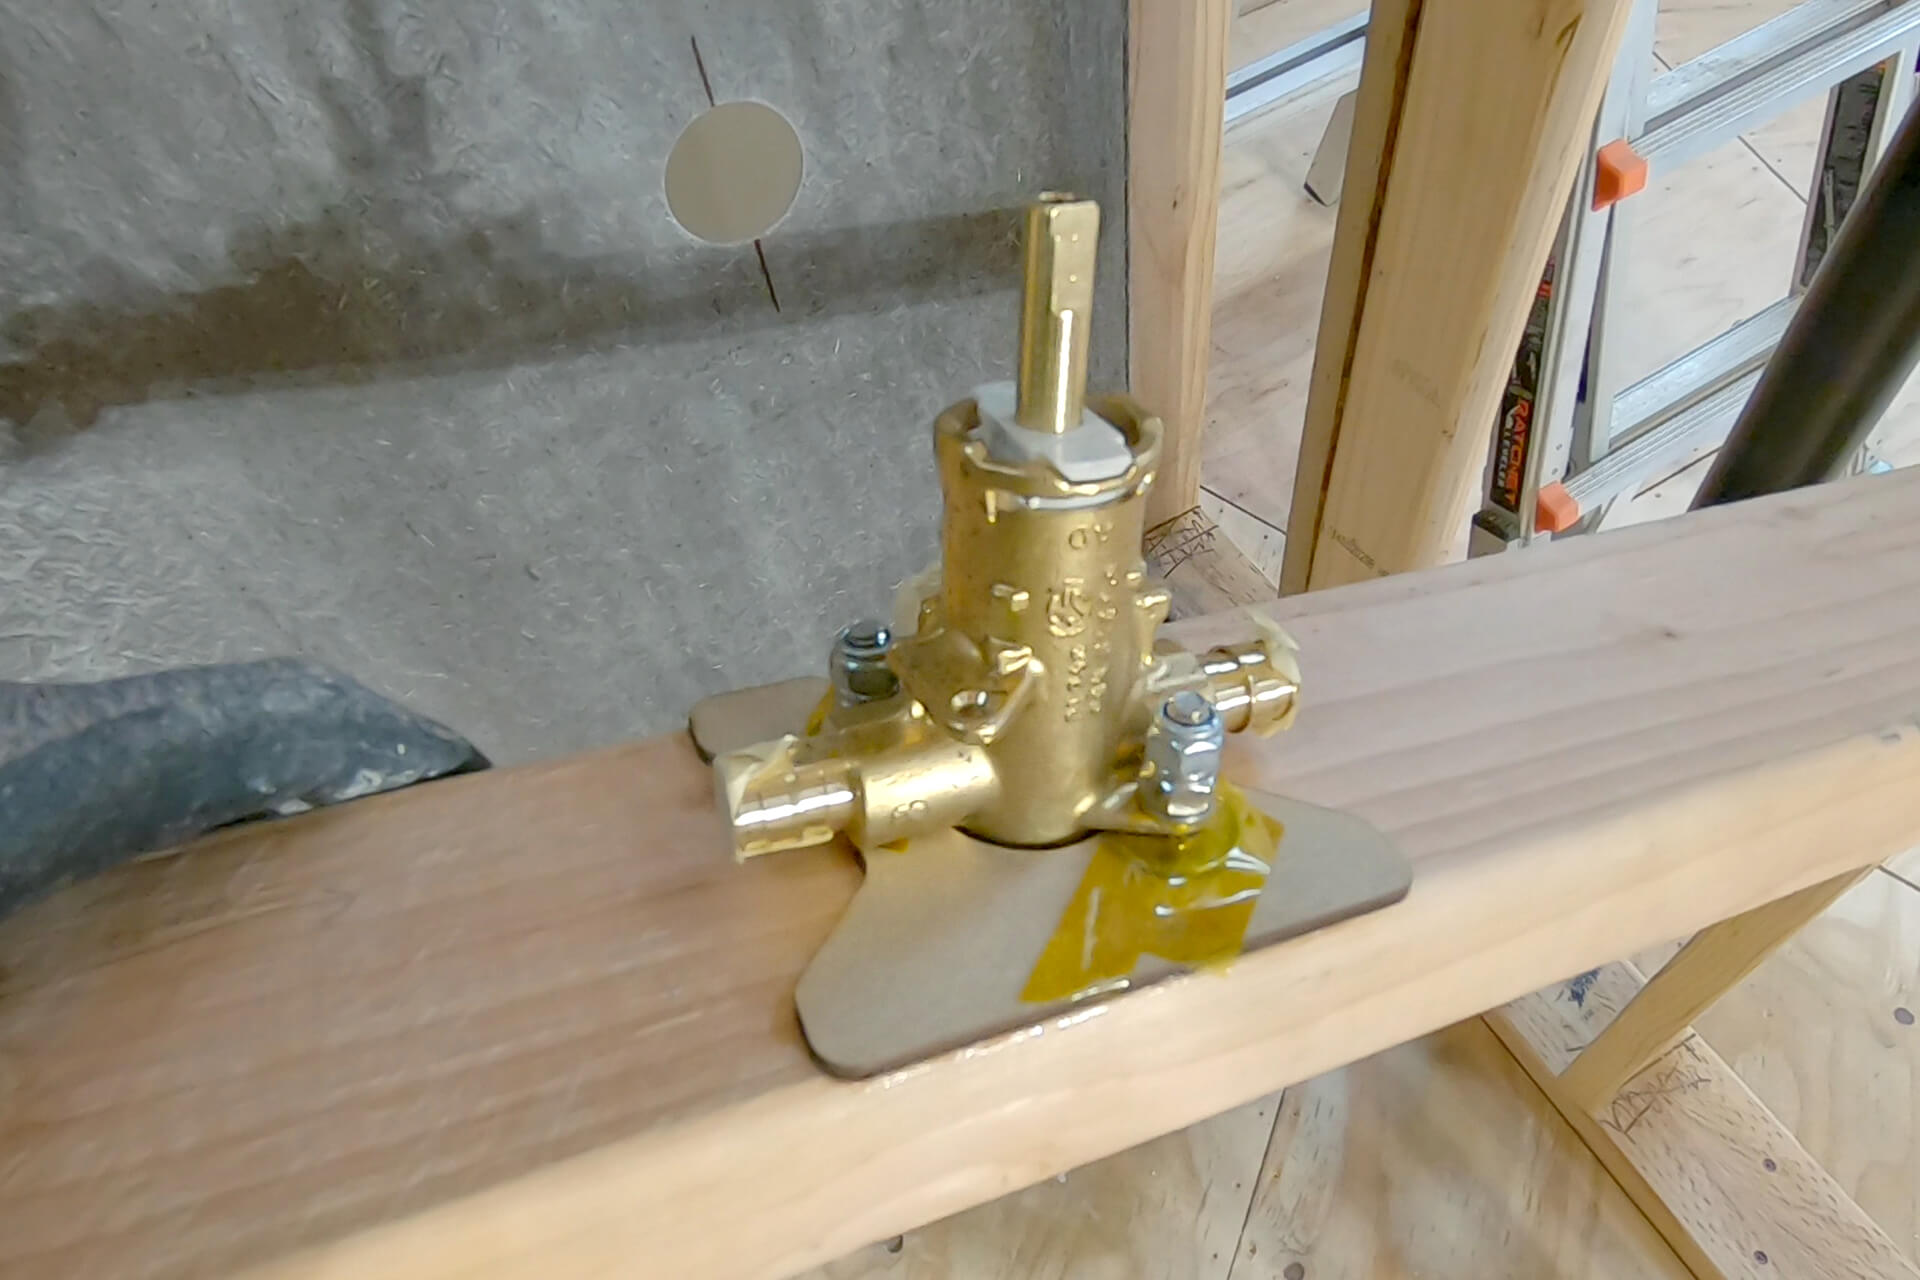
Securely attach the shower valve to 2x4 blocking. A thin MDF spacer was used for extra stability, and tape was applied to prevent dissimilar metals from touching.
Screw the round plastic part to the shower valve and rest it against the shower surface. Shim and angle the blocking as needed to ensure the shower trim handle is vertical.

Detail shot showing the proper installation of the shower valve. Install the shower trim and apply temporary tape over the valve openings to prevent debris from entering.
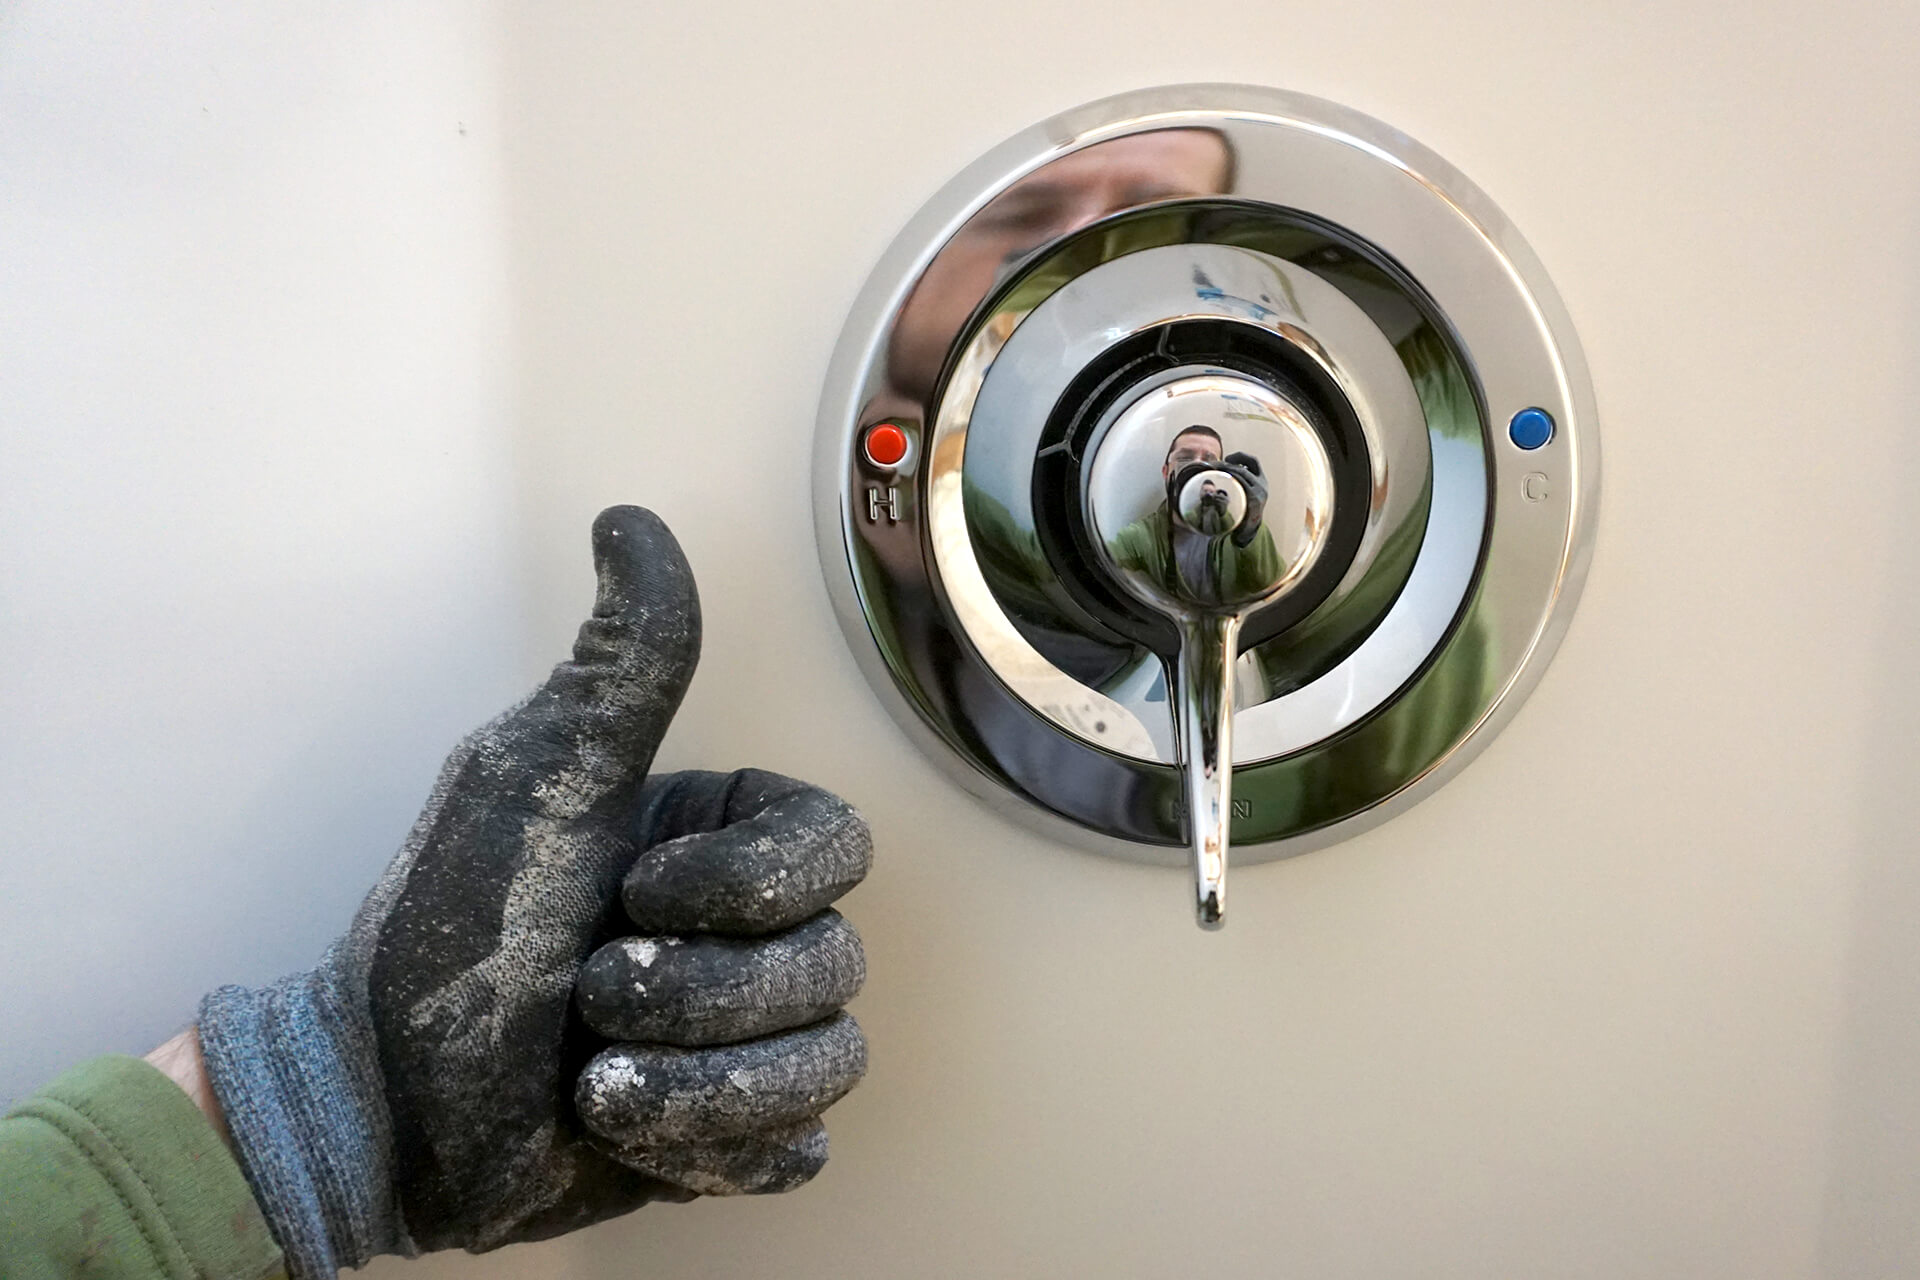
Congratulations on completing the shower installation! If done to perfection, the shower trim handle should be perfectly vertical. The shower pan inspection may not be needed for a 1-piece shower.
Inspection: Shower Pan/Bathtub Test (delay?)